background image

5

will turn off.  This light will cycle on and off throughout the cooking process.

7.  Open the top lid using an oven mitt or pot holder to avoid making contact with hot surfaces.

CAUTION:  Surfaces of the brownie maker are hot.  To avoid accidental burns 

or contact with the hot surfaces or steam being released while cooking, always 

open and close the lid of the brownie maker using an oven mitt or pot holder.

8. 

Fill each cooking reservoir with approximately ¼ cup of batter.  Be careful not to overfill 

the cooking reservoirs as the batter will expand during the cooking process.

TIP:  To easily fill the cooking reservoirs, use a disposable pastry bag or a zip-

top plastic food storage bag with the corner clipped.

9.  Lower the lid using an oven mitt or pot holder.  Press down slightly so the lid latch is 

secured.

10.  A general guideline is 10 to 12 minutes of cooking time per batch of brownies.

11.  With oven mitts or a pot holder, release the lid latch and open the brownie maker lid.

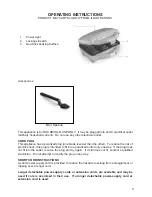
12.  Remove the brownies using the spatula provided or with a wooden or other heat-

resistant, non-metallic utensil.  Remove with caution so as not to scratch or damage the 

nonstick surface.  

13. 

When finished cooking, remove plug from wall outlet and allow the appliance to cool 

before moving, cleaning or storing.

CLEANING AND MAINTENANCE

This appliance requires little maintenance.  It contains no user serviceable parts.  Do not try 

to repair it yourself.

1.  Before cleaning, unplug from outlet and allow to cool.

2.  Clean the interior and exterior surfaces of the brownie maker with a damp cloth or 

sponge.  

Wipe dry with a soft cloth.  

NEVER IMMERSE THE BROWNIE MAKER OR 

CORD IN WATER OR ANY OTHER LIQUID.

3.  To remove batter baked onto the cooking surface, pour a small amount of cooking oil 

onto the hardened batter.  After 5 minutes, wipe with a paper towel or dry cloth.  A clean 

kitchen brush or even a toothbrush works well to remove stubborn batter.

4.  NEVER USE ABRASIVE CLEANERS OR SCOURING PADS TO CLEAN THE BROWNIE 

MAKER, AS THOSE MAY DAMAGE THE SURFACES.

To store, be sure all parts are clean and dry.  Store appliance in its box or in a clean, dry place.  

Never store it while it is hot or wet.  Never wrap cord tightly around the appliance; keep it 

loosely coiled or use the cord wrap on the bottom of the brownie maker.

Summary of Contents for BR-1

Page 1: ......

Page 2: ...n use and before cleaning Allow to cool before cleaning and putting on or taking off parts 7 Do not operate any appliance with a damaged cord or plug or after the appliance malfunctions or has been damaged in any manner Return appliance to the nearest authorized service facility for examination repair or adjustment 8 The use of accessory attachments not recommended by the appliance manufacturer ma...

Page 3: ...f electric shock this plug is intended to fit into a polarized outlet only one way If the plug does not fit into the outlet reverse the plug and try again If it still does not fit contact a qualified electrician Do not attempt to modify the plug in any way SHORT CORD INSTRUCTIONS A short power supply cord is provided to reduce the hazards resulting from entanglement or tripping over a longer cord ...

Page 4: ...vent damage the following precautions should be observed when using this product Always use a trivet under heat generating sources such as Slow Cookers Toaster Ovens Skillets or any kitchen appliance Carefully unpack the brownie maker and all parts Remove all packaging materials including any stickers or labels Clean the interior and exterior surfaces of the brownie maker with a damp cloth or spon...

Page 5: ...den or other heat resistant non metallic utensil Remove with caution so as not to scratch or damage the nonstick surface 13 When finished cooking remove plug from wall outlet and allow the appliance to cool before moving cleaning or storing CLEANING AND MAINTENANCE This appliance requires little maintenance It contains no user serviceable parts Do not try to repair it yourself 1 Before cleaning un...

Page 6: ...and darker in color Most brownies bake in 10 12 minutes Brownies are very fragile and hot when just baked Carefully remove them from the brownie maker and place on a wire rack to cool Use a non metallic heat resistant tool Allow the brownies to stand about 5 minutes before serving If brownies stick unplug the brownie maker and let sit for 2 minutes before attempting to remove again Occasionally co...

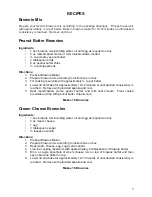
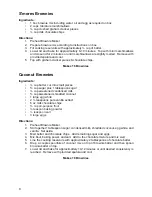
Page 7: ...ely 10 12 minutes or until desired consistency is reached Remove with provided spatula and cool 5 Beat marshmallow creme peanut butter and milk until smooth Frost cooled brownies and top with peanut butter chips nuts Makes 16 Brownies Cream Cheese Brownies Ingredients 1 box brownie mix including water oil and egg as required on box 4 oz cream cheese 1 egg 3 tablespoons sugar teaspoon vanilla Direc...

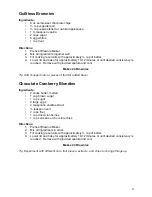
Page 8: ... cup sugar plus 1 tablespoon sugar cup sweetened condensed milk cup sweetened shredded coconut 1 large egg white 2 teaspoons pure vanilla extract 6 oz milk chocolate chips cup all purpose flour teaspon baking powder teaspoon salt 3 large eggs Directions 1 Preheat Brownie Maker 2 Stir together 1 tablespoon sugar condensed milk shredded coconut egg white and vanilla Set aside 3 Melt butter and choco...

Page 9: ...4 Brownies Tip Add chopped nuts or pieces of fruit for added flavor Chocolate Cranberry Blondies Ingredients 2 sticks butter melted 1 cup brown sugar 1 cup sugar 2 large eggs 2 teaspoons vanilla extract teaspoon salt 2 cups flour 1 cup dried cranberries 1 cup semi sweet chocolate chips Directions 1 Preheat Brownie Maker 2 Mix all ingredients in order 3 Fill cooking reservoirs with approximately cu...

Page 10: ...10 ...

Page 11: ...period the authorized service dealer at its option will repair or replace any part that upon examination is found to be defective under normal use and service NORMAL WEAR This warranty does not cover normal wear of parts or damage resulting from any of the following Negligent use or misuse of the product Improper voltage or current Use contrary to the operation instructions Deviation from instruct...

Page 12: ......

Reviews: