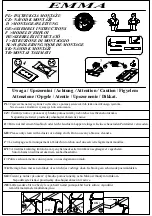
background image

8

CONTENTS (Fig. 1):

1 Mobile lower arm

1 Mobile upper curved arm

1 Mobile tri-shaped arm

3 Toys

Always attach the mobile securely to the playard according to these 

instruction.  Check frequently.

1.  

Insert the Mobile upper curved arm into the Mobile lower arm until 

locked together (Fig. 2)

2.   Snap the Mobile tri-shaped arm onto the end of the upper curved arm 

(Fig. 3).  Connect each of the three toys to the mobile by threading the 

string into the slot at the end of each arm.

3.   Remove the screw through the battery compartment door, located on the 

inside of the lower mobile arm.  Insert two AA Batteries as shown in the 

diagram (Fig. 4).

WARNING:

  Old and new batteries 

should not be mixed.  Alkaline, standard car-

bon-zinc, and rechargeable nickel-cadmium 

batteries should not be mixed.  Remove batter-

ies before storing mobile for a prolonged period 

of time.

4.   Insert the bottom of the lower mobile arm into the hole in the corner 

fitting of the play yard (Fig. 5).  To remove the mobile, squeeze the two 

plastic tabs that protrude through the bottom of the corner fitting while 

pulling upward.  The mobile will rotate out of the way for ease in placing 

or removing the baby from the bassinet.

WARNING: 

 This mobile is designed 

to be used from birth to 5 months.  A mobile 

is intended for visual stimulation and is not 

intended to be touched by the child.  Possible 

entanglement injury: keep out of the babyʼs 

reach.  Do Not place your baby directly under 

the mobile.  Remove mobile from playard when 

baby begins to push up on hands and knees.

WARNING: 

Do  not  add  additional 

strings or straps to attach to a crib


or 

playpen. 


TO ASSEMBLE MOBILE

Figure 1.

Figure 2.

Figure 3.

Figure 4.

Figure 5.

Summary of Contents for 8181bt

Page 1: ...del 8181BT Instruction Manual Convenience through Innovation and thoughtful design Nursery Center Playard 03 04 Read all instructions BEFORE assembly and USE of product KEEP INSTRUCTIONS FOR FUTURE US...

Page 2: ...strings to toys DO NOT place the Playard near a window where cords from blinds or drapes can strangle a child DO NOT add padding or other objects inside the Playard that will permit your child to cli...

Page 3: ...it is flat and locks into position Fig 4 The center lock mechanism will lock automatically The center lock will rotate clockwise about 90 degrees as it locks NOTE Test rails to make sure they are lock...

Page 4: ...ush down on rail while still holding release button in until side forms a U Repeat for remaining sides Fig 3 NOTE If top rail s do not form the U completely do not force Check the floor of your Playar...

Page 5: ...nside your bassinet which will permit a child to climb out To prevent your child from falling out of the bassinet discontinue using your bassinet when your child is too active able to climb out weighs...

Page 6: ...ld be facing toward the inside of the bassinet and is readable 3 Insert 1 long tube into the short side of the bassinet sleeve Repeat for remaining side 4 Slide the corner supports onto the ends of ea...

Page 7: ...ith infant in it NEVER leave bassinet changing area on top of Playard with a child in Playard 1 Remove mattress from bassinet Fig 1 2 Lift bassinet out of Playard Fig 2 3 Remove corner pieces and slid...

Page 8: ...kel cadmium batteries should not be mixed Remove batter ies before storing mobile for a prolonged period of time 4 Insert the bottom of the lower mobile arm into the hole in the corner fitting of the...

Page 9: ...ight Voice Activation Right Manual Operation for Music Light The mobile features a three position switch Off Voice and Manual The night light and music may be activated manually or by voice Place the...

Reviews: