background image

[

鍵入文字


21 


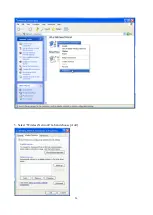
[Status] 


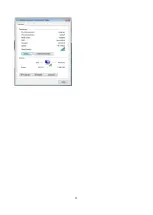
6. This is the information of network status 

Summary of Contents for AW-NB101

Page 1: ...1 AW NB101 IEEE 802 11b g n Combo slim module User s Manual...

Page 2: ...Wireless Combo Slim Module provides up to 128 bit level of WEP security to your wireless data transfers It is able to run in the operating systems of Windows XP Vista in either Infrastructure mode or...

Page 3: ...ming a wireless LAN enabled computer can physically move from the operating range of one access point to the other without losing connection There is a quick association made between new access point...

Page 4: ...Ad hoc mode does not need the access point or router When you use this mode your computer will act as a server within the valid range and connect directly to others in the same LAN workgroup Ad hoc Mo...

Page 5: ...op or laptop 2 Plug AW NB101 Wireless PCI E Module into USB port of desktop or laptop iii Operation Range The operating range of AW NB101 varies from the working environment However this device made i...

Page 6: ...g a Windows operating system it will automatically detect the AW NB101 after the system boots up and displays a Found New Hardware Wizard window Please click Cancel and proceed with the following step...

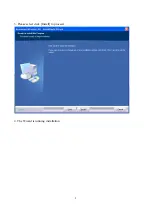
Page 7: ...7 2 Please wait few seconds for wizard to prepare installation...

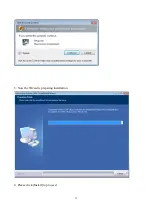
Page 8: ...8 3 Please select click Install to proceed 4 The Wizard is running installation...

Page 9: ...9 5 Please wait few seconds for Wizard to setup...

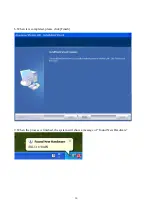
Page 10: ...10 6 When it is completed please click Finish 9 When the process is finished the system will show a message of Found New Hardware...

Page 11: ...11 v Setup Windows Vista OS Please follow the steps to complete installation 1 Launch the setup driver 2 When you see the permission dialogue box please click Continue...

Page 12: ...12 3 Now the Wizard is preparing installation 4 Please click Install to proceed...

Page 13: ...13 5 The system is process installation...

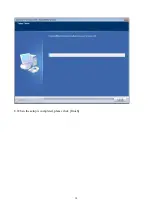
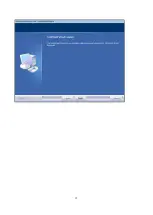
Page 14: ...14 8 When the setup is completed please click Finish...

Page 15: ...15...

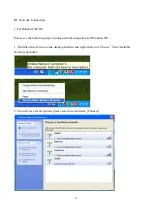
Page 16: ...ease see the following steps to setup network connection for Windows XP 1 Find the network icon on the desktop shortcut and right click on it Choose View Available Wireless networks 2 You will see sev...

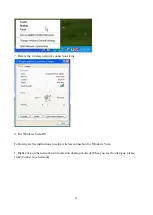
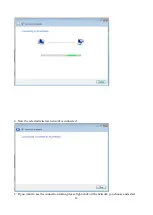
Page 17: ...et system connecting to selected wireless network 4 You may need to type the network key when it is required 5 Now the selected wireless network is connected 6 You can check the connection status by c...

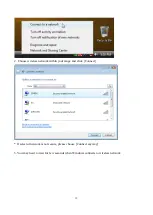
Page 18: ...nection status ii For Windows Vista OS Following are the instructions to setup wireless connection for Windows Vista 1 Right click on the network icon located on desktop shortcut When you see the dial...

Page 19: ...Choose wireless network within your range and click Connect If selected network is not secure please choose Connect anyway 3 You may need to wait for few seconds when Windows connects to wireless net...

Page 20: ...20 4 Now the selected wireless network is connected 5 If you want to see the connection status please right click on the network you choose and select...

Page 21: ...21 Status 6 This is the information of network status...

Page 22: ...22...

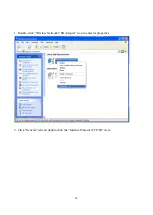
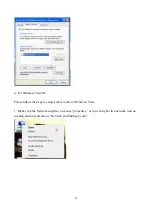
Page 23: ...hoose Ad hoc mode please right click network icon on desktop shortcut and choose Open Network Connections or go to Control Panel and double click Network Connection icon When you see the Network Conne...

Page 24: ...24 1 Double click Wireless Network USB Adapter icon to enter its properties 2 Click General tab and double click the Internet Protocol TCP IP item...

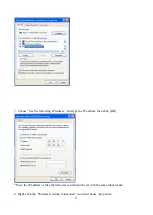
Page 25: ...following IP address and type the IP address then click OK Note the IP address of the other wireless card should be set with the same subnet mask 4 Right click the Wireless Network Connection icon an...

Page 26: ...26 5 Select Wireless Network tab and choose Add...

Page 27: ...work name SSID and choose Data encryption if you want to protect the network security 7 When you see the dialogue showing your network is unsecured please click Continue Anyway 8 Now your network is i...

Page 28: ...ista OS Please follow the steps to setup Ad hoc mode for Windows Vista 1 Right click the Network neighbor to choose properties or you can right click network icon on desktop shortcut and choose Networ...

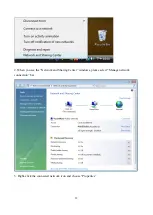
Page 29: ...29 2 When you see the Network and Sharing Center windows please select Manage network connection bar 3 Right click the connected network icon and choose Properties...

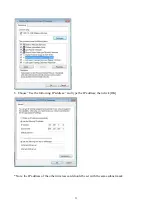
Page 30: ...30 4 When you see the warning message please click Continue 5 Choose Networking tab and double click the Internet Protocol Version 4 TCP IPv4 item...

Page 31: ...31 6 Choose Use the following IP address and type the IP address then click OK Note the IP address of the other wireless card should be set with the same subnet mask...

Page 32: ...32 7 Choose Manage wireless networks bar 8 Select Add...

Page 33: ...33 9 Choose Create ad hoc network...

Page 34: ...34 10 Please click Next 11 Enter Network name and if you want to protect the network security please choose in security type then click Next 12 Now your network is in Ad hoc mode...

Page 35: ...frequency energy and if not installed and used in accordance with the instructions may cause harmful interference to radio communications However there is no guarantee that interference will not occur...

Page 36: ...cated or operating in conjunction with any other antenna or transmitter Radiation Exposure Statement This equipment complies with FCC radiation exposure limits set forth for an uncontrolled environmen...

Page 37: ...d the FCC ID can not be used on the final product In these circumstances the OEM integrator will be responsible for re evaluating the end product including the transmitter and obtaining a separate FCC...

Page 38: ...38 For Taiwan Note 1 2 CCXXXXYYyyyZzW Japanese Notice...

Page 39: ...ne doit pas produire de brouillage pr judiciable et 2 ce dispositif doit accepter tout brouillage re u y compris un brouillage susceptible de provoquer un fonctionnement ind sirable Radiation Exposur...

Page 40: ...essais suppl mentaires sur l metteur ne seront pas n cessaires Toutefois l int grateur OEM est toujours responsable des essais sur son produit final pour toutes exigences de conformit suppl mentaires...

Page 41: ...e all required regulatory information warning as show in this manual Manuel d information l utilisateur final L int grateur OEM doit tre conscient de ne pas fournir des informations l utilisateur fina...

Reviews: