
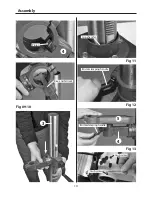


Assembly
12
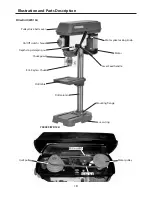
Assembly for WD13L Pillar Drill
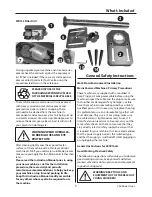
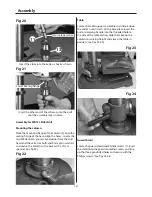
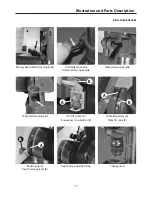
Mounting the column
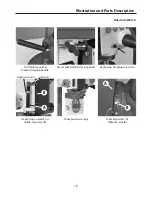
Table
Locate the table/support assembly and slide it down
the column until it rests on the base plate. Insert the
bristol clamping handle into the threaded hole to
the side of the table casting, slide the table up the
column to working height and clamp the table in
position, (see figs 23-24).
Fig 22
Fig 23
Fig 24
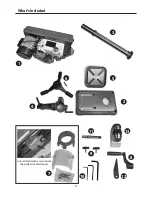
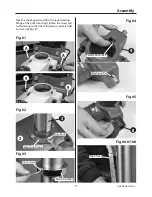
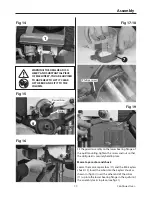
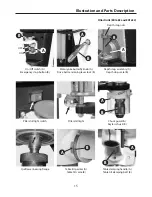
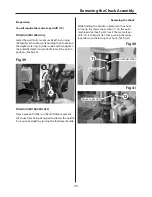
Fig 20
Insert the arbor into the keyless chuck as shown
Fig 21
Insert the other end of the arbor up into the quill
until the assembly locks in place
Lower bearing flange
Morse taper arbor
Place the mounting flange of the column (3) onto the
seating flange of the base. Align the holes. Locate the
two M8 Hex bolts you removed earlier from the drill
head and the extra hex bolts and 8mm plain washers
and secure the column to the base with a 13mm
spanner, (see fig 22).
Guard shield
Locate the guard shield and Phillips screws (7). Insert
the shield into the guard moulding’s recess and line
up the three pre-drilled holes and secure with the
Phillips screws, (See figs 25-26
13
11
Summary of Contents for ED16B2
Page 25: ...Parts Breakdown List 25 Pillar Drills 505024 ED16F 700100 ED16B2 ...
Page 27: ...Parts Breakdown List 27 Pillar Drill 700101 ED16SB ...
Page 28: ...Parts Breakdown List 28 Pillar Drill 700101 ED16SB ...
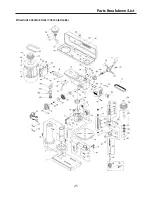
Page 29: ...Parts Breakdown List 29 Pillar Drill 700099 WD13L ...
Page 30: ...Parts Breakdown List 30 Pillar Drill 700099 WD13L ...
Page 31: ...Notes 31 ...