


Changing the Blade
18
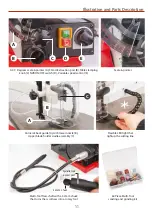
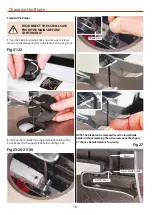
4. Insert one end of the blade down into the machined slot in
one of the blade holders (J). Make sure the blade is settled flush
against the holder and nip up the two grub srews, clamping the
blade in position. Repeat for the remaining holder, see fig 32.
Fig 32
MAKE SURE THE TEETH ARE
POINTING IN THE CUTTING
DOWN DIRECTION!
WARNING! DO NOT USE FAULTY
SAWBLADES.
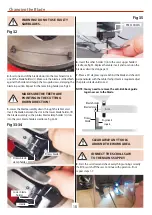
5. Lower the blade assembly down through the table’s void.
Insert the blade between the slot in the lower blade holder, lift
the blade assembly so the pinless blade clamp holder (J) slots
into the saw’s blade holders cradle, see fig 33-34.
Fig 33-34
Pinless blade
clamp holder
Lower blade
holder
Cradle
Pinless blade
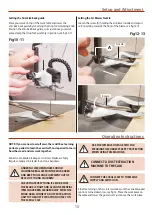
6. Insert the other holder (J) into the saw’s upper holder’s
cradle, see fig 35. Replace the table insert and re-tension the
blade as described on page 12.
7. Place a 90˚ degrees square behind the blade and check it’s
perpendicular with the table. If adjustment is required adjust
the pinless blade until correct.
NOTE: You my need to remove the anti-kick back guide
to gain access to the blade.
Fig 35
PRESS DOWN
Engineers
square
Pinless
blade
Blade holder
Blade clamp
Arm
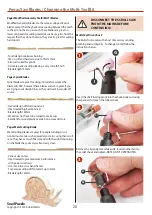
CLEAR AWAY ANY TOOLS
AROUND THE WORK AREA.
CONNECT THE SCROLL SAW
TO THE MAINS SUPPLY!
8. Start the scroll saw and check everything running correctly.
If all OK, switch off the saw. Continue with operation. If not
repeat steps 1-7.


