


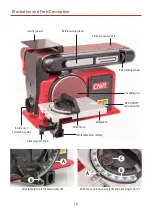
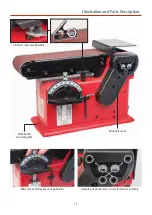
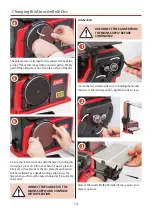


Changing the Abrasive Belt/Disc
15
7
6
4
5
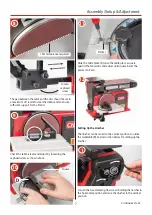
Loosen the two screws holding the rear guard.
Lift and remove the rear guard, place to one side.
Remove the linisher belt. Inspect the new belt, ensure that
there are no tears or rips especially along the edges, check
the direction arrows on the inner surface of the belt and fit
accordingly. The direction of the arrows should point to the
drive drum of the sander.
Release the belt tension by lifting up the tensioning lever.
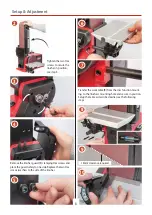
NOTE: If you are using an old belt, and the arrow
markings have worn off, check the direction of travel,
see diagram below.
Belt underlay
Belt overlay
Glue joint
NOTE: Before sliding on the new belt check there is no
dust or resin build up on the drums or at the edges of
the linisher, clean in and around the extraction ports
for dust or resin build up, see next page.
Continues Over...
WEAR A DUST MASK &
EYE PROTECTION WHEN
CHANGING THE BELT!