background image

AXIS Q6045-E Mk II PTZ Dome Network Camera

Media Streams

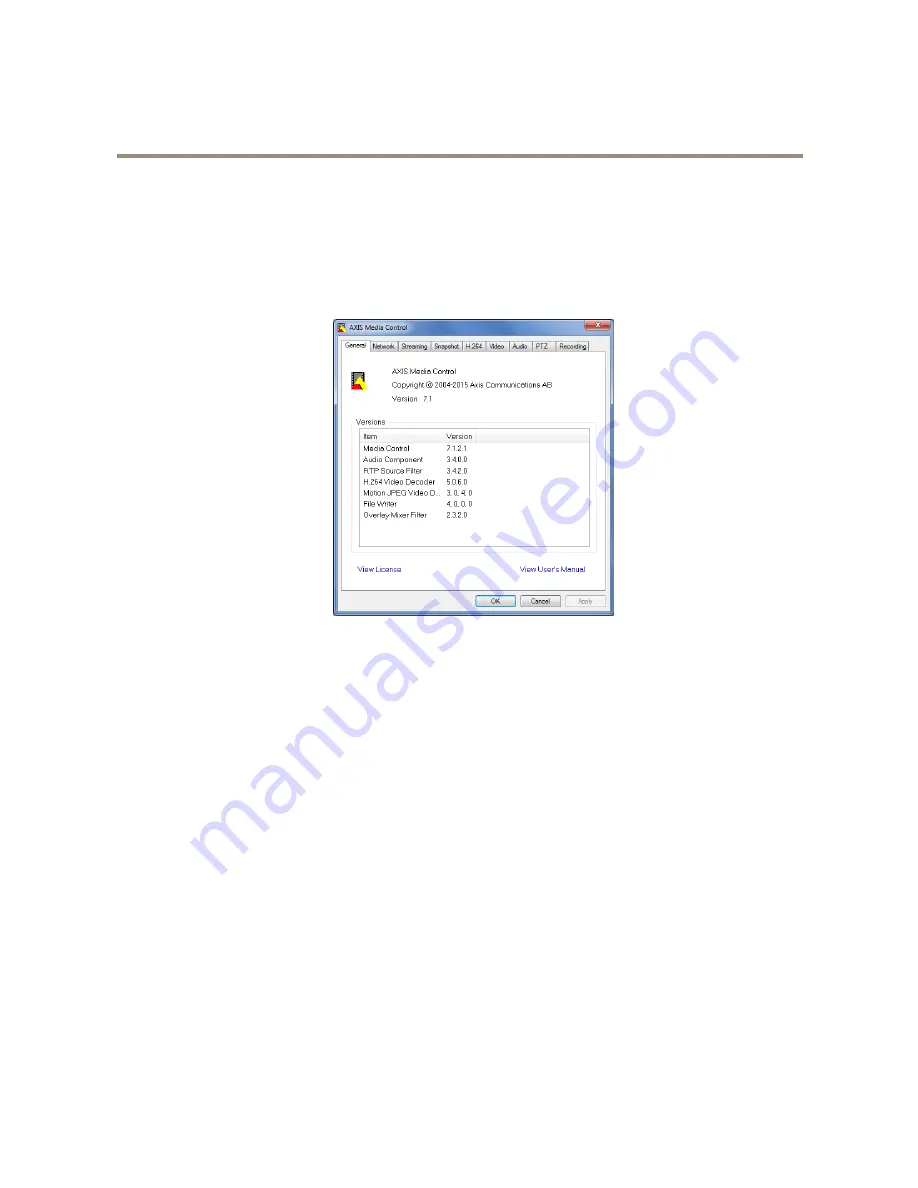
The AMC Control Panel can be used to configure various video settings. Please see the AXIS Media Control User’s Manual for more
information.

The AMC Control Panel is automatically installed on first use, after which it can be configured. Open the AMC Control Panel from:

Windows Control Panel (from the Start screen or Start menu)

Alternatively, right-click the video image in Internet Explorer and click

Settings

.

Alternative Methods of Accessing the Video Stream

You can also access video and images from the Axis product in the following ways:

Motion JPEG server push

(if supported by the client, Chrome or Firefox, for example). This option maintains an open HTTP

connection to the browser and sends data as and when required, for as long as required.

Still JPEG images in a browser

. Enter the path

http://<ip>/axis-cgi/jpg/image.cgi

Windows Media Player

. This requires AXIS Media Control and the H.264 decoder to be installed. The following paths

can be used:

-

Unicast via RTP:

axrtpu://<ip>/axis-media/media.amp

-

Unicast via RTSP:

axrtsp://<ip>/axis-media/media.amp

-

Unicast via RTSP, tunneled via HTTP:

axrtsphttp://<ip>/axis-media/media.amp

-

Multicast:

axrtpm://<ip>/axis-media/media.amp

QuickTime

TM

. The following paths can be used:

-

rtsp://<ip>/axis-media/media.amp

-

rtsp://<ip>/axis-media/media.3gp

15

Summary of Contents for Q6045-E

Page 1: ...AXIS Q6045 E Mk II PTZ Dome Network Camera User Manual ...

Page 2: ...niSD microSD miniSDHC microSDHC microSDXC are all trademarks or registered trademarks of SD 3C LLC in the United States other countries or both Regulatory Information Europe This product complies with the applicable CE marking directives and harmonized standards Electromagnetic Compatibility EMC Directive 2004 108 EC See Electromagnetic Compatibility EMC on page 2 Low Voltage LVD Directive 2006 95...

Page 3: ... disposal of this waste Europe This symbol means that the product shall not be disposed of together with household or commercial waste Directive 2012 19 EU on waste electrical and electronic equipment WEEE is applicable in the European Union member states To prevent potential harm to human health and the environment the product must be disposed of in an approved and environmentally safe recycling ...

Page 4: ...s 18 Stream Profiles 19 Camera Settings 20 Overlay 21 Privacy Mask 23 Configure the Live View Page 24 PTZ Pan Tilt Zoom 26 Preset Positions 26 Autotracking 27 Gatekeeper 28 Guard Tour 28 OSDI Zones 29 Advanced 29 Control Queue 31 Detectors 32 Shock Detection 32 Motion Detection 32 Basic Video Analytics 33 Applications 37 Application Licenses 37 Upload Application 37 Application Considerations 37 E...

Page 5: ...a Table of Contents Advanced 59 Reset to Factory Default Settings 59 Troubleshooting 60 Check the Firmware 60 Upgrade the Firmware 60 Symptoms Possible Causes and Remedial Actions 61 Technical Specifications 64 Performance Considerations 66 5 ...

Page 6: ...ed could result in death or serious injury CAUTION Indicates a hazardous situation which if not avoided could result in minor or moderate injury NO NO NOTICE TICE TICE Indicates a situation which if not avoided could result in damage to property Other Message Levels Important Indicates significant information which is essential for the product to function correctly Note Indicates useful informatio...

Page 7: ...Hook for safety wire 2 Network connector High PoE 3 Ground screw 4 Unit holder 3x 5 Part number P N Serial number S N 6 Power button 7 Heater 8 Control button 9 Status LED indicator 10 SD card slot SDHC 11 Dome Connectors and Buttons For technical specifications see page 64 Network Connector RJ45 Push pull Connector IP66 with High Power over Ethernet High PoE NO NO NOTICE TICE TICE Use the supplie...

Page 8: ...d before removal To unmount go to Setup System Options Storage SD Card and click Unmount This product supports SD SDHC SDXC cards not included For SD card recommendations see www axis com Control Button For location of the control button see Hardware Overview on page 7 The control button is used for Resetting the product to factory default settings See page 59 Connecting to an AXIS Video Hosting S...

Page 9: ...tion Unlit No camera connected Green Steady when camera connected normal operation Green flashing Slow flash when overcurrent or short circuit condition on the port Port Green flashing Fast flash when input voltage is out of range or other internal error AC Green Steady when AC power input connected 9 ...

Page 10: ...t how to discover and assign an IP address see the document Assign an IP Address and Access the Video Stream on Axis Support web at www axis com techsup Note To show Bonjour as a browser bookmark go to Safari Preferences 3 Enter your user name and password If this is the first time the product is accessed the root password must first be configured For instructions see Set the Root Password on page...

Page 11: ...ng 3 Click OK The password has now been configured The Live View Page The controls and layout of the Live View page may have been customized to meet specific installation requirements and user preferences Consequently some of the examples and functions featured here may differ from those displayed in your own Live View page The following provides an overview of each available control Controls on t...

Page 12: ...e 1 Go to Setup Live View Config 2 Under Action Buttons select Show manual trigger button AXIS Media Control viewer toolbar The AXIS Media Control viewer toolbar is available in Internet Explorer only See AXIS Media Control AMC on page 14 for more information The toolbar displays the following buttons The Play button connects to the Axis product and starts playing a media stream The Stop button st...

Page 13: ... the camera view to that position Zoom bar Use the arrows to zoom in and out or click on a position on the bar to zoom to that position Focus bar Use the arrows to focus the camera or click on a position on the bar to set the focus position Using the focus bar will disable the product s autofocus To re enable use the PTZ control panel which is opened by clicking the Ctrl panel button see above Iri...

Page 14: ...video traffic on the network until a client connects and requests the stream Note that there are a maximum of 20 simultaneous unicast connections Multicast RTP This method RTP over UDP should be used for live multicast video The video stream is always up to date even if some frames are dropped Multicasting provides the most efficient usage of bandwidth when there are large numbers of clients viewi...

Page 15: ...m the Axis product in the following ways Motion JPEG server push if supported by the client Chrome or Firefox for example This option maintains an open HTTP connection to the browser and sends data as and when required for as long as required Still JPEG images in a browser Enter the path http ip axis cgi jpg image cgi Windows Media Player This requires AXIS Media Control and the H 264 decoder to b...

Page 16: ...treams Note ip IP address The Axis product supports QuickTime 6 5 1 and later QuickTime may add latency to the video stream It may be possible to use other players to view the H 264 stream using the paths above although Axis does not guarantee this 16 ...

Page 17: ... of the Live View page Administrators have unrestricted access to all settings Operators have access to all settings except System Options See also the online help Basic Setup Basic Setup provides shortcuts to the settings that should be made before using the Axis product 1 Users See page 48 2 TCP IP See page 51 3 Date Time See page 50 4 Video Stream See page 18 The Basic Setup menu can be disable...

Page 18: ... and resize the rectangle or enter the number of pixels in the Width and Height fields and click Apply When accessing the Live View page in Internet Explorer with AXIS Media Control AMC in Windows Right click in the image and select Pixel counter Use the mouse to move and resize the rectangle Image The default image settings can be configured under Video Video Stream Select the Image tab The follo...

Page 19: ...t rate works like the ceiling of a tent It limits the bit rate while maintaining some flexibility The bit rate may bounce up and down within the set target but when it nears the set target value the limitation kicks in However because MBR will always prioritize a continuous video stream it allows temporary overshoots from the target bit rate Because setting a target value prevents the bit rate fro...

Page 20: ...e the exposure when there is a considerable contrast between light and dark areas in the image There are three different WDR modes WDR 1 contrast WDR 2 double exposure WDR 3 contrast and double exposure The different WDR settings adjust for various amounts of contrast in the image Use a higher WDR number for a higher contrast Enable WDR in intense backlight conditions Disable WDR in low light cond...

Page 21: ...d manually using the focus bar autofocus will be disabled even if enabled in Image Settings In this case use the PTZ control panel to enable autofocus see page 12 If required the focus control can be disabled under PTZ Advanced Controls Auto defog The product will detect fog and automatically filter it out to get a clear image Select the level of fog removal from the drop down list High implies th...

Page 22: ...e Privacy Mask on page 23 To use an overlay image the image must first be uploaded to the Axis product The uploaded image should be a Windows 24 bit BMP image with maximum 250 colors The image width and height in pixels must be exactly divisible by 4 and cannot be larger than the maximum image resolution If combining text and image overlays take into consideration that the text overlay occupies 16...

Page 23: ...es 2 Click Add to create a new rule 3 Select a Trigger and optionally a Schedule and Additional conditions See the online help for details 4 From the Actions list select Overlay Text 5 Enter the text to display in the Text field This is the text that D will be replaced by 6 Specify the Duration The text can be displayed while the rule is active or for a fixed number of seconds Example To display t...

Page 24: ...age Server Push Recommended viewer for other browsers Motion JPEG QuickTime H 264 Other browsers Still image Displays still images only Click the Refresh button in your browser to view a new image For more information please see the online help Viewer Settings To configure options for the viewer go to Live View Config Viewer Settings Select Show viewer toolbar to display the AXIS Media Control AMC...

Page 25: ...a name and then enter the URL to link to When defining a web link do not remove the http from the URL address Custom links can be used to run scripts or activate external devices connected to the product or they can link to a web page Custom links defined as cgi links will run the script in the background in a hidden frame Defining the link as a web link will open the link in a new window 25 ...

Page 26: ...urrent position as Home 5 Click Add to save the preset position To include the preset position name in the overlay text go to Video select Include overlay text and enter the modifier P in the field For more information about modifiers see File Naming Date Time Formats in the online help Set the Home Position The Home position is readily accessible by clicking the Home button on the Live View page ...

Page 27: ...t to enable autotracking To disable autotracking click Stop Settings The Movement trigger sensitivity level can be set to Low Medium or High Medium is usually a good choice depending on the size of the moving objects and the image contrast a low or high sensitivity might be more suitable Exclude Areas Exclude areas are areas where movement is to be ignored Note Movement in an area blocked by a pri...

Page 28: ...xample record video or save images take a snapshot while the Gatekeeper is active Go to Events and set up an action rule with PTZ Preset Reached or Autotracking as trigger Guard Tour A guard tour displays the video stream from different preset positions one by one in a predetermined order or at random and for configurable time periods The enabled guard tour will keep running after the user has log...

Page 29: ...ill overwrite the existing guard tour The recorded tour can be activated from the Live View and Guard Tour pages or through events For more information see the online help OSDI Zones On Screen Direction Indicator OSDI zones can be included in the overlay text see Overlay on page 21 to aid the user to navigate the Axis product Each OSDI zone is set up with coordinates and a descriptive name OSDI zo...

Page 30: ... the camera s pan and tilt movements The default setting is maximum speed When using a joystick or emulating one with the mouse the Enable proportional speed setting can be used to reduce the maximum pan tilt movement speed i e the speed the camera view moves at when the joystick is pushed all the way out in any direction This is useful then the view is zoomed in on an object See the online help f...

Page 31: ...a group see Users on page 48 with a higher PTZ priority can go before other users in the queue and take control of the product The order of priority is as follows 1 Administrator An administrator takes over PTZ control regardless of who is first in queue The administrator will be removed from the queue 60 seconds after the last PTZ control command 2 Event The Axis product can be configured to go t...

Page 32: ...duct can be configured to perform actions when motion is detected Possible actions include uploading images and start recording For more information see Set Up Action Rules on page 39 Note Using the motion detection feature may decrease the product s overall performance The position of the Motion Detection Window is relative to the orientation of the Camera Changing the orientation of the camera w...

Page 33: ...expected select a high history level This will cause motion detection to trigger as long as the object is present in the window To only detect flashing light select a low sensitivity In other cases high sensitivity is recommended Basic Video Analytics The Basic Video Analytics section include the following detectors Object Removed see page 33 Enter Exit Detector see page 34 Fence Detector see page...

Page 34: ...ject and the background for the detector to be activated See the online help for more information Enter Exit Detector Enter Exit Detector is used to trigger an alarm if an object within a pre defined area of interest has entered or left the area Do the following to set the detector Note Use the Drawing Opacity slidebar to define how transparent the area of interest or object size shape should be N...

Page 35: ...e position 2 Choose Object size from the drop down list Set the size limits of the object that should be detected The camera will detect any object whose size falls in between the minimum blue shape and maximum white shape range 3 Use the Sensitivity slidebar to define how sensitive the detection should be The lower sensitivity selected on the Sensitivity bar the greater difference in luminance is...

Page 36: ...to be activated See the online help for more information Observations The Observations element appears when a preset is selected in the drop down list Left to Right The value shows the amount of objects detected moving from left to right or if the virtual line is horizontal objects detected moving downwards Right to Left The value shows the amount of objects detected moving from right to left or i...

Page 37: ...if applicable For instructions see the documentation provided by the application vendor 4 Start the application Go to page Applications select the application in the list of installed applications and click Start 5 Configure the application For instructions see the documentation provided by the application vendor Note Applications can be uploaded by product administrators Applications and licenses...

Page 38: ...I PTZ Dome Network Camera Applications If the Axis product is reset to factory default uploaded applications and their settings are removed For information about factory default see Reset to Factory Default Settings 38 ...

Page 39: ...Select Detectors from the Trigger drop down list 4 Select Motion Detection from the drop down list Select the motion detection window to use 5 Optionally select a Schedule and Additional conditions See below 6 Under Actions select Record Video from the Type drop down list 7 Select a Stream profile and configure the Duration settings as described below 8 Select Network Share from the Storage drop d...

Page 40: ...ide or inside the operating range of the product This can for example be used to send maintenance notifications Input Signal Manual Trigger Trigger the rule using the Manual Trigger button in the Live View page See Controls on the Live View Page on page 11 This can for example be used to validate actions during product installation and configuration Virtual Inputs can be used by a VMS Video Manage...

Page 41: ... filter off Overlay Text Display an overlay text See Use Overlay Text in an Action Rule on page 23 PTZ Control Autotracking Start autotracking See Autotracking on page 27 Preset Position Go to a preset position Guard Tour Start a guard tour See Guard Tour on page 28 Record Video Record video to a selected storage Send Images Send images to a recipient Send Notification Send a notification message ...

Page 42: ...HTTPS Specify login information for the HTTPS server and validate the server s certificate If there is a proxy between the Axis product and the HTTPS server also specify the proxy settings Network Share Send Images Send Video Clip A network share can also be used as a storage device for recorded video Go System Options Storage to configure a network share before setting up a continuous recording o...

Page 43: ... Click OK To use the schedule in an action rule select the schedule from the Schedule drop down list in the Action Rule Setup page Set Up Recurrences Recurrences are used to trigger action rules repeatedly for example every 5 minutes or every hour To set up a recurrence 1 Go to Events Recurrences and click Add 2 Enter a descriptive name and recurrence pattern 3 Click OK To use the recurrence in an...

Page 44: ... them to the alarm device Connect the following wires to the midspan through an alarm device that can open and close the circuit Pin Pair Wire Color 4 2 Blue 5 1 1 White blue 7 1 White brown 8 4 2 Brown B 1 2 3 4 A C A Midspan B Alarm device with a physical switch not included C Camera 4 Mount the network connector and connect the cable between the camera and the midspan Connect the following wire...

Page 45: ...e configured under System Options Date Time see Date Time on page 50 To find a recording follow these steps 1 Go to Recordings List 2 To reduce the number of recordings displayed select the desired options under Filter Recording time List recordings that started between the From and To times Event List recordings that were triggered by a specific event Select continuous to list continuous recordin...

Page 46: ...n page 45 3 Select the recording and click Export The Export Recording dialog opens 4 By default the complete recording is selected To export a part of the recording modify the start and stop times 5 Optionally enter a file name for the recording 6 Click Export Note Recordings can also be exported from the playback window Continuous Recording The Axis product can be configured to continuously save...

Page 47: ...Resetting the product to factory default settings will erase any uploaded language files and reset the product language to English Clicking the Restore button on the Maintenance page will not affect the language A firmware upgrade will not affect the language used However if you have uploaded a new language to the product and later upgrade the firmware it may happen that the translation no longer ...

Page 48: ...etup menu Basic Setup provides quick access to settings that should be made before using the Axis product ONVIF ONVIF Open Network Video Interface Forum is a global interface standard that makes it easier for end users integrators consultants and manufacturers to take advantage of the possibilities offered by network video technology ONVIF enables interoperability between different vendor products...

Page 49: ...ol Transport Layer Security The certificates are provided by a Certification Authority CA You need a CA certificate to authenticate the authentication server a CA signed client certificate to authenticate the Axis product To create and install certificates go to System Options Security Certificates See Certificates on page 49 Many CA certificates are preinstalled To allow the product to access a n...

Page 50: ... certificates If required additional CA certificates can be installed 1 Go to Setup System Options Security Certificates 2 Click Install certificate and upload the certificate Date Time The Axis product s date and time settings are configured under System Options Date Time Current Server Time displays the current date and time 24h clock The time can be displayed in 12h clock in the text overlay se...

Page 51: ...address according to the configuration in the network router To enable IPv6 go to System Options Network TCP IP Basic Other settings for IPv6 should be configured in the network router ARP Ping The product s IP address can be assigned using ARP and Ping For instructions see Assign IP Address Using ARP Ping on page 51 The ARP Ping service is enabled by default but is automatically disabled two minu...

Page 52: ...able AVHS box One click enabled Press and hold the product s control button see Hardware Overview on page 7 for about 3 seconds to connect to an AVHS service over the Internet Once registered Always will be enabled and the Axis product stays connected to the AVHS service If the product is not registered within 24 hours from when the button is pressed the product will disconnect from the AVHS servi...

Page 53: ...ges For more information see the online help Link Local IPv4 Address Link Local Address is enabled by default and assigns the Axis product an additional IP address which can be used to access the product from other hosts on the same segment on the local network The product can have a Link Local IP and a static or DHCP supplied IP address at the same time This function can be disabled under System ...

Page 54: ... click Save FTP The FTP server running in the Axis product enables upload of new firmware user applications etc The FTP server can be disabled under System Options Network TCP IP Advanced Note This FTP server has nothing to do with the product s ability to transfer images via FTP to other locations and servers RTSP The RTSP server running in the Axis product allows a connecting client to start an ...

Page 55: ...led Note All AXIS Video MIB traps are enabled when SNMP v1 v2c traps are enabled It is not possible to turn on or off specific traps SNMP v3 provides encryption and secure passwords To use traps with SNMP v3 an SNMP v3 management application is required To use SNMP v3 HTTPS must be enabled see HTTPS on page 48 To enable SNMP v3 check the box and provide the initial user password Note The initial p...

Page 56: ...avoid filling the card it is recommended to remove recordings continuously Under General Settings select Remove recordings older than and select the number of days or weeks To stop writing to the card and protect recordings from being removed select Lock under General Settings Mount and Unmount SD Card NO NO NOTICE TICE TICE To prevent corruption of recordings the SD card should always be unmounte...

Page 57: ... dedicated for recordings and data from the Axis products connected to the network For information about reference NAS devices go to www axis com se sv products axis camera companion support and documentation Note For NAS recommendations see www axis com To add a network share 1 Go to System Options Storage 2 Click Network Share 3 Enter the IP address DNS or Bonjour name to the host server in the ...

Page 58: ...tion on troubleshooting and contact information should you require technical assistance See also Troubleshooting on page 60 System Overview To get an overview of the Axis product s status and settings go to System Options Support System Overview Information that can be found here includes firmware version IP address network and security settings event settings image settings and recent log items M...

Page 59: ...nced users with experience of Axis product configuration Most parameters can be set and modified from this page To open Plain Config go to System Options Advanced Plain Config Axis Support does not provide assistance Reset to Factory Default Settings Important Reset to factory default should be used with caution A reset to factory default will reset all settings including the IP address to the fac...

Page 60: ...are file to your computer The latest version of the firmware is available free of charge from Axis website at www axis com techsup 2 Go to Setup System Options Maintenance in the product s webpages 3 Under Upgrade Server click Browse and locate the file on your computer Click Upgrade 4 Wait approximately 10 minutes while the product is being upgraded and restarted Then access the product AXIS Came...

Page 61: ...eans that if the same default static IP address is also used by another device there may be problems accessing the product The product cannot be accessed from a browser Cannot log in When HTTPS is enabled ensure that the correct protocol HTTP or HTTPS is used when attempting to log in You may need to manually type http or https in the browser s address field If the password for the user root is lo...

Page 62: ...n usually be downloaded from the manufacturer s website Color saturation is different in H 264 and Motion JPEG Modify the settings for your graphics adapter Refer to the adapter s documentation for more information Lower frame rate than expected See Performance Considerations on page 66 Reduce the number of applications running on the client computer Limit the number of simultaneous viewers Check ...

Page 63: ...ogs Reports Depending on the problem it might be necessary to re mount the storage device For information on how to set up a storage disruption alarm see Events on page 39 Video cannot be recorded Check that the SD card is not write protected that is read only SD card cannot be mounted Reformat the SD card and then click Mount NO NO NOTICE TICE TICE Formatting the card will remove all content incl...

Page 64: ... balance exposure control exposure zones backlight compensation fine tuning of behavior at low light rotation 0 180 text and image overlay 32 individual 3D privacy masks image freeze on PTZ highlight compensation automatic defog Network Security Password protection IP address filtering HTTPSa encryption IEEE 802 1Xa network access control Digest authentication User access log Centralized Certifica...

Page 65: ... A ICES 003 Class A VCCI Class A C tick AS NZS CISPR 22 Class A KCC KN22 Class A KN24 IEC EN UL 60950 1 EN 50121 4 IEC 62236 4 IEC 60068 2 1 IEC 60068 2 2 IEC 60068 2 6 IEC 60068 2 14 IEC 60068 2 27 NEMA 250 Type 4X IEC EN UL 60950 22 IEC 60068 2 30 IEC 60068 2 60 IEC 60068 2 78 IEC EN 60529 IP66 NEMA TS 2 2003 v 02 06 subsection 2 2 7 2 2 8 2 2 9 IEC 62262 IK10 ISO 4892 2 Midspan EN 60950 1 GS UL...

Page 66: ...th affected Access by large numbers of Motion JPEG and or unicast H 264 clients Bandwidth affected Simultaneous viewing of different streams resolution compression by different clients Effect on frame rate and bandwidth Accessing Motion JPEG and H 264 video streams simultaneously Frame rate and bandwidth affected Heavy usage of event settings affect the product s CPU load Frame rate affected Using...

Page 67: ...User Manual Ver M5 6 AXIS Q6045 E Mk II PTZ Dome Network Camera Date May 2015 Axis Communications AB 2014 2015 Part No 1463329 ...

Reviews: