AXIS M1075-L Box Camera
The device interface
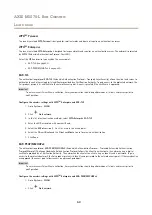
All current SIP accounts are listed under
SIP accounts
. For registered accounts, the colored circle lets you know the status.
The account is successfully registered with the SIP server.
There is a problem with the account. Possible reasons can be authorization failure, that the account credentials are wrong,
or that the SIP server can’t find the account.
The
peer to peer (default)
account is an automatically created account. You can delete it if you create at least one other account
and set that account as default. The default account is always used when a VAPIX
®
Application Programming Interface (API) call
is made without specifying which SIP account to call from.
Account
: Click to create a new SIP account.
•
Active
: Select to be able to use the account.
•
Make default
: Select to make this the default account. There must be a default account, and there can only
be one default account.
•
Name
: Enter a descriptive name. This can, for example, be a first and last name, a role, or a location. The name is
not unique.
•
User ID
: Enter the unique extension or phone number assigned to the device.
•
Peer-to-peer
: Use for direct calls to another SIP device on the local network.
•
Registered
: Use for calls to SIP devices outside the local network, through a SIP server.
•
Domain
: If available, enter the public domain name. It will be shown as part of the SIP address when calling other
accounts.
•
Password
: Enter the password associated with the SIP account for authenticating against the SIP server.
•
Authentication ID
: Enter the authentication ID used for authenticating against the SIP server. If it is the same as the
user ID, you don’t need to enter the authentication ID.
•
Caller ID
: The name which is presented to the recipient of calls from the device.
•
Registrar
: Enter the IP address for the registrar.
•
Transport mode
: Select the SIP transport mode for the account: UPD, TCP, or TLS. When you select TLS, you get the
option to use media encryption.
•
Media encryption
(only with transport mode TLS): Select the type of encryption for media (audio and video) in SIP calls.
•
Certificate
(only with transport mode TLS): Select a certificate.
•
Verify server certificate
(only with transport mode TLS): Check to verify the server certificate.
•
Secondary SIP server
: Turn on if you want the device to try to register on a secondary SIP server if registration
on the primary SIP server fails.
•
Answer automatically
: Select to automatically answer an incoming call.
•
SIP secure
: Select to use Secure Session Initiation Protocol (SIPS). SIPS uses the TLS transport mode to encrypt traffic.
•
Proxies
-
Proxy
: Click to add a proxy.
-
Prioritize
: If you have added two or more proxies, click to prioritize them.
-
Server address
: Enter the IP address of the SIP proxy server.
-
Username
: If required, enter the username for the SIP proxy server.
-
Password
: If required, enter the password for the SIP proxy server.
•
Video
-
View area
: Select the view area to use for video calls. If you select none, the native view is used.
-
Resolution
: Select the resolution to use for video calls. The resolution affects the required bandwidth.
-
Frame rate
: Select the number of frames per second for video calls. The frame rate affects the required
bandwidth.
-
H.264 profile
: Select the profile to use for video calls.
•
DTMF
-
Use RTP (RFC2833)
: Select to allow dual-tone multifrequency (DTMF) signaling, other tone signals and
telephony events in RTP packets.
-
Use SIP INFO (RFC2976)
: Select to include the INFO method to the SIP protocol. The INFO method adds
optional application layer information, generally related to the session.
-
DTMF sequence
: Click to add an action rule triggered by touch-tone. You must activate the action
rule in the
Events
tab.
-
Sequence
: Enter the characters to trigger the action rule. Allowed characters: 0–9, A-D, #, and *.
-
Description
: Enter a description of the action to be triggered.
39


