3: A
dv
an
ce
d P
ro
gr
am
m
in
g • 1
7
Version 1.2 July 2010
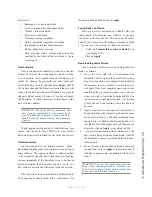
configuration page that is discussed later.
Talk and Listen pins are selected by the associated
drop-down selector. Pins 1 through 5 are available.
Each port is assigned separate Talk and Listen pins
that will allow you to interface these sources to the real
world. These GPIO ports may be connected to 2-way ra-
dios, wireless intercom equipment, audio console logic,
electric door locks ... use your imagination!
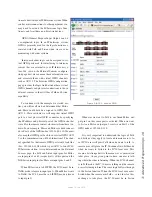
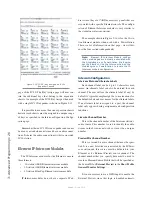
Since each port has five pins, you can double-up two
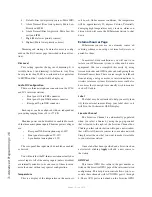
sources on a single GPIO port as shown in Figure 3-6.
Let’s use a real-world example to illustrate the concepts.
In this example, Milos is assigned pins 1 and 2 on AUX
2 while Marc has been assigned pins 4 and 5; both on the
same GPIO port AUX 2.
Talk Pin
A contact closure to this pin will replicate pressing
the front panel Talk key associated with this source. In
our example, pin 1 is the Talk pin for Milos and pin 4 is
the Talk pin for Marc.
Listen Pin
A contact closure to this pin will replicate press-
ing the front panel Listen key associated with this
source. In Figure 3-6, Milos has pin 2 defined as his
Listen pin and Marc has pin 5.
NEW
Additional Livewire sources can be added to the
list of external sources by entering the relevant in-
formation in this row and then clicking the
Apply
button.
Delete
Checking the
Delete
box and clicking
Apply
will delete all checked sources from this intercom
station. As expected, any keys with labels that may
correspond to deleted stations will no longer func-
tion.
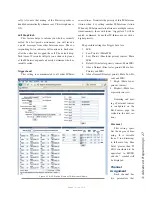
Key Assign Page (IC.20)
The Key Assign configuration is used to assign
intercom sources to front panel channels and to create
Shift Pages
that may be loaded to the intercom station
(IC.20 only). Each Shift page contains the key assign-
ment and mode for each of the front panel keys. This
concept is similar to Show Profiles or scenes. You may
store numerous
Shift Pages
that are easily loaded from
the front-panel controls.
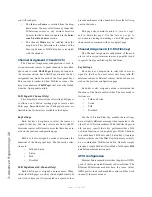
Shift Page
This drop-down selects from all existing Shift Pages
or allows you to edit an existing page or create a new
Shift Page. Remember that your Shift Page names are
limited to the 10 characters available in the display.
Key Settings
Each key has a drop-down to select the source as-
signed to that key. You may select only from valid IP-
Intercom sources or External sources that have been cre-
ated on the previous configuration page.
Each key is also assigned a mode to determine the
functions of the front panel keys. The four mode selec-
Figure 3-6: IC.20 - Livewire External Source Configuration

