background image

Precaution

9

Operation

CAUTION

Upon completion of any service or
repairs to this the TV, ask the service
technician to perform safety checks to
determine that the TV is in a safe 
operating condition. 

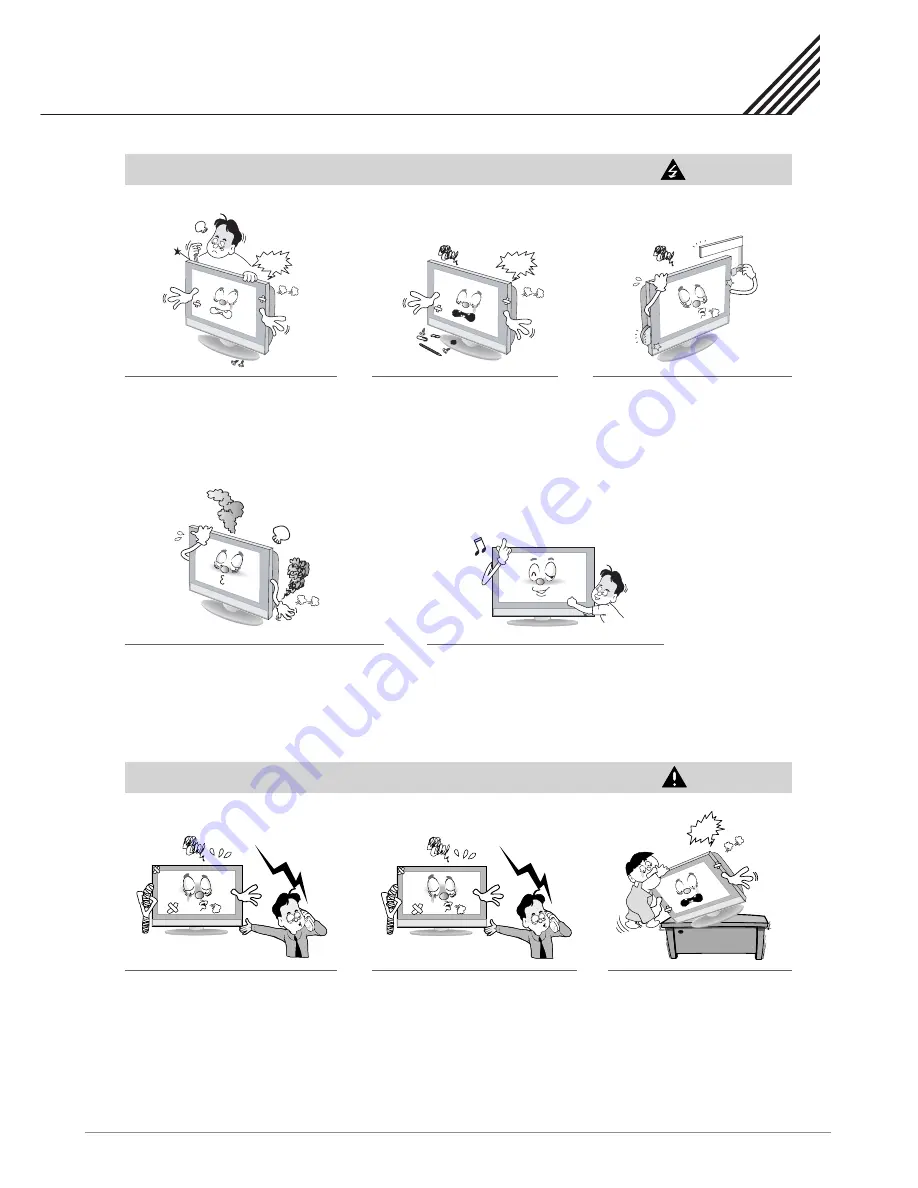
Do not place anything containing
liquid on top of the TV.

- This may cause a fire or could give 

an electric shock.

Never add any attachments and/or
equipment without approval of the
manufacturer. Such additions can
increase the risk of fire, electric 
shock, or other personal injury.

NO!!

NO!!

Operation

WARNING

When replacement parts are required,
be sure the service technician uses
replacement parts specified by the
manufacturer or those that have the
same characteristics as the original
part. Unauthorized substitutions may
result in additional damage to the unit. 

If you make adjustments yourself, 
adjust only those controls that are 
covered by the operating instructions.
Adjusting other controls may result 
in damage and will often require 
extensive work by a qualified 
technician to restore the TV to normal.

Do not let children hang on or
ride on the TV.

In case of smoke or strange smell from the 
TV, switch it off, unplug it from the wall outlet
and contact your dealer or service center.

- This may cause a fire or could give an electric shock.

Do not insert anything through the openings
in the unit, where they can touch dangerous
voltage points or damage parts. Never spill
liquid of any kind on the TV.

NO!!

Summary of Contents for CL-40KDF10S

Page 1: ...User S Manual 101cm LCD Television CL 40KDF10S Please read this user s manual carefully before operating your set Retain it for future reference ...

Page 2: ...AWA Hot Iine 1300 366 144 ...

Page 3: ...TV Cable 17 Connecting the VCR 18 Watching VCR 18 Connecting the DVD 19 Connecting the Set Top Box 20 Connecting the PC D Sub 21 Supported Display Specification PC Input 22 Turning the TV On Off 23 Select Source 23 Source Select 23 Changing Picture Mode 24 Color Temperature Setting 25 DNR Setting 25 Advance Equalizer 26 Adjusting the Equalizer 27 Manual Search 27 Program Edit 28 Channel List 28 Fa...

Page 4: ...ation 30 Digital Audio 30 Teletext 30 Subtitle 30 EPG 30 Image Setting 31 Auto Adjust 31 OSD Setting 32 Time 33 Date and Time 33 Reset 33 Specification 42 PDP 34 Setup Setting DVB T Geometry Setting System Setting Timer Setting 34 Specification 42 PDP ...

Page 5: ...is not considered a malfunction and is not covered by the warranty To prevent image retention lower the contrast and brightness levels Typical still images Channel number and other logos Image displayed in 4 3 modes Video game Computer This symbol is intended to alert the user to the presence of uninsulated dangerous voltage within the product s enclosure that may be of sufficient magnitude to con...

Page 6: ...d plug does not fit into your outlet consult an electrician for replacement of the obsolete outlet 10 Protect the power cord from being walked on or pinched particularly at plugs convenience receptacles and the point where they exit from the apparatus 11 Only use the attachments accessories specified by the manufacturer 12 Use only with a cart stand tripod bracket or table specified by the manufac...

Page 7: ...g electrodes and requirements for the grounding electrode Setting CAUTION Follow all operating and use instructions Do not use the TV where contact with or immersion in water is a possibility such as near bath tubs sinks washing machines swimming pools etc Avoid overhead power lines An outside antenna system should not be placed in the vicinity of overhead power lines or other electric light or po...

Page 8: ...ntilation to protect it from overheating Do not block these openings with any object and do not place the TV on a bed sofa rug or other similar surface Do not place it near a radiator or heat register If you place the TV on a rack or bookcase ensure that there is adequate ventilation and that you ve followed the manufacturer s instructions for mounting NO This TV is designed to be mounted horizont...

Page 9: ...e a damp cloth do not use liquid or aerosol cleaners Unplug the TV from the wall outlet and disconnect the antenna or cable system during a lightning storm or when left unattended and unused for long periods of time This will prevent damage to the unit due to lightning and power line surges NO AC100 125V AC200 240V AC240 SAA TYPE NO Protect the power cord Power supply cords should be routed so tha...

Page 10: ...d by the manufacturer or those that have the same characteristics as the original part Unauthorized substitutions may result in additional damage to the unit If you make adjustments yourself adjust only those controls that are covered by the operating instructions Adjusting other controls may result in damage and will often require extensive work by a qualified technician to restore the TV to norm...

Page 11: ...y use the specified batteries This make cause damaged the TV or could give an electric shock More than two people are necessary to move or take off the package due to the product s weightiness Otherwise it can cause personal injury Keep the batteries out of reach of children when exchanged Seek urgent medical advice if child swallows a battery The distance between eyes and the screen should be abo...

Page 12: ...nt Back Panel Diagram Front OSD Button Position CH CH VOL VOL POWER INPUT MENU IR Sensor Warnings and Cautions 3 5 6 8 Remote Control Power Cord Alkaline Batteries User s Manual Accessories Composite Cable ...

Page 13: ... 1 Audio In Y Pb Pr 2 In Y Pb Pr 2 Audio In HDMI 1 In HDMI 2 In 12 13 11 14 15 16 17 18 19 1 2 3 4 5 6 7 8 9 10 PC RGB In PC Audio In DVI Audio In AV Video In AV Audio In Digital Audio Out Optical Digital Audio Out Coaxial USB Service Port AC Inlet Back panel of the TV 1 19 15 14 2 16 18 11 12 13 9 10 5 6 7 8 17 3 4 ...

Page 14: ...various optional adjustable settings EXIT Press this key to exit from the current menu VOL Press these keys to adjust the volume level up or down CH Press these keys to select channels in ascending or descending order OK Press this key to execute the selected item in the menu screen or enter the desired value in any input mode SOURCE Press this key to switch among TV broadcast AV input programme a...

Page 15: ...e hold state SUBPAGE Some teletext pages e g P250 may contain several sub pages Press this key once P250 will be displayed on screen Enter number keys 0 9 to display the sub page if available Press this key again to exit from sub page mode REVEAL Press this key to reveal the hidden information for some Teletext pages e g answers to puzzles or riddles Press again to hide the information Colour keys...

Page 16: ...e in the direction of the arrow Load two AAA batteries taking care that the and ends face the correct direction Close the cover until it clicks Loading the Batteries Reception Range of Remote Control 1 2 3 Left 5m Front Right Upper Lower IR Sensor ...

Page 17: ...e control and select TV on OSD Use button or numeric button to change TV programme for your programme selection Also you can tune to cable service provided programmes using the cable box For further information regarding cable TV service contact cable TV service provider s TV IN Connection the TV Cable 1 2 3 ...

Page 18: ...a video tape into the VCR and press the PLAY button on the VCR Connecting the VCR 18 Connecting the VCR 1 2 Watching VCR S VIDEO IN AV AUDIO IN AV VIDEO IN N No ot te es s To avoid picture noise interference leave an adequate distance over 3m between the VCR and TV When connecting the TV with external equipment match the colour of connecting ports e g Video Yellow Audio L White Audio R Red If you ...

Page 19: ...ets as below Connecting the DVD 19 How to Use Connecting the DVD 1 2 HDMI Y Pb Pr 1 in Y Pb Pr 2 in Y Pb Pr 2 AUDIO In Y Pb Pr 1 AUDIO In N No ot ti ic ce e Normal DVD source is based on 480i which should be through normal Y Pb Pr of component signal It may occur screen noise blank screen in case of using HDMI Cable unauthorized by ATC It may easily occur as specially HD signal 720p or 1080i input...

Page 20: ...acks of the STB and the TV Connect L White and R Red sound cables Composite to the sound jacks of the STB and the TV With HDMI Connect a HDMI cable to the HDMI jacks of the STB and the TV With PC RGB Connect a D Sub cable to the AV video jacks of the STB and the TV Connect L White and R Red sound cables Composite to the sound jacks of the STB and the TV The interlace mode in not supported How to U...

Page 21: ...PC mode Turn on the PC and check for the PC requirement Adjust the PC screen in Position menu See 22 page 1 2 3 VGA In 1 2 3 4 5 6 7 8 9 10 11 12 13 14 15 Red R Green G Blue B Grounding Grounding DDC Red R Grounding Green G Grounding Blue B Grounding Reserved Sync Grounding Grounding Data DDC Horizontal sync Vertical sync Clock DDC Pin No Description Connecting a PC to the TV Pin Configuration To ...

Page 22: ...Depending on the manufacturer your PC screen might appear differently and depending on your particular version of Windows Check your PC instruction book for information about connecting your PC to a the TV The TV may operate abnormally if a non standard video signal inputs No Signal or Unsupported Mode message box will appear when an over spec video signal is inputted Change the video settings of ...

Page 23: ...Y MENU SYSTEM MENU Menu key has two functions First is opening or closing the menu and second is closing the current menu and then opening the previous menu Press the MENU key on the remote control unit to cancel the menu function After entering an item you can select the desired adjusting item by pressing CH CH keys and adjust it by VOL VOL keys Press SOURCE button to enter source select menu and...

Page 24: ...to enter Picture Setting Menu Adjust settings with VOL VOL buttons Being adjustment done press MENU button to exit and press again to go back to the previous menu The operation of Brightness Saturation and Sharpness takes same step with Contrast Contrast adjusts difference between bright and dark area of picture Brightness adjusts brightness of picture Saturation adjusts richness of colour Sharpne...

Page 25: ... improves picture quality where receiving weak signals Select MENU button on the remote control to display main menu Colour Temperature Setting DNR Setting Normal sets common picture Warm sets picture with strong red Cool sets picture with strong blue High reduces highly noise of picture Normal reduces mid noise of picture Low reduces low noise of picture Off turns off DNR function 1 1 ...

Page 26: ...mode of Digital Audio This item is available only in DVB T and HDMI1 2 source Press MENU key to return to main menu Press VOL key to enter the Equalizer menu Press VOL VOL keys to adjust the value of 100HZ 330HZ 1KHZ 3 3KHZ and 10KHZ items Press MENU key to return to main menu 1 2 3 4 Advance Equalizer 1 2 3 Balance adjusts audio balance between left and right channel AVL is auto volume leveller A...

Page 27: ...L key to enter the menu Press VOL VOL keys to select the band Press VOL VOL keys to select the channel number Press VOL VOL key to select the search of direction Press VOL VOL keys to change the position and press Numeric and Letter keys to change the character Press OK key to start searching Press MENU key to return to main menu Adjusting the Equalizer Manual Search 1 2 1 2 3 4 5 6 7 N No ot te e...

Page 28: ...an watch the channel Press MENU key to return to main menu Select Channel List by pressing OK key during normal DTV viewing Press CH CH VOL or VOL key to move cursor up down right or left Press RED and GREEN key to change to the page Press the OK key to select the channel Press the EXIT key to cancel the menu Press FAV key to display defined favorite group for selection Press Red and Green key to ...

Page 29: ...ressing CH CH keyst Press VOL or OK key to enter the menu Press NUMERIC and LETTER keys to select the frequency Press VOL VOL keys to select the Bandwidth Press CH CH keys to select SAVE menu press OK key to start searching Press MENU key to return to main menu Auto Search Manual Search N No ot te es s Only after finishing Auto Search channels will be sorted If you break the process during the aut...

Page 30: ...re are two items such as MPEG2 and AC3 which supports the DTV programme If DTV programme supports Subtitle press the Subtitle key during normal DTV viewing Channel List and Favorite Channel List are same as in TV Press EPG key on remote control to enter EPG menu during normal DTV viewing Press RED or GREEN key to select the channel Press CH or CH key to move cursor up down Press VOL or VOL key to ...

Page 31: ...f the window Press VOL VOL keys to adjust the vertical size of the window Press VOL VOL keys to adjust the phase of the window Press MENU key to return to main menu Press VOL key to enter into the menu Press VOL VOL keys to adjust the horizontal position of the window Press VOL VOL keys to adjust the vertical position of the window Press MENU key to return to main menu Press VOL VOL keys to restor...

Page 32: ... On and Off when no signal Press MENU key to return to main menu Press VOL VOL keys to restore the horizontal and vertical position of the window Press VOL key to enter the menu Press VOL VOL keys to enhance or reduce the transparent of the menu Press VOL VOL keys to select the OSD Display Timer such as 10sec 30sec and 1 min Press MENU key to return to main menu 2 3 1 2 2 OSD Setting ...

Page 33: ...ime Press VOL VOL keys to select the mode Press Numeric and Letter buttons to input the Data and Time if the mode is on Press CH CH key to move cursor up down Press MENU key to return to main menu Press CH CH keys to select the item of reset Press OK key to reset the parameter to factory setting 1 2 1 2 1 2 3 4 5 Date and Time Reset Time ...

Page 34: ...Zone Timer Mode 16 9 1 920 H x 1 080 V 500cd m2 Typical 2 000 1 Typical VHF 174MHz 230MHz UHF 520MHz 820MHz DVB T OFDM 7MHz MPEG 2 MP HL HDTV MPEG 2 MP ML SDTV MPEG MusicCam Layer l ll Yes 45MHz 820MHz PAL B G A2 NICAM Mono Stereo Dual Auto Search Manual Search Fine Tune Program Edit Balance AVL Equalizer Level 2 5 500 Pages PAL NTSC 480i p 60Hz 576i p 50Hz 720p 50 60Hz 1080i 50 60Hz 1080p 50 60Hz...

Page 35: ...35 Memo ...

Page 36: ...36 Memo IR Sensor ...

Reviews: