


Page 5
Configure Your Switch Sensor
Configure Your Switch Sensor
Use Room Alert Monitor’s Built-In Web Interface
Navigate to
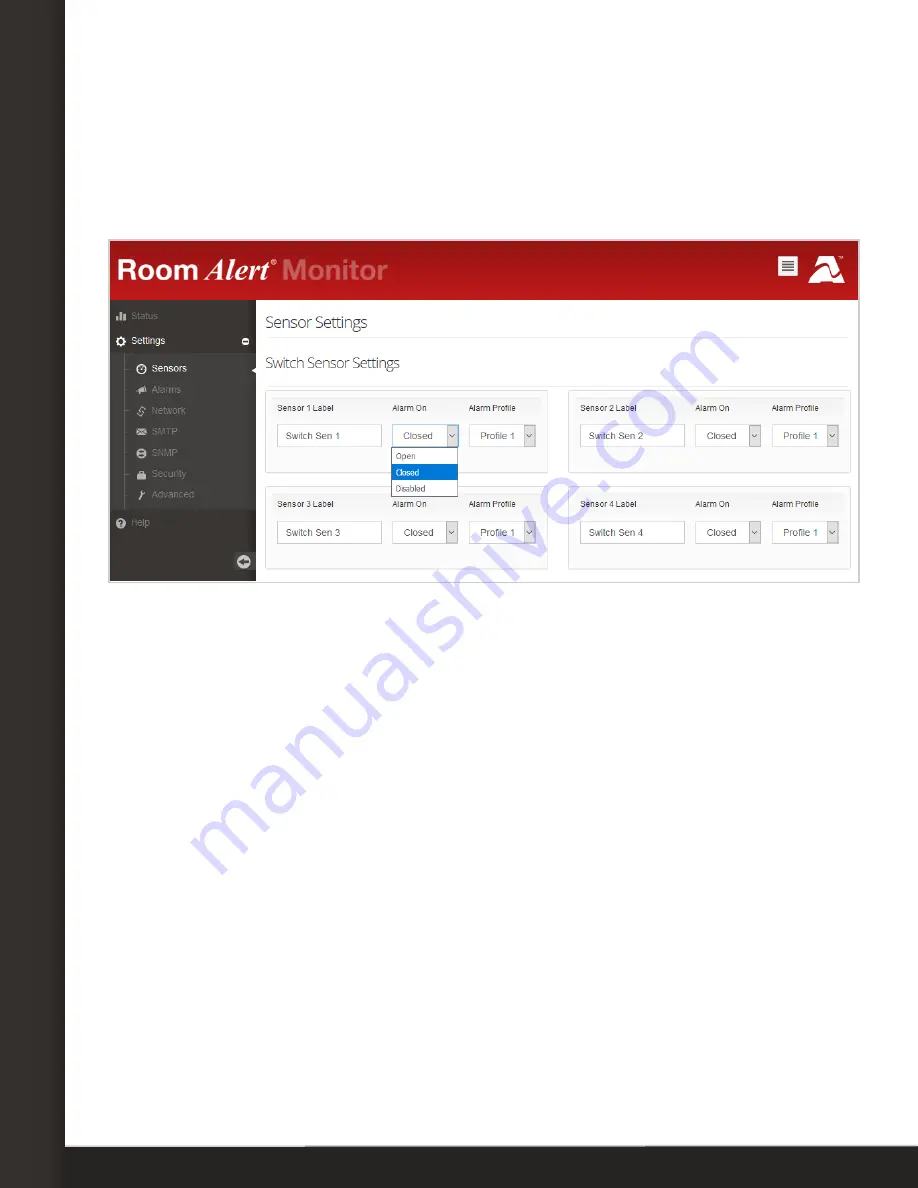
Settings
Sensors
in your Room Alert Monitor’s web interface. The
options you see below will vary depending on your Room Alert model.
1. Scroll down to
Switch Sensor Settings
.
2. Find the switch sensor label that matches the port you connected your switch sensor
to. For example, if you used the first switch sensor port on your Room Alert Monitor,
look for
Sensor 1 Label
; if you used the second, look for
Sensor 2 Label
, and so on.
3.
In
Sensor X Label
, you may leave the default, “Switch Sen X,” or enter something more
descriptive of up to 15 characters. You may use the following characters in sensor
labels: letters, numbers, spaces, hyphens (-), underscores (_) and periods (.).
4.
In
Alarm On
, select the alarm state (
Open
or
Closed
) for your switch sensor. You
may find the alarm state of your switch sensor under the
Features & Specifications
section of this Installation Note.
5.
In
Alarm Profile
, which controls light towers and relays on your Room Alert Monitor,
you may leave the default,
Profile 1
, or choose another profile from the drop-down
menu.
6. Select
Save Settings
at the top or bottom of the page. Your Room Alert Monitor will
automatically reboot and commit your changes.
AVT-180309-1.2.0
www.serverroomenvironments.co.uk


