


12
APPENDIX 1 CREATING AN ACCOUNT FOR DDNS SERVICE
For PPPOE or DHCP, you should enter the host name which points to the IP address of your network
camera for login first. Besides using the default DDNS service, you can also apply for new DNS
services.
There are many websites for free DDNS service application, and below shows an example of DDNS
account application from the website
http://www.dyndns.com
.
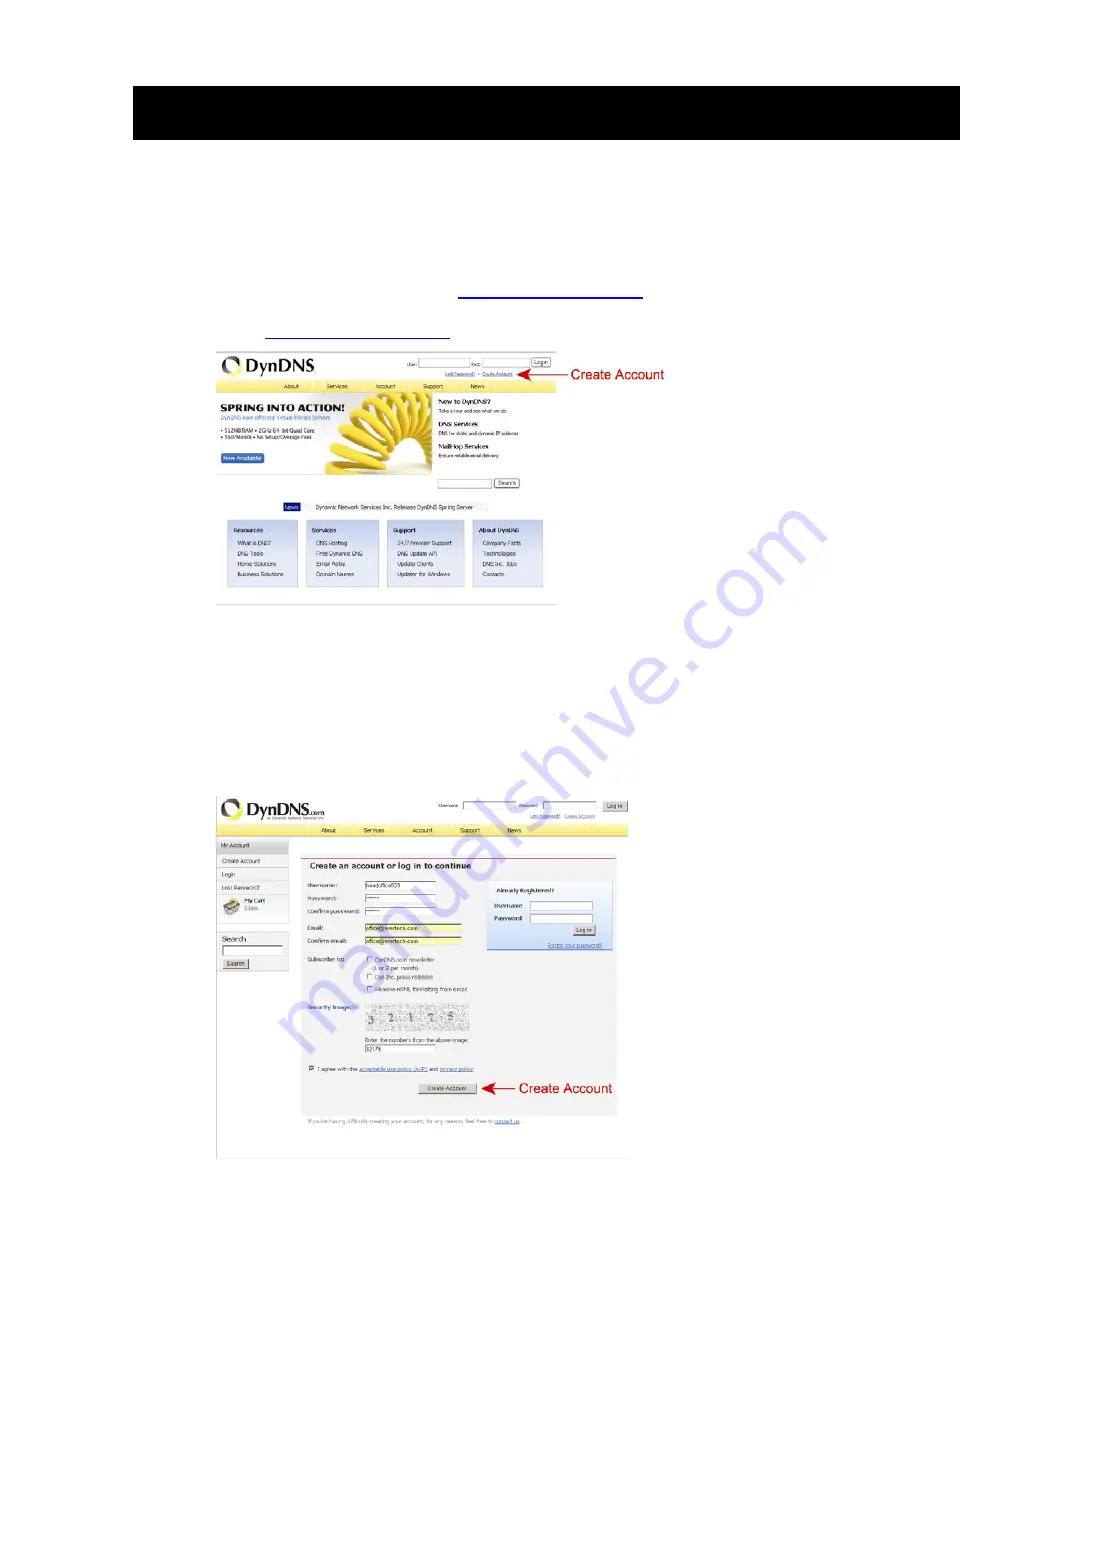
Step1: Go to
http://www.dyndns.com
, and click “Create Account” to sign up a DDNS account.
Step2: Enter all the information necessary for signing up an account according to the website
instructions.
‧
Key in a user name for login, for example,
headoffice523
.
‧
Set the password and input it again to confirm.
‧
Key in your E-mail address and input it again to confirm.
Then, click “Create Account”.
Step3: The system will automatically send a confirmation email to your email account. Please read
this email within 48 hours and complete the procedure to activate your account according to
the instructions in the email.
When the account is confirmed, you will see “Account Confirmed”. Your account is created
successfully now.


