


7
Step2. Setting of the system select switch
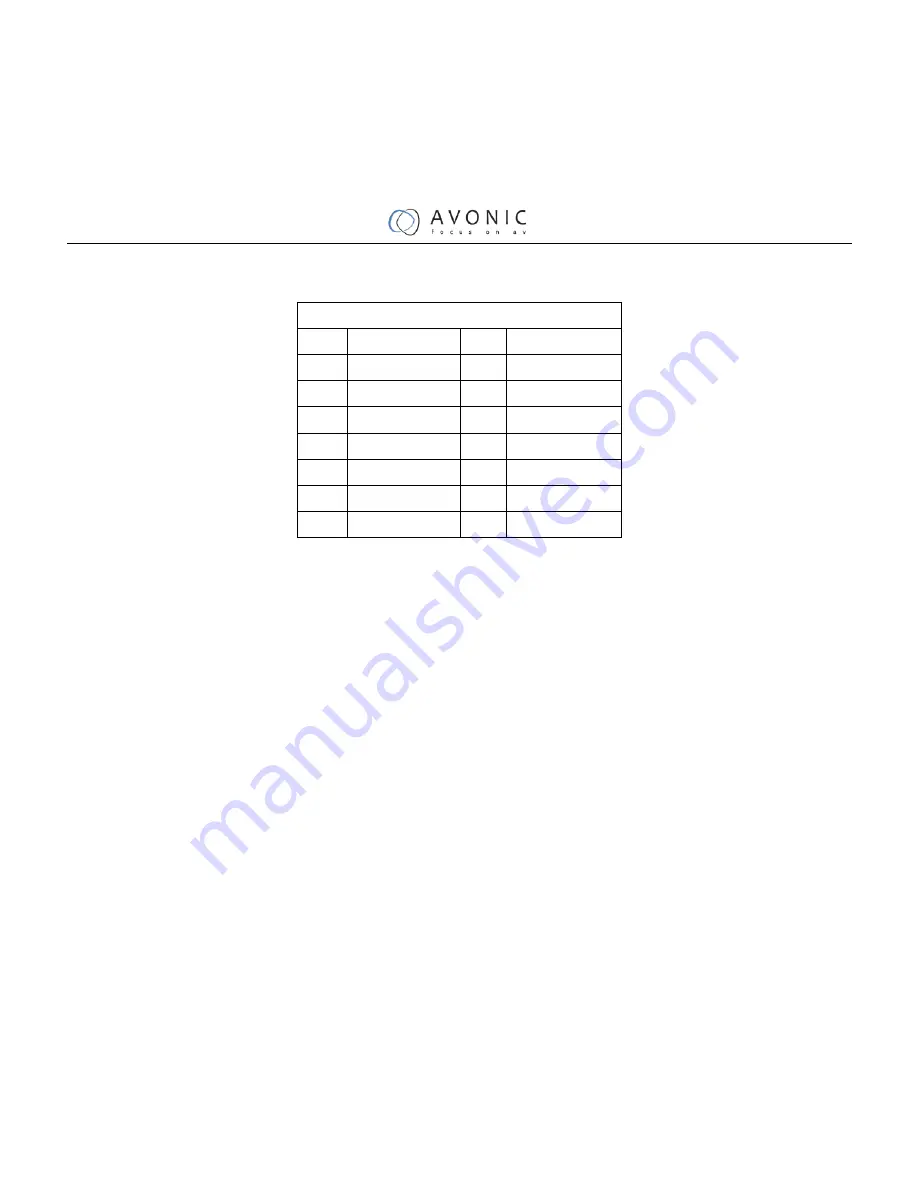
The option of video format:
VIDEO SYSTEM
0
-
8
-
1
-
9
-
2
1080i60
A
-
3
1080i50
B
-
4
720p60
C
-
5
720p50
D
576i
6
1080p30
E
480i
7
1080p25
F
-
CAUTION:
a.
After changing the switch, you need to restart the camera to take effect.
Step3. Press the Switch ON/OFF button on the rear of the camera, the power lamp light.
Step4. Pan-Tilt will rotate to the maximum position of top right after the camera started, then it return to the center,
the process of initialization is finished. (Note: If the position preset 0 has been stored, the position preset 0 will be
called up after initialization)
Step5. (Optional) If you want to restore the factory default settings, Press [MENU] button to display the OSD
menu. Select the item [MENU] -> [RESTORE DEFAULT] -> [Restore]. Set the value [Yes], press [HOME]
button to restore the factory default settings.
Summary of Contents for CM50-IP
Page 1: ...HD Video Conferencing Camera User Manual V2 2 English...
Page 5: ...4 The specific frequency of electromagnetic field may affect the image of the camera...
Page 7: ...6 Quick Start Step1 Please check connections are correct before starting...
Page 9: ...8 RESTORE DEFAULT Restore Yes Change Value Home OK Menu Back...
Page 15: ...14 Size...
Page 18: ...17 F4 Address4...
Page 24: ...23 VISCA Network Configuration...


