ZedBoard Booting and Configuration Guide
ISE Design Suite 14.1
26
Booting From the SD Card
With the SDK tasks completed, we are now ready to boot our system from the SD card.
Prepare the SD Card
1.
Take the SD card that came with the ZedBoard and install it in an open SD card slot
on your PC host. Using Windows Explorer identify the drive letter where the SD
card is mounted and backup the SD card contents to a folder of your choice on your
PC host. Once the SD card files are backed up on the PC, delete them from the SD
card.
2.
In Windows Explorer navigate to
<installation>\boot_image
and copy the
BOOT.BIN
file to the SD card.
3.
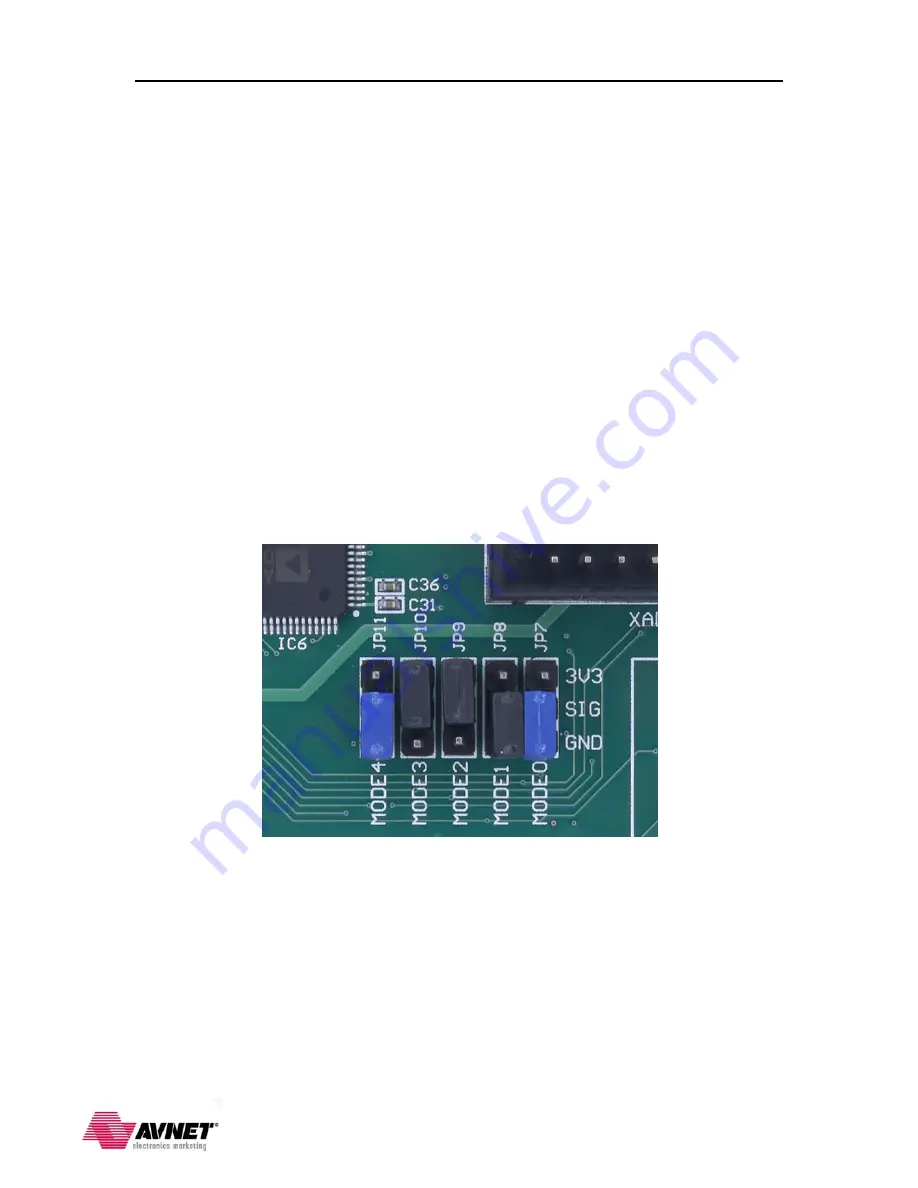
Turn off the ZedBoard if it is turned on. Verify the Configuration Mode jumpers are
set for SD card mode as described and in the figure below:
MODE3 (JP10) shunted to 3.3V
MODE2 (JP9) shunted to 3.3V
All other MODE pins shunted to GND
4.
Remove the SD card from the PC and insert it in the SD card slot of the ZedBoard.
5.
Slide the power switch (SW8) to the ON position. You will see the green ‘power
good’ LED (LD13) will illuminate immediately and the blue ‘DONE’ LED (LD12)
will illuminate once the processor has been initialized and then configures the PL.
When booting from SD card this may take 10-15 seconds.


