Page 25
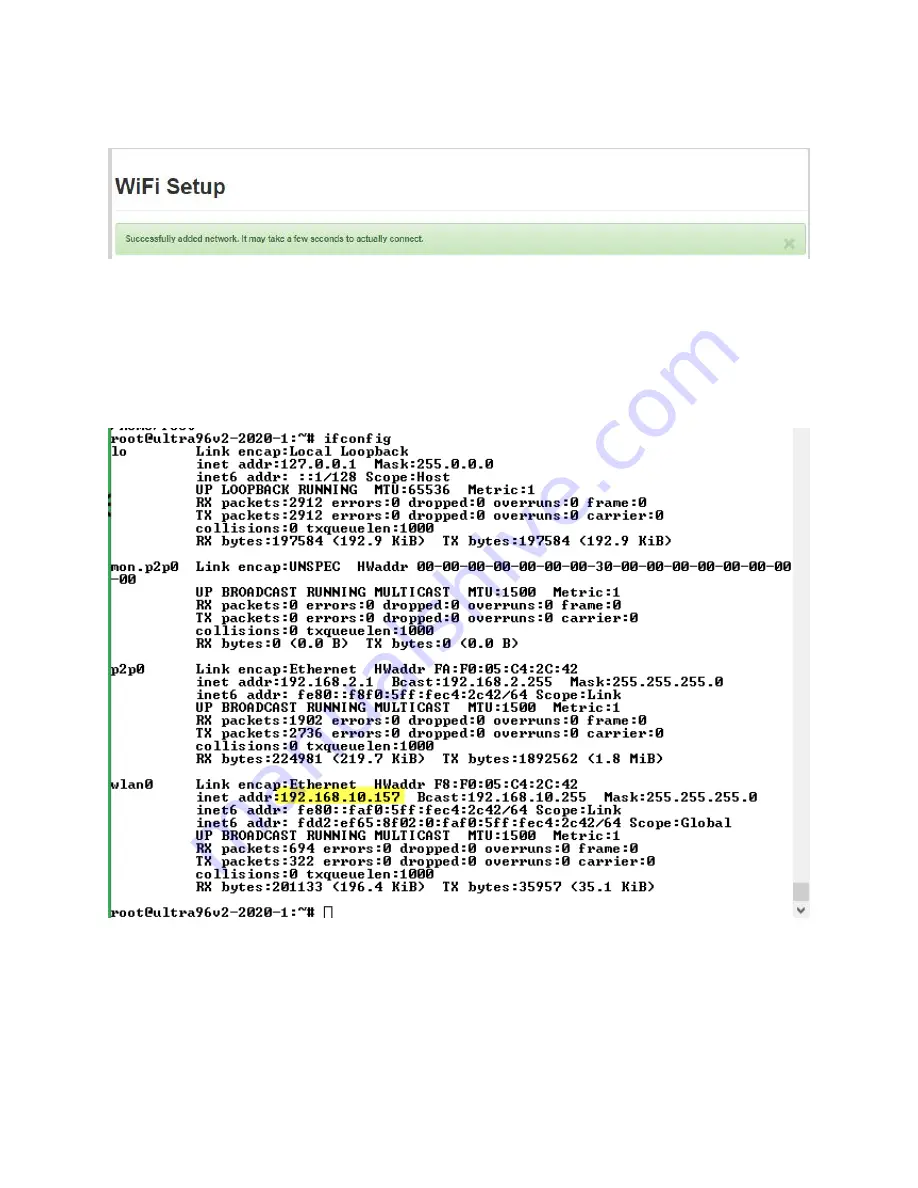
4. Be patient as it can take several seconds for the connection to work. When successful,
you should see the following message:
Figure 21 – Successfully Connected
At this point, the Access Point may no longer work. To connect back to the board, you must now
connect to the IP addressed assigned by the external Wi-Fi router. You can do this by logging
into the router, or you can use the terminal from the JTAG/UART Pod as shown below.
4. In the terminal, enter command ‘ifconfig’ to determine the assigned IP address.
Figure 22 – Determine IP Address Assigned to Ultra96-V2
5. Connect your host to the same Wi-Fi source. With both your host and Ultra96-V2 board
connected to the same Wi-Fi source, point your browser to this new IP address, and you
will be back to the same interactive browser page for Ultra96-V2.
Summary of Contents for AES-ULTRA96-V2-G
Page 10: ...Page 10 Figure 2 Ultra96 V2 Block Diagram ...
Page 26: ...Page 26 Figure 23 Connected to Ultra96 V2 Via External Wi Fi ...
Page 29: ...Page 29 Figure 28 Telemetry from PMIC 0x13 43 Figure 29 Telemetry from MPSoC Sysmon ...
Page 42: ...Page 42 7 Create or select your Host ID Click Next Figure 41 Select Host Information ...


