19
-‐
On the AVM device plug the LAN cable into the socket marked with “LAN”. On the WiFi router
choose one of the available LAN sockets and plug in your LAN cable.
-‐
Make sure the supplied WLAN antenna is screwed on the respective WLAN antenna connection of
your AVM device.
-‐
Make sure you have downloaded and installed the RC S App from the Apple App Store or Google
Play Store.
2. Switch on your AVM device by turning on the mains switch on the rear-side of the unit. Wait until the
starting procedure is completed and your AVM device has gone to stand-by mode. Now, switch on
your AVM device by pressing the power-button on the front panel of the unit.
3. Launch the RC S App by clicking on the App icon on your smartphone or tablet.
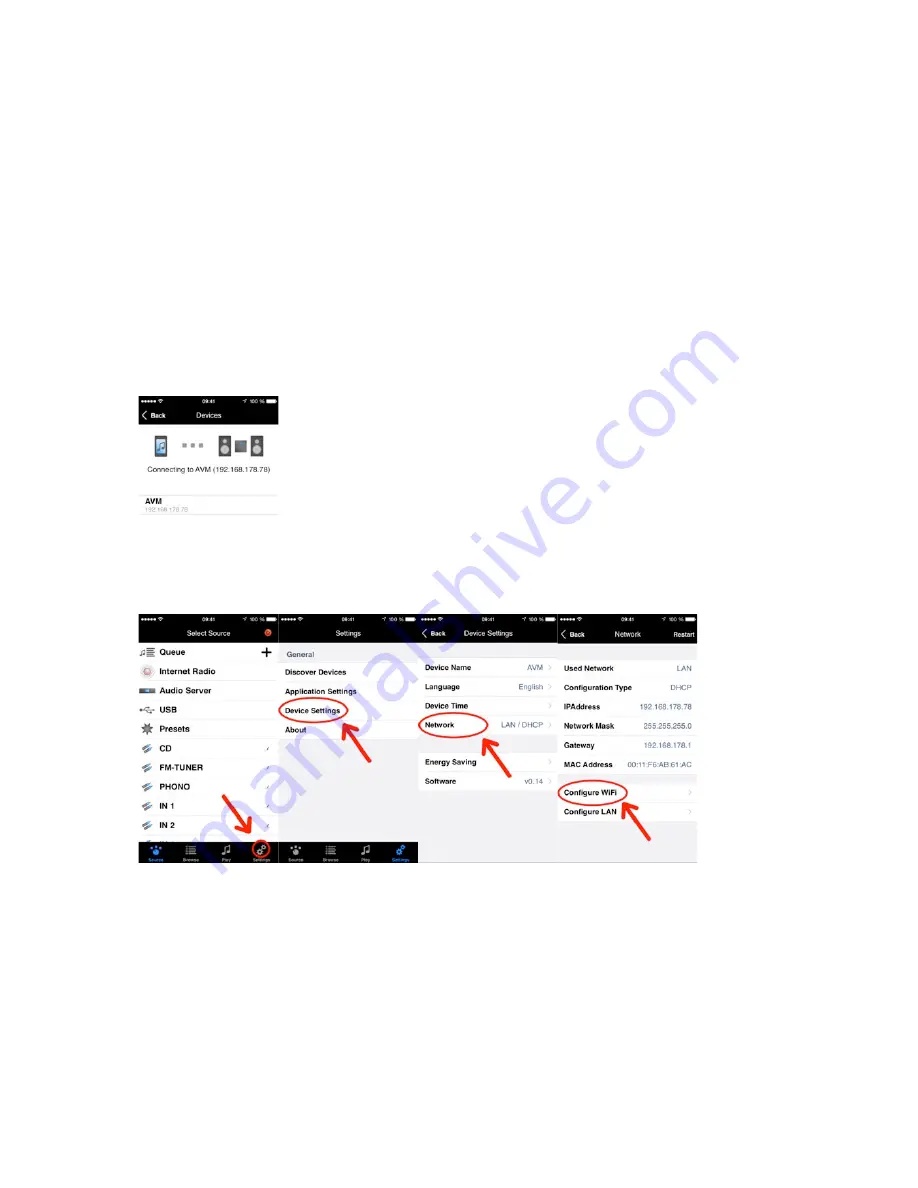
4. As soon as the RC S App has launched, you will be led to the settings menu which is automatically
searching for available AVM devices in your local network. After a quick search run, your AVM device
will be detected and listed with its respective device name (default name is “AVM”) and its unique IP
address (e.g. “192.168.187.1”). By selecting the AVM device, a connection between your AVM device
and your smartphone or tablet running the RC S App is established.
5. Select the “Settings” menu in the lower-right corner of the RC S App and navigate to the “Device
Settings" menu. Now, go to the “Network” menu and select the “Configure WiFi” tab.


