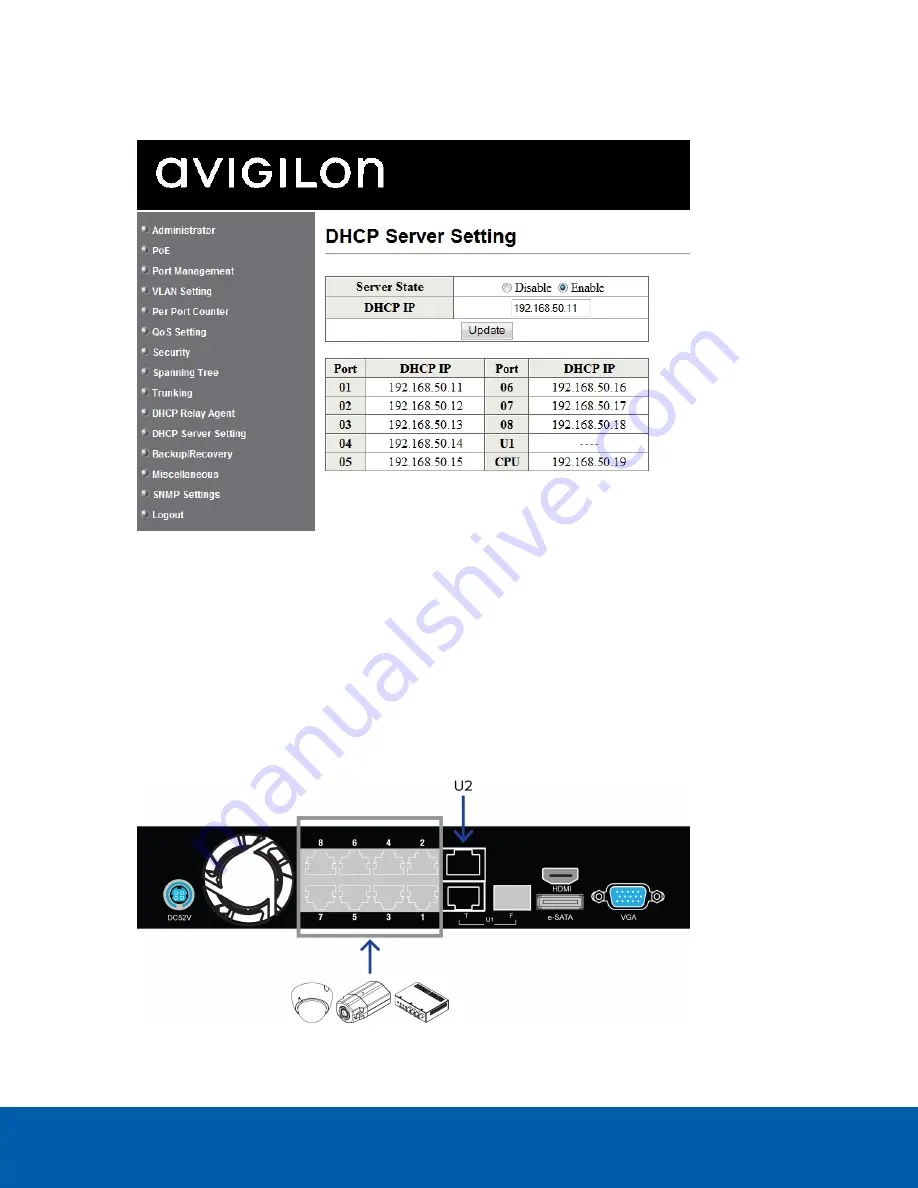
6. Once you are logged in, click
DHCP Server Settings
from the left menu pane.
7. In the Server State setting area, select
Enable
then click
Update
.
Figure 7:
The DHCP Server Settings page
The appliance is now set to act as a DHCP server.
As you add cameras and network devices, the IP address for each item will be listed beside the
connected port number.
NOTE:
The U1 port on the HD Video Appliance is not part of this DHCP setting. Only the PoE camera ports
broadcast DHCP.
8. Connect Avigilon cameras and other network devices to the numbered ports.
Each connected device is automatically assigned an IP address by the appliance.
Figure 8:
Example cable connections on an 8 port HD Video Appliance.
Configuring an External DHCP Network
9


