background image

HDX Card Installation Guide

4

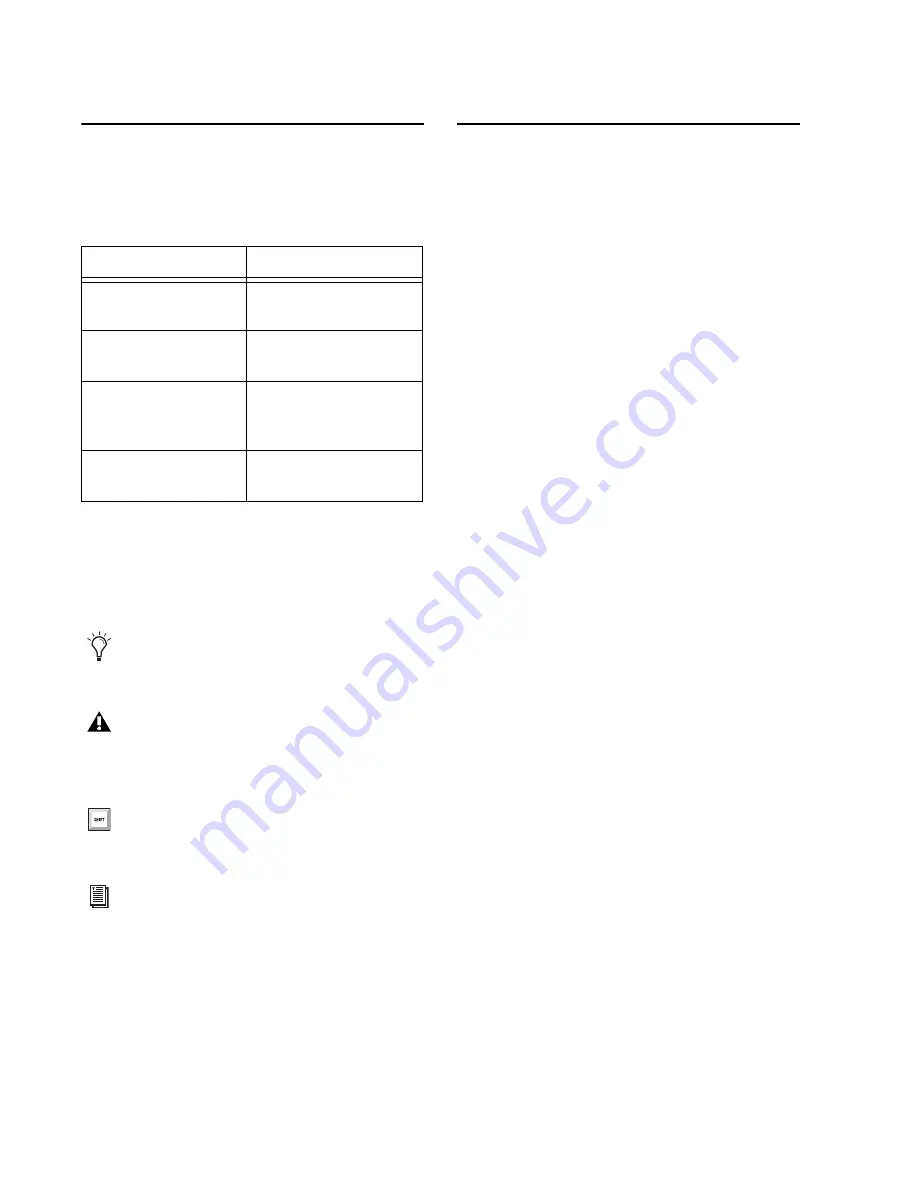
Conventions Used in This 

Guide

All of our guides use the following conventions 
to indicate menu choices and key commands:

The names of 

Commands

Options

, and 

Settings


that appear on-screen are in a different font.

The following symbols are used to highlight im-
portant information:

About www.avid.com

The Avid website (www.avid.com) is your best 
online source for information to help you get the 
most out of your Pro Tools system. The follow-
ing are just a few of the services and features 
available. 

Product Registration 

Register your purchase 

online. 

Support and Downloads 

Contact Avid Customer 

Success (technical support); download software 
updates and the latest online manuals; browse 
the Compatibility documents for system re-
quirements; search the online Knowledge Base 
or join the worldwide Pro Tools community on 
the User Conference. 

Training and Education 

Study on your own using 

courses available online or find out how you can 
learn in a classroom setting at a certified 
Pro Tools training center. 

Products and Developers 

Learn about Avid 

products; download demo software or learn 
about our Development Partners and their 
plug-ins, applications, and hardware. 

News and Events 

Get the latest news from Avid 

or sign up for a Pro Tools demo.

Convention

Action

File > Save

Choose Save from the 
File menu

N

Hold down the Control 
key and press the N key

Control-click

Hold down the Control 
key and click the mouse 
button

Right-click

Click with the right 
mouse button

User Tips are helpful hints for getting the 
most from your Pro Tools system.

Important Notices include information that 
could affect your Pro Tools session data or 
the performance of your Pro Tools system.

Shortcuts show you useful keyboard or 
mouse shortcuts.

Cross References point to related sections in 
the Pro Tools Guides.

Summary of Contents for HDX Card

Page 1: ...HDX Card Installation Guide ...

Page 2: ...iaComposer MIDI I O MIX MultiShell Nitris OMF OMF Interchange PRE ProControl Pro Tools Pro Tools HD Pro Tools LE Pro Tools M Powered Pro Tools MP QuickPunch Recti Fi Reel Tape Reso Reverb One ReVibe RTAS Sibelius Smack SoundReplacer Sound Designer II Strike Structure SYNC HD SYNC I O Synchronic TL Aggro TL AutoPan TL Drum Rehab TL Everyphase TL Fauxlder TL In Tune TL MasterMeter TL Metro TL Space ...

Page 3: ...indows Computer 17 Connecting Multiple HDX PCIe Cards Using HDX TDM Cables 21 Connecting Audio Interfaces 22 Installing Pro Tools HD Software and HDX Hardware Drivers 25 Configuring Your Pro Tools System 25 Chapter 4 Configuring Core Audio Mac OS X Only 27 Avid Core Audio Driver Capabilities 27 Installing the Avid Core Audio Driver 28 CoreAudio Manager 28 Configuring HD Audio Interfaces for Third ...

Page 4: ...ードを HDX TDM ケーブルで接続する 58 オーディオ インターフェイスの接続 59 Pro Tools HD ソフトウェアおよび HDX ハードウェア ドライバーのインストール 62 Pro Tools システムを設定する 62 Chapter 9 Core Audio の構成 Mac OS X のみ 63 Avid Core Audio Driver の機能 63 Avid Core Audio Driver のインストール 64 CoreAudio Manager 64 サードパーティ製アプリケーション用に HD オーディオ インターフェイスを設定する 67 Apple サウンド環境設定または Apple オーディオ MIDI 設定の構成 68 Chapter 10 ASIO の設定 Windows のみ 71 ASIO ドライバーの性能 71 ASIO ドライバーのインストー...

Page 5: ...ble with Pro Tools HD software This guide covers the installation and configu ration of HDX cards and hardware drivers on Mac and Windows platforms HDX Package The HDX package includes the following HDX PCIe card HDX TDM cable HDX PCIe power cable for Mac HDX PCIe power cable for PC 12 DigiLink Mini cable for connecting the HDX card to an audio interface Registration Information Card This Install ...

Page 6: ...en of the following Avid HD audio interfaces sold separately HD OMNI HD I O HD MADI A qualified synchronization peripheral optional sold separately A qualified MIDI interface optional sold sep arately Registration Review the enclosed Registration Information Card and follow the instructions on it to quickly register your purchase online By registering you become eligible to receive the following I...

Page 7: ... the Avid Limited Warranty Check the compatibility pages on the Avid website www avid com for fully compliant systems Important Safety Notes 1 Only use HDX in compatible systems tested and certified by Avid see www avid com 2 The host system needs to have a minimum air flow of 275 lfm Failure to comply could result in a hazardous situation and damage the host as well as any HDX cards in your syste...

Page 8: ...orldwide Pro Tools community on the User Conference Training and Education Study on your own using courses available online or find out how you can learn in a classroom setting at a certified Pro Tools training center Products and Developers Learn about Avid products download demo software or learn about our Development Partners and their plug ins applications and hardware News and Events Get the ...

Page 9: ...cards in your system will differ depending on your system configuration HDX Hardware HDX PCIe Card A single HDX PCIe card provides up to 256 voiceable tracks of direct to disk recording and playback as well as DSP power for mixing and plug in processing The HDX card supports up to 24 bit 192 kHz Pro Tools sessions Figure 1 HDX PCIe card DigiLink Mini ports DigiSerial port ...

Page 10: ... HDX cards in your sys tem so they can share data along the TDM bus One HDX TDM cable comes with each HDX card Power Cable HDX PCIe cards require power beyond what the PCIe bus can deliver A custom power cable included is used to connect HDX PCIe cards to the motherboard in your Mac or to a hard drive power source in your PC The Serial port on an HDX card does not sup port MachineControl connectio...

Page 11: ...terface connected to the first port of the first HDX card in your system HD OMNI Audio Interface HD OMNI provides a compact preamp monitor ing and I O solution for music production and recording and post production studios HD OMNI Features HD OMNI provides up to 8 discrete channels of Pro Tools input and output with 4 segment LED meters for input or output selectable Analog I O 24 bit analog to di...

Page 12: ...or two channels of S PDIF Optical with sample rates of up to 96 kHz Real time sample rate conversion SRC on Digital Inputs 1 2 of either AES EBU S PDIF or Optical S PDIF Monitoring An additional stereo CUE output path in Pro Tools for headphone monitoring from the front panel headphone jack Front panel Control Room MAIN ALT and Headphone monitoring volume control Flexible monitoring with fold down...

Page 13: ...ing on analog input Digital I O Up to sixteen channels of 24 bit digital I O using AES EBU TDIF DB 25 or Optical at sample rates of 44 1 kHz 48 kHz 88 2 kHz 96 kHz 176 4 kHz and 192 kHz with a Digital HD I O card Real time sample rate conversion on digital inputs with a Digital I O card up to sixteen channels of AES EBU Optical or TDIF Support for S MUX Optical for sample rates of 88 2 kHz and hig...

Page 14: ...Mini port Supports sample rates of 44 1 kHz 48 kHz 88 2 kHz 96 kHz 176 4 kHz and 192 kHz 24 or 16 bit resolution Sample Rate Conversion SRC on input or output Front panel clock and SRC indicators Front panel signal present LEDs for input and output BNC Word Clock I O for synchronizing HD MADI with external 1x Word Clock BNC Loop Sync I O for synchronizing HD MADI with additional HD audio interface...

Page 15: ...nd 4 The PCI Express slot numbers increase from bottom to top as you face the open computer case from the side Install the first HDX card into PCIe slot 2 To install cards into an expansion chassis see the HDX Expanded Systems Guide Install Pro Tools software only after you have installed your HDX cards and HD au dio interfaces For information on installing Pro Tools software see the Pro Tools Ins...

Page 16: ...l access port covers to the chassis 6 Remove the metal access port covers for the slots you want to use 7 Remove your computer s SATA drive trays If any extra SATA drives are installed remove them also Refer to your computer s documenta tion for information on removing SATA drives and SATA drive trays 8 Connect the included custom power cable to the motherboard and move the cable away from the PCI...

Page 17: ...f the card down into the PCIe slot s grey plastic PCIe card support where the slot numbers appear See Figure 5 on page 15 With the card PCIe connectors facing down carefully slide the card straight down and firmly seat the PCIe connector into the PCIe slot making sure that all card compo nents on the back of the card have clearance from the grey plastic PCIe card support On Mac Pro Westmere machin...

Page 18: ...HDX Card Installation Guide 14 Figure 4 Installing an HDX card into a Mac Pro 3 2 1 4 2 2 1 ...

Page 19: ...Chapter 3 Installing HDX Cards 15 Figure 5 HDX card sliding into the grey plastic PCIe card support 3 2 1 4 1 2 4 2 2 ...

Page 20: ...s See Figure 6 above 13 Check to be sure that your cards are installed in the proper order for your system starting with the lowest numeric slot Display card for your computer monitor HDX cards Avid approved video capture card op tional Host Bus Adapter HBA card optional 14 Reattach the clamp that secures the cards and the slot covers to the chassis 15 Replace the SATA drives 16 Close the computer...

Page 21: ...er such as hard drives displays USB and FireWire devices except for the power cable 3 Open the computer case 4 Connect the included custom power cable to any available hard drive power connector com ing from the main power supply See Figure 7 on page 18 5 Remove the metal access port cover behind the slot you want to use by removing the screw and sliding the cover out from the access port 6 Instal...

Page 22: ...HDX Card Installation Guide 18 Figure 7 Connecting the HDX card power cable to a hard drive power source PC ...

Page 23: ...Chapter 3 Installing HDX Cards 19 Figure 8 Installing an HDX card in your PC ...

Page 24: ... for your system this may vary depending on your machine Display card for your computer monitor HDX cards Host Bus Adapter HBA card optional 11 Secure each card in place with the slot access port screws you removed earlier 12 Close the computer case 13 Connect your HD audio interfaces see Con necting Audio Interfaces on page 22 Figure 9 Connecting the HDX card power cable PC ...

Page 25: ...ard to the IN port of the next card with an HDX TDM cable To connect HDX PCIe cards with an HDX TDM cable 1 Connect the end of the HDX TDM cable labeled OUT to the OUT port of the first HDX card 2 Connect the other end of the HDX TDM cable labeled IN to the IN port of the second HDX card 3 For systems with more than two cards connect each additional card to its preceding card Use additional HDX TD...

Page 26: ...system using the provided DigiLink Mini cable If you are connecting an additional HD au dio interface such as HD I O you can connect its Primary Port to DigiLink Mini Port 2 on the first HDX card in your system using the provided DigiLink Mini cable If you are connecting HD MADI to your sys tem connect HD MADI Primary Port 1 to DigiLink Mini Port 1 on the HDX card using a DigiLink Mini cable inclu...

Page 27: ...ons 1 Connect the Loop Sync Out of each interface to the Loop Sync In of the next interface with the BNC cables included in your I O packaging 2 Connect the Loop Sync Out of the last inter face to the Loop Sync In of the primary interface or SYNC peripheral Figure 11 Making DigiLink and Loop Sync connections with HD OMNI and HD I O 12 foot DigiLink Mini A single HDX card cable Loop Sync cables 18 ...

Page 28: ...d Installation Guide 24 Figure 12 Making DigiLink and Loop Sync connections with HD OMNI and five HD I Os 12 foot DigiLink Mini First HDX card cable Loop Sync cables 18 inch DigiLink Mini cable Second HDX card ...

Page 29: ... automati cally If you are not installing Pro Tools you can download the driver installers from the Avid website www avid com Configuring Your Pro Tools System After you have installed authorized and launched Pro Tools you can configure your sys tem to meet the specific needs of your studio For detailed information on configuring your Pro Tools software see the Pro Tools Reference Guide which is a...

Page 30: ...HDX Card Installation Guide 26 ...

Page 31: ...tem Limitations of the CoreAudio Driver The Avid Core Audio Driver has the following limitations The Avid Core Audio Driver cannot be used to preview sound files from the Mac Finder When a sound file is located in the Mac OS X naviga tion window a QuickTime transport bar is dis played next to it The QuickTime transport bar lets you audition the sound file The sound will always play back though the...

Page 32: ...reen instructions to complete the installation 5 When the installation is complete click Re start CoreAudio Manager You can configure the Avid Core Audio Driver using CoreAudio Manager or from within most third party CoreAudio compatible client appli cations such as BIAS Peak or Logic Refer to the manufacturer s documentation for more in formation Some applications such as Apple s iTunes or QuickT...

Page 33: ...ur Avid hardware the supported number of Input and Output Channels and the number of attached clients applications Buffer Size You can select from the following buffer sizes depending on your Avid hardware 64 samples 128 samples 256 samples 512 samples 1024 samples 2048 samples Changing the Buffer Size for the Avid Core Au dio Driver does not affect the H W Buffer Size setting in the Pro Tools Pla...

Page 34: ...en finished setting these options click OK to close the Avid Core Audio Manager Preferences window Hide Manager if Auto Launched by Client En able this option to hide the Manager panel after the first client application accesses the Avid Core Audio Driver To open the Manager panel click on the Avid Core Audio Manager applica tion icon in the Dock Auto Quit Manager when Last Client Quits En able th...

Page 35: ...may get an error message indicating that the Pro Tools hardware is no longer available You may have to change the application s preferences to use different hardware for playback or possibly quit and relaunch the application for proper play back to be resumed Configuring HD Audio Interfaces for Third Party Applications When using an HDX card with an application other than Pro Tools such as Apple G...

Page 36: ...ger However for most Core Audio compatible client applications such as BIAS Peak or Ableton Live this is unnecessary since you can configure the Core Audio Buffer Size setting and audio input and output chan nels from within the client application Apple Sound Preferences To configure the Apple Sound Preferences 1 Launch System Preferences Apple menu System Preferences 2 Click Sound 3 Click Output ...

Page 37: ...evices list on the left select HDX 4 In the Audio Devices window click the Output tab 5 From the Audio Devices list on the left select HDX 6 In the Audio Input or Audio Output page se lect the Format sample rate Note that the input sample rate and output rate are linked 7 Choose Audio MIDI Setup Quit Audio MIDI Setup Apple Audio MIDI Setup application Audio Devices Input settings Apple Audio MIDI ...

Page 38: ...HDX Card Installation Guide 34 ...

Page 39: ...ndows system sounds It is also recommended that you use a separate sound card for games or other general work Installing the ASIO Driver The ASIO Driver is installed by default when you install Pro Tools The ASIO Driver can also be installed as a standalone driver on Windows sys tems that do not have Pro Tools software in stalled The installer for the standalone ASIO Driver is available on the Dri...

Page 40: ...ing a third party audio program that has an option to keep the ASIO Driver open even when you are not playing or re cording You must close the audio program before you can open the ASIO Driver Con trol Panel Example Accessing the Avid ASIO Control Panel from Ableton Live To access the Avid ASIO Control Panel from Ableton Live do the following 1 Open the Live Preferences 2 Select the Audio tab 3 Se...

Page 41: ...recording In some ASIO compatible audio programs per forming various tasks will interrupt the ASIO Driver and may result in clicks and pops in au dio playback or recording Choosing medium or large buffers such as 256 512 or 1024 can help alleviate this problem Changing the Buffer Size setting for the ASIO Driver does not affect the H W Buffer Size set tings in the Pro Tools Playback Engine dialog ...

Page 42: ...HDX Card Installation Guide 38 ...

Page 43: ...HDX DSPおよび複数のカードを使用する構成で の I Oの拡張は Pro Tools HDソフトウェアでのみ可能 です このガイドでは HDXカードおよびハードウェア ドラ イバーのインストールと設定 Mac用と Windows用 に ついて説明します HDXパッケージ HDXパッケージには 以下のものが含まれています HDX PCIeカード HDX TDMケーブル HDX PCIe電源ケーブル Mac用 HDX PCIe電源ケーブル PC用 HDX カードをオーディオ インターフェースに接 続するための 12 DigiLink Miniケーブル オンライン登録カード このインストール ガイドでは HDXハードウェア のインストールと設定の詳細について説明します HDX カード クイック セットアップでは 基本 的なハードウェアのインストールを説明します 安全にお使いいただくためのガイ...

Page 44: ...ーフェース オプション 別売 システム要件と互換性 HDX PCIeカードは 認定された Macおよび Windows コンピューターにインストールできます Avidは 動作が確認されたハードウェアとソフトウェア に対してのみ互換性の保証とサポートの提供を行ってい ます 完全なシステム要件および認定されたコンピューター オ ペレーティング システム ハードディスク サードパー ティデバイスのリストについては 次のサイトにアクセス してください www avid com compatibility 1つのシステムでは 1つの HD OMNIが使用でき ます Pro Tools ソフトウェアのインストールについ て詳しくは Pro Toolsソフトウェア パッケー ジ 別売 に付属の Pro Tools インストール ガイド をご参照ください Pro Tools ソフト ウェアの詳しい使い方に...

Page 45: ... 3 ホスト システムの送風を妨げないようにしてください 送風の入り口 出口にご注意ください 4 DigiLinkコネクターは長時間の使用で高温になります 変更をする前に システムをクールダウンしてください 5 HDXカード周辺のエリアは高温になります システム 周辺に十分な送風を確保し 服や紙などの可燃物を周辺に 置かないでください 6 ホスト システムが仕様温度を超えないようにしてく ださい 本ガイドで使用される表記規則 本書では メニュー アイテムの選び方やマウスの操作 方法を簡略化するために 以下のような方法で表記して います 画面に表示されるコマンド オプション 設定の名前は フォ ントが異なります 以下の記号は重要な情報を示すために使用します 表記法 アクション ファイル File 保存 Save ファイルメニューから保存を選択する Control N Controlキーを押し...

Page 46: ...cess 技術サ ポート にアクセスします ソフトウェア アップデート と最新のオンライン マニュアルのダウンロード 互換性 に関するマニュアルでのシステム要件の参照 オンライン ナレッジベースの検索 ユーザー フォーラムおよび世界 規模のPro Toolsコミュニティへの参加などを行えます トレーニングと教育 オンラインで利用可能なコースを通じ て自己学習を行ったり 認定されたPro Toolsトレーニ ング センターのクラスルーム設定で学習方法を見つけた りできます 製品と開発者 Avid製品に関する情報 ソフトウェアのデモ 版のダウンロード デベロップメント パートナーとその プラグイン アプリケーション ハードウェアに関する情 報をご覧いただけます ニュースとイベント Avid の最新ニュースを取得したり Pro Toolsデモにサイン アップしたりします ...

Page 47: ...の各コンポーネントについて説明します 拡 張シャーシで最大7つのカードが使用できます 使用するHDXカードの数は システムの構成により異なります HDXハードウェア HDX PCIeカード HDX PCIeカードは 最大256トラックのダイレクト ディスク レコーディングとプレイバックを可能にし さらにミ キシングとプラグイン プロセッシングにDSPパワーを提供します HDXカードは 最大24 bit 192 kHzのPro Tools セッションに対応しています 図 1 HDX PCIeカード DigiLink Mini ポート DigiSerial ポート ...

Page 48: ...ピンのミニDINです HDX TDMケーブル 同梱のHDX TDMケーブル SATAケーブル を使用し て HDX カードのペアを接続してください TDM バス を介してデータを共有できます 1つの HDX TDMケー ブルが各 HDXカードに付属します 電源コード HDX PCIeカードはPCleバスが供給する以上の電力を必 要とします カスタム電源ケーブル 同梱 を使用して ご使用の Mac のマザーボードまたは ご使用の PC の ハード ドライブ電源にHDX PCleカードを接続してくだ さい HDXカードのシリアル ポートは MachineControlの接続には対応していません 2つ以上の HDXカードで SYNC同期機器を使用 する場合 SYNC同期機器は第一の HDXカード に接続することが必要です HDX TDMケーブル HDXカード電源ケーブル Mac HDXカード電源...

Page 49: ...オ イン ターフェースがご使用のシステムの第一HDXカードの第 一ポートに接続されている必要があります HD OMNIオーディオ インターフェース HD OMNIは 音楽制作 レコーディング ポストプロダ クションの各スタジオにおいて コンパクトなプリアンプ モニタリング I Oソリューションを提供します HD OMNIの機能 HD OMNI は Pro Tools のインプットとアウトプット の最大8 のディスクリート チャンネルを提供し イン プットまたはアウトプット 選択可能 用の 4セグメント LEDメーターを搭載しています アナログ I O 24 bitの AD DAコンバーター サンプルレートは最大 192kHzまで対応 高品質 Mic DIプリアンプ x 2 チャンネル1 2 マイクと楽器レベル入力用の XLR と 1 4 インチ TRS のフロントパネル インプット x 2...

Page 50: ...al S PDIF のデ ジタル インプット 1 2のリアルタイム サンプルレー ト変換 SRC モニタリング Pro Toolsに 追加ステレオ キュー アウトプット パス フロントパネルのヘッドフォン ジャックから のヘッドフォン モニタリング用 フロントパネルのコントロール ルーム MAIN ALT とヘッドフォンのモニタリング ボリューム コント ロール ステレオ フォーマットとサラウンド フォーマット 最大7 1サラウンド すべてのフォールドダウン機能 を搭載した柔軟なモニタリング さまざまな入力信号の低レイテンシー ダイレクト モニタリング用インプット ミキサー Pro Tools の ハードウェア設定 で設定 同期 Synchronization 追加 HD インターフェースや周辺機器を接続するため の Loop Syncインプットとアウトプット HD OMNI を外部ワード...

Page 51: ...ンプルレート変換 最大 16 チャンネルの AES EBU Optical またはTDIF サンプルレート 88 2kHz以上の S MUX Opticalに対 応 サンプルレート 96kHzまでの S PDIF Optical 付属 2チャンネルに対応 サンプルレート 192kHzまでのAES EBU I O 付属 2チャンネル サンプルレート 192kHz までの 24 bit S PDIF I O 付属 2チャンネル 同期 Synchronization 追加 HD インターフェースや周辺機器を接続するため の Loop Syncインプットとアウトプット HD I O を外部ワードクロック機器と同期するための 外部クロック インプットとアウトプット 拡張性 オプションの追加 I O カードでアナログまたはデジタ ル I Oを拡張 複数の Avid HDオーディオ インターフェースを同...

Page 52: ...応 分解能 24 bitまたは 16 bit インプットまたはアウトプット上でのサンプルレート 変換 SRC フロントパネルにクロックと SRCのインジケータ フロントパネルにインプットとアウトプット用の LED HD MADI を外部 1x ワードクロックと同期させる BNCワードクロック I O HD MADIを追加 HDオーディオ インターフェース および周辺機器 HD I O HD OMNI SYNC HDな ど と同期させる BNC Loop Sync I O 外部MADI同期 アウトプットにSRCを使用する場合 のための専用BNCワードクロック インプットとXLR AES EBUインプット クロック入力のみ 以下のフォーマットのクロックに対応 Internal Loop Sync Word Clock AES EBU MADI バリスピード モード 64 チャンネルと 56 チ...

Page 53: ...Mac ProにはPCI Express PCIe スロットが 3つあります スロット 2 スロット3 スロット4 PCI Expressの スロット番号は ケースを開いたコンピューターを横から みて下から上へつけられています PCIeスロット 2に最 初の HDXカードをインストールします 拡張シャーシへカードをインストールする方法 については 拡張システム ガイド をご参照く ださい Pro Tools softwareは HDXカードおよび HD オーディオ インターフェースのインストール後 に行ってください Pro Toolsソフトウェアのイ ンストールについて詳しくは Pro Toolsソフト ウェア パッケージに同梱されている Pro Tools インストール ガイド をご参照ください 図 2 Mac Pro 以下の説明をよく読み カードや部品を傷つけな いよう気をつけてくださ...

Page 54: ...します 4 コンピューターの背面にある掛け金を使ってコン ピューターのケースを開けます 5 金属のアクセス ポート カバーをシャーシへ固定して いる金具を取り外します 6 使用するスロットの金属のアクセス ポート カバーを 取り外します 7 コンピューターの SATA ドライブ トレイを取り外し ます 追加の SATAドライブがインストールされている 場合は これらも取り外します SATAドライブと SATA ドライブ トレイの取り外し方については コンピュー ターの説明書をご覧ください 8 付属のカスタム電源ケーブルをマザーボードに接続し PCle カード スロットからケーブルを避けてください 50ペー ジの図 3をご参照ください カードを持つ前に 電源ケーブルで接続されてい るコンピューター内の電源ケースなどの接地 アース された金属に触れ 体や服の静電気を あらかじめ除去しておきます...

Page 55: ...シの端に置きます カードの後を PCIeスロットの番号が表記されてい る灰色のプラスチックのPCleカード サポートに 慎重に差し込みます 53ページの図 5を参照してく ださい カードの PCIe コネクタが下を向いた状態でカード を真っ直ぐ差し込み カードの PCIe コネクタを PCIeスロットへしっかりと固定します カードの前 の部品がPCIeカード サポート 灰色のプラスチッ ク に接触していないことを確認してください Mac Pro Westmere 搭載マシンでは 十分 に注意して HDX PCleカードを傷つけないよう に 灰色のプラスチック PCle カード スロット を押し下げてください カードを PCIeカード スロットへ無理に差し込 まないでください 正しい角度で差し込めば カードは簡単にインストールされます 角度が正 しくないようであれば カードの位置を変えてく ...

Page 56: ...HDXカード インストール ガイド 52 図 4 Mac Proのスロット 2に HDXカードをインストールするには 3 2 1 4 2 2 1 ...

Page 57: ...第 8章 HDXカードをインストールする 53 図 5 HDXカードを灰色のプラスチック PCleカード サポートに差し込む 3 2 1 4 1 2 4 2 2 ...

Page 58: ...複数の HDX PCleカードをHDX TDMケーブルで接続する をご覧ください 12 電源ケーブルをインストールした HDX PCleカード に接続します 上記図6参照 13 最も小さい番号のスロットから正しい順序でカードが インストールされているかどうか確認します コンピューター モニターのディスプレイ カード HDXカード Avid 推奨のビデオ キャプチャー カード オプ ション ホスト バス アダプタ HBA カード オプション 14 カードとスロット カバーをシャーシへ固定する金具 を取り付けます 15 SATAドライブを元に戻します 16 コンピューターの本体を閉じます 図 6 電源ケーブルをインストールされた HDXカードへ接続する 1 2 4 カードの PCIeコネクタは カードと金属のアク セス ポート カバーをシャーシへ固定する金具 を取り付けるまでは完全には固定され...

Page 59: ...機器の電源を切ります コン ピューターが接地 アース されるよう 電源ケーブルは 接続したままにします 2 コンピューターに取り付けられている 電源ケーブル以 外 の ケ ー ブ ル ハ ー ド デ ィ ス ク モ ニ タ ー USB FireWireなど をすべて外します 3 コンピューターの本体を開けます 4 付属のカスタム電源ケーブルを 主電源から来ている ハード ドライブ電源コネクターに接続します 56ペー ジの図 7参照 5 使用するスロットの後にある金属のアクセス ポート カバーのネジを外し カバーをスライドさせてアクセス ポートから外します 6 推奨される PCIeスロット 通常 ビデオ カードに一 番近い1番目の PCIe スロット にHDX PCleカードを インストールします 56ページの図 8参照 7 追加 HDXカード または他のカード をインストール する場合には...

Page 60: ...HDXカード インストール ガイド 56 図 7 HDXカードの電源ケーブルをハード ドライブの電源に接続する PC 図 8 PCに HDXカードをインストールする ...

Page 61: ...参照 10 以下のとおり 正しい順序でカードがインストールさ れていることを確認してください この順序はマシンによ り異なることもあります コンピューター モニターのディスプレイ カード HDXカード ホスト バス アダプタ HBA カード オプション 11 先程取り外したアクセス ポートのネジで各カードを 固定します 12 コンピューターの本体を閉じます 13 オーディオ インターフェースを接続するには 59ペー ジの オーディオ インターフェイスの接続 を参照して ください 図 9 HDXカード電源ケーブルを接続する PC ...

Page 62: ...ートがあります カード間のデータ通信は 最初のカー ドの OUTポートと次のカードの INポートを HDX TDM ケーブルで接続することによって可能になります HDX PCIeカードを HDX TDMケーブルで接続する 1 OUTと表記されている HDX TDMケーブルの端を最 初の HDXカードの OUTポートに接続します 2 INと表記されている HDX TDMケーブルの端を二番 目の HDXカードの INポートに接続します 3 複数のカードを使用するシステムの場合は それぞれの カードを前のカードへ接続します 上記のとおり 追加の HDX TDMケーブルを使用して 追加カードをその前の カードに接続します HDX TDMケーブルは各HDXカー ドに同梱されています 図 10 2つの HDXカードをHDX TDMケーブルで接続する ...

Page 63: ... プライマリ ポートを HDX カードの DigiLink Miniポート1に 付属のDigiLink Miniケー ブルで接続します 追加 HD オーディオ インターフェース HD I O など を使用している場合には プライマリ ポー トを最初のHDXカードのDigiLink Miniポート2に 付属のDigiLink Mini ケーブルで接続してくださ い HD MADI をシステムに接続する場合には HD MADI プライマリ ポート 1 を HDX カードの DigiLink Mini ポート 1 に DigiLink Mini ケーブル 同梱 で接続します HD MADIで 64チャンネル の I O をフルに使うには HD MADI プライマリ ポート2とHDXカードのDigiLink Miniポート2に DigiLink Miniケーブル 同梱 で接続します 2 追加する ...

Page 64: ...cを接続する必要があります ループ シンクを接続するには 1 各インターフェースの Loop Sync Out を I O パッケージに含まれているBNCケーブルで次のインターフェースの Loop Sync In に接続します 2 最後のインターフェースの Loop Sync Out を1台目のインタ フェースまたは SYNCの Loop Sync In へ接 続します 図 11 HD OMNIと HD I Oの DigiLink接続とループ シンク接続 12フィート DigiLink Mini ケーブル 18インチ DigiLink Miniケーブル Loop Syncケーブル HDXカード1枚 ...

Page 65: ...第 8章 HDXカードをインストールする 61 図 12 HD OMNIと 5つの HD I Oの DigiLink接続とループ シンク接続 12フィート DigiLink Mini ケーブル 18インチDigiLink Mini ケーブル Loop Syncケーブル 第一 HDXカード 第二 HDXカード ...

Page 66: ...ア ドライバーをインストー ルする必要があります Pro Tools HDソフトウェアをイ ンストールする場合には これらのドライバーは自動的に インストールされます Pro Toolsをインストールしない 場合には Avidウェブ サイト www avid com から ドライバー インストーラーをダウンロードしてくださ い Pro Toolsシステムを設定する Pro Toolsソフトウェアのインストール 承認 起動の後 で Pro Toolsシステムを構成し スタジオでの使用方法 に合わせることができます Pro Tools ソフトウェアの 構成について詳しくは Pro Tools リファレンス ガイ ド をご参照ください Pro Toolsの ヘルプ メニュー から見ることができます HD オーディオ インターフェースは 本体の両 側に通気 冷却 用の空間を必要とします 本体 の両...

Page 67: ...です Avid Core Audio Driverは 最初の HDXカード使用し て 64チャンネルのI Oを提供します CoreAudio Driverの制限 Avid CoreAudio Driverには 以下のような制限があり ます Mac Finder でサウンド ファイルを試聴するのに CoreAudio Driverを使用することはできません サウン ド ファイルが Mac OS Xのナビゲーション ウィンド ウにある場合は ファイルの隣に QuickTimeのトランス ポート バーが表示されます QuickTimeトランスポー ト バーを使用してサウンド ファイルを作成できます サウンドは 常に Mac内蔵のオーディオ コントローラー Macのスピーカーやヘッドフォン ジャック を通して 再生されます ただし サウンド ファイルをダブルクリッ クすると QuickTimeが起...

Page 68: ... ます www avid com 3 Install HD Family Driver mpkgをダブルクリックします 4 画面に表示される指示に従い インストールを完了し ます 5 インストール作業が完了したら 再起動 をクリックし ます CoreAudio Manager Avid Core Audio Driver を構成するには CoreAudio Managerを使います また サードパーティ製の大部分の 対応クライアント アプリケーション BIAS Peak Logic など では クライアント側でも設定できます 詳しくは それぞれのメーカーのマニュアルをご参照ください また Apple の iTunes やQuickTime Player などのア プリケーションでは Mac サウンド環境設定または Apple オーディオ MIDI 設定にて Avid Core Audio ...

Page 69: ...ファ サイズから選択できます 64サンプル 128サンプル 256サンプル 512サンプル 1024サンプル 2048サンプル Avid Core Audio Driverのバッファーサイズを変更して も Pro Tools側のプレイバック エンジン ダイアログ のH Wバッファーサイズの設定値には影響ありません Avid Core Audioハードウェア バッファーサイズの設定 1 Avid Core Audio Managerのファイル Applications Avid をダブルクリックします 2 バッファーサイズ ポップアップメニューで 必要なCore Audioバッファーサイズをサンプル数で選択します 一般 的には バッファーを小さめのサイズに設定するのが望 ましいです ただし パフォーマンスに問題が発生する レコーディング 再生時にクリックやポップなどのノイ ズが出る 場合は ...

Page 70: ...anagerを自動終了 こ の オ プ ションを選択すると クライアント アプリケーションが Avid Core Audio Driver を使用しなくなった時点で Managerアプリケーションが自動的に終了します C 24ステレオ ルーティングを使用 L Rから 1 3 C 24 を使用する場合 このオプションを選択すると Avid Core Audio Driverを C 24の標準ステレオ ルーティン グ アウトプット 1と3 を使用して出力されるように設 定できます XMONステレオ ルーティングを使用 L Rから1 5 このオ プションを選択すると D ControlまたはD Commandを 使用しているとき D Controlまたは D Command標準 のステレオ ルーティング アウトプット1と 5 を通し て出力されるようにAvid Core Audio Driver...

Page 71: ... この場合 他のハードウェアを使用するよう アプリケーションの設定を変更するか 場合によってはア プリケーションを再起動しないと 再生を再開することが できません サードパーティ製アプリケーション用に HDオーディオ インターフェイスを設定 する HDX カ ー ド を Pro Tools 以 外 の ア プ リ ケ ー シ ョ ン Apple GarageBandなど で使用するときは そのア プリケーションで利用できるオーディオ環境設定から ハードウェアの設定を行うことができます Core Audioアプリケーション Apple GarageBandなど からハードウェアの設定を行うには 1 オーディオ インプットとオーディオ アウトプットに Avid HW HDX を選択します 2 以下のオプションからご使用のシステムのバッファ サイズを選択 Maximum Largeバッファ サイ...

Page 72: ... Audio Manager に加え サウンド環境設定または Apple オー ディオMIDI設定で設定を行う必要があります ただし Core Audio に対応しているクライアント アプリケー ションの多く BIAS Peakや Ableton Liveなど では アプリケーション側からCore Audio のバッファーサイ ズ および入出力チャンネルを設定できるため これは不 要です Appleサウンド環境設定 Appleサウンド環境設定の設定 1 環境設定 Apple メニュー 環境設定 を起動し ます 2 サウンド をクリックします 3 アウトプット をクリックし HDX をサウンド ア ウトプットのデバイスとして選択します 4 インプット をクリックし サウンド インプットのデ バイスとして HDX を選択します 5 環境設定を終了します サウンド環境設定 アウトプット設定 サウ...

Page 73: ...で インプット タブをクリックします 3 左の オーディオ デバイス リストで HDX を選 択します 4 オーディオ デバイス ウィンドウで アウトプット タブをクリックします 5 左の オーディオ デバイス リストで HDX を選 択します 6 オーディオ インプットまたはオーディオ アウトプット ページで フォーマット サンプルレート を選択します インプットとアウトプットのサンプルレートはリンクし ています 7 Audio MIDI設定 Audio MIDI設定の終了 を選 択します Appleオーディオ MIDI設定アプリケーション オーディオ デバイス インプット設定 Appleオーディオ MIDI設定アプリケーション オーディオ デバイス アウトプット設定 ...

Page 74: ...HDXカード インストール ガイド 70 ...

Page 75: ...ASIO Driverは Windowsのシステムサウンド の再生には使用できません ゲームとその他の一般的な作業では 別々のサウンド カードを使用することを推奨します ASIOドライバーのインストール ASIOドライバーは Pro Toolsと共にインストールされ ます ASIOドライバーは Pro Toolsソフトウェアがイ ンストールされていないWindowシステムに スタンドア ロン ドライバーとしてもインストールできます ASIO ドライ バーのスタ ンドアロン 用インスト ーラーが Pro Toolsソフトウェア パッケージに付属のドライバー インストーラー ディスクにあり また Avidウェブサイ ト www avid com からもダウンロードできます スタンドアロン ASIOドライバーのインストール 1 HDXカードが正しくインストールされていることを確 認してください ...

Page 76: ...グをしてい るとき 再生またはレコーディングをしていない場合でも ASIOドライバーを開いた状態にするようなサード パーティ製オーディオ プログラムを使用している とき この場合 ASIOドライバー コントロール パネルを開く前に そのアプリケーションを終了す る必要があります 例 Avid ASIOコントロール パネルにAbleton Liveか らアクセスする Avid ASIOコントロール パネルに Ableton Liveからアクセ スするには以下のようにします 1 Live Preferencesをオープンします 2 Audio タブを選択します 3 ASIO をDriver Type ポップアップ メニューから 選択します 4 ASIO Avid Driver をAudio Devices ポップアップ メニューから選択します 5 Hardware Setup ボタンをクリック...

Page 77: ...ズを大きくすると 再生 時とレコーディング時の両方で ASIO ドライバーで オーディオ信号のドロップ アウトが少なくなるという長 所があります いくつか ASIO対応オーディオ プログラムでは 操作を 行うと オーディオの再生やレコーディング時にクリック やポップなどのノイズを生じてしまうものがあります バッファーサイズを中または大 256 512または1024 など に設定することで 症状を緩和できます ASIOドライバーのバッファーサイズを変更しても Pro Tools再生エンジン ダイアログのハードウェア バッファーサイズには影響しません Device デバイス 設定は常にインストールされている Pro Tools ハードウェアを選択してください 詳細ボタン 詳細 ボタンは使用している Avidハードウェアの ハー ドウェア設定 ダイアログを開きます ハードウェア設定 ダイアログ ...

Page 78: ...HDXカード インストール ガイド 74 ...

Page 79: ...l help conserve natural resources and ensure that it is recycled in a manner that protects human health and the environment For more information about where you can drop off your waste equipment for recycling please contact your local city recycling office or the dealer from whom you purchased the product Proposition 65 Warning Perchlorate Notice This product may contain a lithium coin battery The...

Page 80: ...s B digital device pursuant to Part 15 of the FCC Rules These limits are designed to provide reasonable protection against harmful interference in a residential installation This equipment generates uses and can radiate radio frequency energy and if not installed and used in accordance with the instructions may cause harmful interference to radio communications However there is no guarantee that i...

Page 81: ...ete outlet 10 Protect power cords from being walked on or pinched particularly at plugs convenience receptacles and the point where they exit from the equipment 11 Only use attachments accessories specified by the manufacturer 12 For products that are not rack mountable Use only with a cart stand tripod bracket or table specified by the manufacturer or sold with the equipment When a cart is used u...

Page 82: ...の接地用ピンが付いています 幅広 のブレードまたは 3番目のピンは 安全のために付いています 提供されたプ ラグがコンセントに合わない場合は 役立たないコンセントを電気技師に交換 してもらう必要があります 10 特にプラグ 利便性レセプタクル 製品に近い位置などで電源コードが踏 みつけられたり つままれたりしないよう保護してください 11 メーカーが指定した付属品またはアクセサリーのみを使用してください 12 ラック マウントできない製品の場合は メーカーが指定しているか または製品とともに販売されるカート スタンド 三脚 ブラケット または テーブルのみと一緒に使用してください カートを使用するときは カートと 製品を一緒に移動するときに転倒による怪我を負わないよう十分注意してくだ さい 13 雷雨時または長期間使用しない場合は 本製品のプラグを抜いてください 14 すべての補修 修理は...

Page 83: ......

Page 84: ...ero Serra Boulevard Daly City CA 94014 3886 USA Technical Support USA Visit the Online Support Center at www avid com support Product Information For company and product information visit us on the web at www avid com ...

Reviews: