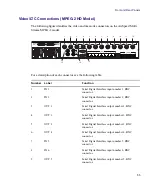


Cabling Up the AirSpeed Multi Stream
69
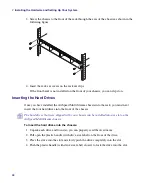
5. Repeat steps 1 through 4 until all drives are installed in the chassis.
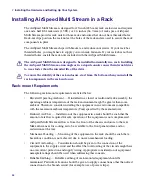
Once the drives are installed, you can begin cabling up the AirSpeed Multi Stream for
your site. For more information, see
“Cabling Up the AirSpeed Multi Stream” on page
.
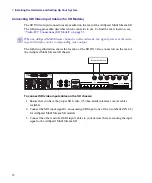
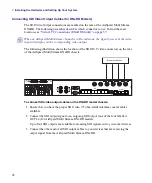
Cabling Up the AirSpeed Multi Stream
Once the AirSpeed Multi Stream is securely installed in the rack, and the drives are installed,
you are now ready to connect the appropriate cables to the rear panel of the AirSpeed Multi
Stream to the external devices for your particular site. This section contains the cabling
diagrams and instructions for all AirSpeed Multi Stream models.
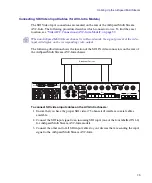
The following sections describe the cabling on the rear of the AirSpeed Multi Stream for all
models:
•
Connecting SDI and Video Reference Cables
•
Connecting Time of Day (TOD) LTC Cables
•
Connecting Control and Communications Cables
•
Connecting USB Devices (Mouse and Keyboard)
•
•
Connecting Remote Serial Cables
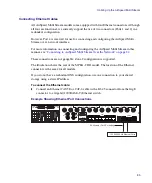
NET
TMP
LRM
PGD
LTC
REF
ACT
WNK
500
500
500
500
Summary of Contents for AirSpeed Multi Stream
Page 1: ...Avid AirSpeed Multi Stream Installation and User s Guide...
Page 6: ...6...
Page 22: ...22...
Page 178: ...5 Configuring the Software with a Standalone Transfer Manager 178...
Page 326: ...10 Working with the Remote Console 326...
Page 344: ...11 Maintaining Your AirSpeed Multi Stream 344...
Page 362: ...A Specifications 362...
Page 380: ...C Network Teaming 380...
Page 390: ...390 Taiwan EMC Regulations Taiwan EMC Regulations BSMI Class A EMC Warning...
Page 397: ...Index 397...


