37601AA
51
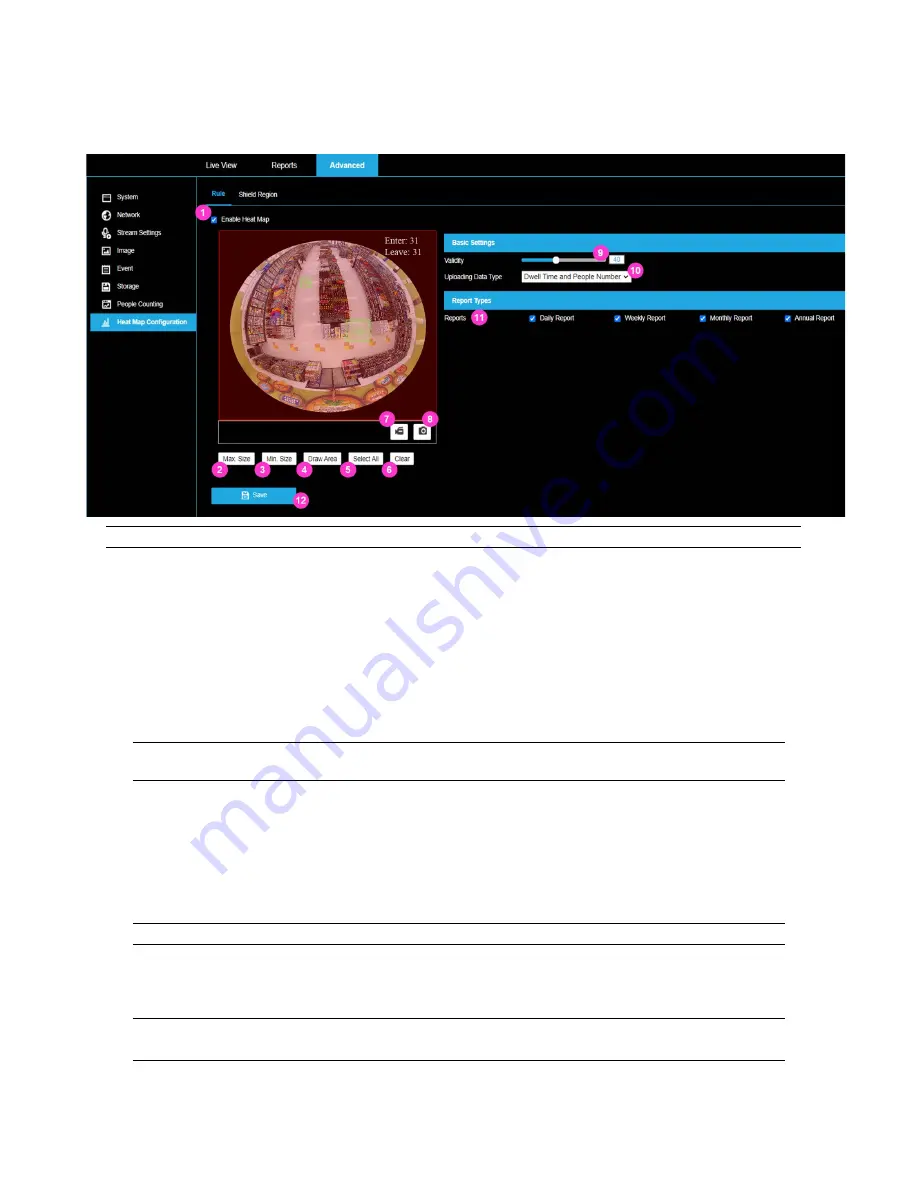
Heat Map Configuration
Heatmapping provides the necessary data to assist in managing labor allocation at peak service
times as well as maximizing upsell opportunities by identifying high traffic areas.
IMPORTANT:
Set the date and time on the camera to ensure accuracy in your Heat Map reports
.
1. Enable Heat Map
Heat Mapping is enabled when the checkbox is checked and disabled when unchecked.
2. Max. Size
The maximum size of a valid target. Targets larger than the max size box will not be
detected.
To create a Min. Size detection box:
Click on
Max. Size
.
Adjust the size of the box to represent a person directly below the camera.
Note:
Min/Max boxes must be square. “Parameter Error” indicates a problem with the
Min/Max Size boxes.
3. Min. Size
The minimum size of a valid target. Targets smaller than the min size box will not be
detected.
To create a Min. Size detection box:
Click on
Min. Size
.
Adjust the size of the box to represent a person at the edge of the image.
Note:
The Min. Size box must be smaller than the Max. Size box.
4. Draw Area
Draw your Count Area by left clicking on your mouse at each point of your area. Right-click
when finished drawing your detection area.
Note:
The Count Area must be a convex polygon with a maximum of 10 sides.
Drawing the Count Area where people may linger can impact counting accuracy.


