background image

User’s Manual 


8

Using the AVerMedia

 AVerTV Box3 

Using AVerMedia

®

 AVerTV Box3 for the First Time  

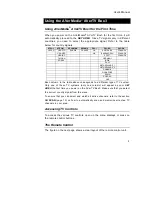
When you power on the AVerMedia

®

 AVerTV Box3 for the first time, it will 

automatically proceed to the 

SET AREA

. Since TV signals vary in different 

countries, you need to select the appropriate signal. Refer to the table 
below for country signals. 

NTSC-J 

NTSC-M 

SECAM-DK 

SECAM-L 

PAL-I 

PAL-BG 

PAL-DK 

JAPAN USA-STD  RUSSIA  FRANCE UK 

AUSTRALIA  POLAND-1 

 USA-HRC   


HK BANGLADESH 

POLAND-2 

 USA-IRC   


EGYPT  POLAND-3 

 TAIWAN   


GERMANY 


 KOREA   


INDIA 


  ITALY 


NETHERLANDS_1 


NETHERLANDS_2 


RUMANIA   


SINGAPORE  


 SPAIN 


SWEDEN   


  UAE 


Each column in the table above corresponds to a different type of TV system. 

Only one of these TV systems (only one column) will appear as your 

SET 

AREA 

the first time you power on the AVerTV Box3. Make sure that you select 

the correct country signal from the menu. 

To ensure that you can select and watch all active channels, refer to the section 

CH SCAN

 (page 10) on how to automatically scan and memorize all active TV 

channels in your area.  

Accessing TV Controls 

To access the various TV controls, open up the menu displays or press on 
the remote control buttons. 

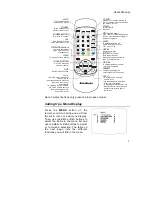
The Remote Control 

The figure on the next page shows a clear layout of the remote control unit. 

Summary of Contents for TV TUNER BOX

Page 1: ...EXTERNAL TV TUNER BOX...

Page 2: ...and peripherals must be shielded and grounded Operation with non certified computers or non shielded cables may result in interference to radio or television reception Any changes or modifications not...

Page 3: ...Power Adapter 6 Connecting a Video Source 7 Composite Video 7 S Video 6 Connecting to a Video Output Device 7 Using the AVerMedia AVerTV Box 8 Using AVerMedia AVerTV Box for the First Time 8 Accessing...

Page 4: ...your computer Just plug it into your monitor or LCD projector and you re ready to watch TV or play video games AVerTV Box3 is completely plug n play There is no software driver required What s in the...

Page 5: ...ss this button to toggle between TV Video and PC display VOLUME Press the button to and RIGHT button to increase LEFT decrease the volume level CHANNEL Press the button to go and to go up to the next...

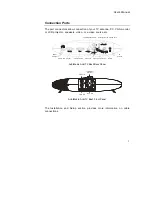
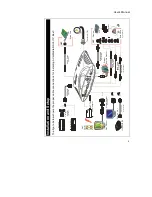
Page 6: ...e etc S Video Audio In from PC s sound card TV Antenna Power Adapter VGA Out to monitor Left Right Audio2 In VGA In from PC Video2 In Speaker Connection AVerMedia AVerTV Box3 Back Panel Video Out Audi...

Page 7: ...nna 75 Wall Outlet Power Adapter Audio Cable supplied External Amplified Speaker Sound Card OUT S Video Cable not supplied OUT V G A M o n i to r Video Game e g Nintendo VCR Camcorder Example Audio Ca...

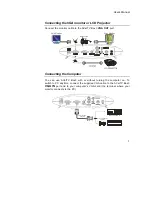
Page 8: ...optional VGA Monitor LCD PROJECTOR Connecting the Computer You can use AVerTV Box3 with or without turning the computer on To switch to PC anytime connect the supplied VGA cable to the AVerTV Box3 VG...

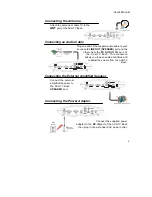
Page 9: ...he other end to the PC AUDIO IN port of the AVerTV Box3 This connection allows you to have audio at all times and to adjust the volume from the AVerTV Box3 Connecting the External Amplified Speaker Co...

Page 10: ...quality than composite video Connecting to a Video Output Device You can output the video signal from your TV antenna or video source like the camcorder to a receiving device The receiving device can...

Page 11: ...TALY NETHERLANDS_1 NETHERLANDS_2 RUMANIA SINGAPORE SPAIN SWEDEN UAE Each column in the table above corresponds to a different type of TV system Only one of these TV systems only one column will appear...

Page 12: ...y selected channel AV PC To toggle between TV Video or PC display SOURCE Switch between TV or external video sources NUMBER BUTTONS To select a TV channel 100 Press this button first for cable channel...

Page 13: ...n press Vol button to make the selection If you want to interrupt or cancel the scanning process press the MENU button but this will only memorize the scanned channel These two types of channel preset...

Page 14: ...actual time and the time to automatically turn on the AVerTV Box3 If you want to clear or change the time press Vol Under CLOCK menu select number three 3 Press Vol button to select ALARM ON to activa...

Page 15: ...o remove add Use the CH or CH buttons to select ADD to include or DEL to remove the channel number in the channel line up then press Vol Note To browse through channels while setting the USER CH and C...

Page 16: ...ion Use the CH or CH buttons to select from different languages then press Vol The available languages for NTSC version are English and For PAL and SECAM the available languages are English Espa ol De...

Page 17: ...avel TV program listings and more Teletext Control Buttons The figure and descriptions in this section show how to use the teletext function using the remote control FASTEXT LINK BLUE Jump to the tele...

Page 18: ...th page which is page 300 Press Vol button To select your desired teletext information use the FASTEXT LINK buttons In the last display line of the index page or any teletext page text appears in four...

Page 19: ...uct defect 3 Cartons cases batteries cabinets tapes or accessories used with product 4 AVerMedia does not warrant that this product will meet your requirements it is your responsibility to determine t...

Reviews: