


AVerMedia AVerKey500 Pro User’s Manual
12
Connecting a TV Monitor and Video Source
Use the connectors at the side panel of the
AVerKey500 Pro
to connect a TV
monitor (or any video monitor). If you have a video source such as a VCR,
laserdisc player or video camera originally connected to your TV monitor, you can
also connect the video source to the
AVerKey500 Pro
.
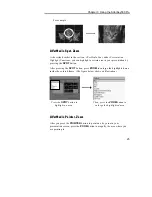
To output your computer presentation to a TV monitor :
¬
S-OUT
:
If you have a TV monitor that uses the S-video standard,
connect the supplied
S-Video Cable
to the
AVerKey500
Pro
"
S-OUT
" port and the TV monitor's "S-IN" port.
VIDEO-OUT
: If you have a TV monitor that uses the Composite video
standard, connect the supplied
AV Cable
to the
AVerKey500 Pro
"
VIDEO-OUT
" port and the TV
monitor's "VIDEO-IN" port.
Refer also to the setup diagram on the next page for the proper cable
connections.
To use the
AVerKey500 Pro
as a Video Switcher :
The
AVerKey500 Pro
allows you to connect a computer and a video device
such as the VCR or LaserDisc Player. You can then use the
AVerKey500 Pro
as a Video Switcher to select either source to be the final output.
Environments such as classrooms and conference rooms usually require a TV
to be connected to a VCR at all times. Now with the
AVerKey500 Pro
, you do
not need to disconnect cables whenever you need to use the TV with either
the computer or the VCR/LaserDisc.
To connect the
AVerKey500 Pro
to a VCR or any video source :
®
S-IN
:
If the VCR (or any video source) is originally attached to
your TV monitor and it uses the S-video standard, use an
S-
Video Cable
to connect the VCR to the
AVerKey500 Pro
"
S-IN
" port and the TV monitor's "S-OUT" port.
¯
VIDEO-IN
: If a VCR (or any video source) is originally attached to the
TV monitor and it uses the Composite video standard, use
an
AV Cable
to connect the VCR to the
AVerKey500 Pro
"
VIDEO-IN
" port and the TV monitor's "VIDEO-OUT"
port.
Refer also to the setup diagram on the next page.
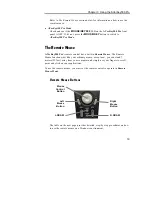
Summary of Contents for 500
Page 1: ......
Page 16: ...Chapter 2 Hardware Installation and Setup 13 ...