background image

18

DO NOT cover up the charger while it is charging. The charger air cools and needs to be 
on a hard, flat surface in an open space. Use the charger with the indicator light facing upward.
DO NOT use when the charger is inverted, which can inhibit cooling and reduce charger lifespan. 

DO NOT open the battery housing, which will void the warranty and can result in damage to
the battery, property or cause serious injury and/or death.

PACE 350/500 QUICK START GUIDE

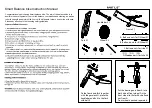
The Pace 350 /500E-Bike is equipped with a throttle, which is mounted 

The motor stops when you: stop pedaling, squeeze the brake levers, 
or release the throttle. Simply start pedaling again to re-engage the 

motor. 

BATTERY AND CHARGING

W
temperature conditions. To charge the battery, plug the charger into 

the charging port and then connect the charger to a wall outlet. The 
LED indicator light will be red when charging and will turn green when 
charging is complete. 

MAINTENANCE AND SERVICE

Properly maintaining your Pace 350/500 ensures its longevity and smooth 
operation. Before assembling your bike, please watch the “How To 
Assemble” video we’ve prepared for you. If you have questions during 

the assembly process, please contact Aventon at (866) 300-3311 or 
check link: 

https://support.aventon.com/contact-us

SAFETY

You should wear an approved bicycle helmet every time you ride 
a bicycle, regardless of the legal requirement to do so. You should 

comply with local law when riding your Pace 350/500 Ebike. 

pace 350

GETTING STARTED

First, tap the power button on the battery to turn on. The current 
charge level will be flashed upon four green LEDs (4 = full, 1 = near 
empty), then one green LED to show the battery is turned on. Next, 
press and hold the 


 button on the handlebar controls to turn on the


display. Now, your e-bike is ready to ride. To turn off, press and hold 


M

 f

or 3 seconds. 

The Pace ebike offers pedal assist. When using pedal assist, an 
electric motor supplements the rider's own effort. To use the pedal 
assist, simply start pedaling, then tap the “U” or “D” arrows to increase 
or de

crease the amount of pedal assist. Pedal assist will engage at 

speeds up to 28 MPH

 for Pace 500 and 20 MPH for Pace 350

near the rider’s left thumb, to propel the bike without pedaling. To use 
the throttle, start pedaling then apply the throttle. Once the bike is 
moving on throttle power, you can stop pedaling entirely and use your 
thumb to control the speed of the bike. The throttle can propel you at 
speeds up to 20 MPH. 

Derailleur
On the right side of handlebar, next to the brake lever,
you can see two levers with 7-1 (For Pace 350)/8-1 (For
Pace 500). Those are derailleur levers. By pressing those
levers, you can make the chain move to different gears to
change your riding experience.

Summary of Contents for PACE 350

Page 1: ...n com contact us Phone 1 866 300 3311 We take pride in bringing you a quality product that will over years of enjoyment Please read and understand this manual fully before assembling and riding your b...

Page 2: ...RAL INFORMATION WARNINGS AND SAFETY SPECIFICATIONS ASSEMBLY INSTRUCTION BATTERY CHARGING LOCK REMOVAL OPERATION MAINTENANCE TROUBLESHOOTING LIMITED WARRANTY LINK TO ASSEMBLY VIDEO AND ONLINE RESOURCES...

Page 3: ...e that cannot be predicted or avoided and are the sole responsibility of the rider GENERAL INFO Assembly and Fit Correct assembly and fit are essential elements to ensure your bicycling safety perform...

Page 4: ...ith normal use we recommend that a certified reputable bike mechanic performs all wheel tuning and truing operations on your bike from Aventon DO NOT attempt to true wheels or tighten spokes unless yo...

Page 5: ...s thorns broken glass and other obstacles hazards and puncture flat risks Cross train tracks at a 90 degree angle or walk your bike across Expect the unexpected such as opening car doors or cars backi...

Page 6: ...ding this is not recommended nor permitted and you can be seriously injured or killed if you perform extreme riding Bikes and bike parts have strength and integrity limitations and extreme riding incl...

Page 7: ...ognitive language impairment a seizure disorder or any other physical condition that could impact your ability to safely operate a vehicle consult your physician before riding any bike A Note for Pare...

Page 8: ...arging Time Approx 3 4 Hours Water Resistance IPX4 Gross Weight 46 lbs 20 kg SPECIFICATIONS Range Per Charge is measured under the conditions that power is sufficient with a 75kg load at 86 F 30 C 70...

Page 9: ...nditions that power is sufficient with a 75kg load at 86 F 30 C 70 humidity on a level road in pure electric riding mode Actual results may vary based on di erences in temperature load wind speed road...

Page 10: ...er cable 2 Front Rear Reflector 1 Spare Derailleur Hanger 1 Grease 1 Hex key 1 Wrench 1 Owner s manual 2 Reflector holder 1 Left pedal 1 Right pedal 09 HUB MOTOR REAR WHEEL FRONT WHEEL SEATPOST PEDAL...

Page 11: ...guide to assist in the assembly of your ebike and are not a complete or comprehensive manual of all aspects of assembly maintenance and repair Consult a certified reputable bike mechanic to assist wi...

Page 12: ...rotor sits in between the braking pads in the brake caliper the flat washer on the axle should sit outside the fork dropout Step 7 Install the front wheel A Remove the plastic insert from the fork dr...

Page 13: ...alue at 25 30 Nm Step 10 Perform a handlebar twist test to ensure the handlebar stem is secure WARNING an improperly secured front wheel and or handlebar stem can cause loss of control accidents serio...

Page 14: ...to desired angle Step 12 Use a pedal wrench to install the pedals Locate the pedal with a smooth pedal axle exterior and an R stamped into the end of the pedal axle which indicate it is the right ped...

Page 15: ...sure indicated on the tire sidewall 30 50PSI 2 0 3 5 BAR Do not overinflate or underinflate tires Step 15 Set the desired seat height Open the quick release lever by hinging it open fully Adjust the s...

Page 16: ...the minimum and maximum horizontal movement allowed C While holding the seat in the desired position use a 5mm allen key to tighten the seat angle adjustment bolt securely to the recommended torque v...

Page 17: ...ttery 4 Plug the charger into a power outlet Connect the charger input plug 110 240 volt plug to the power outlet Charging should initiate and will be indicated by the LED charge status light on the c...

Page 18: ...short rides will not cause damage Charging the battery normally takes 3 7 hours The charger indicator lights will show red light while the battery charges When charging is complete the indicator ligh...

Page 19: ...smell or any other indicator of overheating discontinue using the charger and contact Aventon Support Charge the battery only with the charger originally supplied with the bike from Aventon Bikes or a...

Page 20: ...us SAFETY You should wear an approved bicycle helmet every time you ride a bicycle regardless of the legal requirement to do so You should comply with local law when riding your Pace 350 500 Ebike pa...

Page 21: ...shouldn t change and Max speed in km h After chaging in this menu hold M to get back to normal menu Long press Down button while it s PAS 1 5 to trigger Walk Mode SPEED INDICATOR Current Max Average...

Page 22: ...re are important safety warnings throughout the manual that must be followed to prevent dangerous situations accidents damage to the bike damage to property injury or death Users must follow the instr...

Page 23: ...ons needs more frequent maintenance to prevent rust corrosion etc and to ensure all systems are working safely In public places your bike from Aventon Bikes must be parked in accordance with local rul...

Page 24: ...aged beyond repair or broken Monthly 402 1207 km 250 750 mi Check brake pad alignment brake cable tension Check bike is shifting properly proper derailleur cable tension Check chain stretch Check brak...

Page 25: ...r is adjutsted and functioning properly Ensure shifter and brake levers are atached to the handlebar securely Ensure all shifter and brake cables are properly lubricated 8 Frame Fork and Seat Check th...

Page 26: ...tion 24 It is critically important that proper air pressure is always maintained in pneum may result in loss of control and overinflated tires may burst Failure to always maintain the air pressure rat...

Page 27: ...scharge fuse 1 Charge the battery 2 Clean and repair connectors 3 Install battery correctly 4 Turn on bike with proper sequence 5 Disengage brakes 2 Irregular acceleration and or reduced top speed 1 I...

Page 28: ...ake note of any immediately recognizable damage on the shipper s Bill of Lading prior to signing off on the shipment Shipping damage claims are very time sensitive and it is your responsibility to imm...

Page 29: ...d Component into your ebike You will be responsible for shipping costs associated with returning a Covered Component unless Aventon agrees in writing to pay for such shipping costs Replacement Covered...

Page 30: ...mation on best practices please visit the Aventon Bikes website www aventon com Support https www aventon com pages support or contact Aventon Bikes Product Support with any questions We are here to h...

Reviews: