


BS; Reviewed:
SPOC 2/14/2005
Solution & Interoperability Test Lab Application Notes
©2005 Avaya Inc. All Rights Reserved.
4 of 22
RAD-IP-Mux.doc
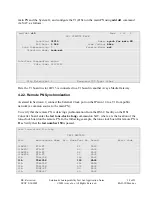
2. Equipment and Software Validated
The following equipment and software/firmware were used for the sample configuration provided:
Equipment
Software/Firmware
Avaya S8700 Media Server in MultiConnect
Configuration
2.0.1 (R012x.01.0.221.1)
Avaya MCC1 Media Gateway (main Port Network)
•
Switch Node Interface TN573B
•
DS1 Converter TN1654 with “special” Y cable
V4
V6
Avaya SCC1 Media Gateway (remote Port Network)
•
Expansion Interface TN570B
•
DS1 Converter TN1654 with “special” Y cable
V8
V6
Avaya P333R Multilayer Stackable Switch
3.9.1
Avaya P333T-PWR Power over Ethernet Stackable
Switch
4.0.17
Avaya 4612 IP Telephones
1.8.1
Avaya 8410D Digital phones using TN2224B
V5
Analog phones
Analog trunk (Central Office)
AvayaT1/E1 trunk circuit packs - TN464F
V16
Synchronization source from public network
•
TN464F T1/E1
RAD IPmux-14 TDMoIP Gateway
1.0
3. Configure IPmux-14 TDMoIP Gateway
The IPmux-14 is configured via a terminal control session. There are four basic configuration steps
that need to be followed when deploying IPmux-14, as follows:
1.
IP Configuration – Setting the device host IP address
2. Physical
layer
configuration
– Setting the TDM parameters (line type, synchronization, etc.).
3.
Creating bundles – Allocating timeslots to bundles.
4.
Connecting bundles – Directing the bundles to remoteIPmux-14 unit.