


Installing and operating the Rackmount Charger
206
Avaya DECT R4 - Installation and Maintenance Guide
06/2009
●
Cutting pliers
●
Multimeter
●
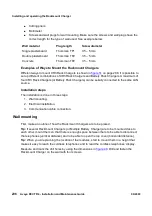
Screws and wall plugs for wall mounting. Make sure the screws and wall plugs have the
correct length for the type of wall used. See example below:
Examples of Ways to Mount the Rackmount Chargers
Different ways to mount CR3 Rack Chargers is shown in
figure 51
on page 208. It is possible to
set up different combinations of CR3 Rack Chargers and Battery Pack Chargers. A maximum of
four CR3 Rack Chargers (or Battery Pack Chargers) can be serially connected to the same LAN
source.
Installation steps
The installation is done in three steps:
1. Wall mounting.
2. Electrical installation.
3. Communication cable connection.
Wall mounting
First, make an outline of how the Rackmount Chargers are to be placed.
Tip:
If several Rackmount Chargers (or Multiple Battery Charger) are to be mounted close to
each other, mount them so that there is enough space between them to be able to disconnect
the telephones (vertical distance) and to be able to open the top cover (horizontal distance).
Tip:
When you are planning the location of the modules, start to mount them in a height that
makes it easy to reach the cordless telephones and to read the cordless telephones’ display.
Measure and mark the drill holes by using the dimensions in
figure 49
. Drill and fasten the
Rackmount Charger on the wall with four screws.
Wall material
Plug length
Screw diameter
Single plasterboard
Thorsman TP1
3.5 – 5 mm
Double plasterboard
Thorsman TP2
3.5 – 5 mm
Concrete
Thorsman TP2
3.5 – 5 mm