background image

User Manual

4 www.AvantcoEquipment.com

Installation

CAUTION!  

This unit should be installed in a non-combustible location only.

CAUTION!  

The installation must be performed by qualified personnel or the warranty will be void.

WARNING!  

Check the serial plate on this unit before installation. Only connect the unit to the


voltage and frequency listed on the serial plate.

1. 

Remove the electric range, parts, and other documentation from the box/carton and dispose of 

any non-essential packaging materials.

2. 

Turn the unit upside down and install the 4 legs into the threaded inserts on the unit.

3. 

Turn the unit right side up and place in the intended operating location, adjusting the legs to 

ensure the unit is level and secure

4. 

Remove any protective plastic sheeting from the range and wipe down all surfaces.

5. 

Before initial use, plug the unit in and turn the temperature control to the maximum setting and 

allow the equipment to warm-up for 10-15 minutes. You may notice smoke appearing due to the 

cooking surface and elements burning-in. This is normal and after 10-15 minutes the equipment 

is ready to use.

6. 

Continue to operating instructions.

Specifications

MODEL #

DESCRIPTION

OVERALL 

DIMENSIONS

VOLTAGE

WATTAGE

PLUG

177CER200

Dual 9" Solid


Plate Electric Range

15"L x 25"W x 9"H

208-240V

3000-4000W

NEMA 6-20P

Summary of Contents for 177CER200

Page 1: ...User Manual www AvantcoEquipment com 1 Countertop Electric Range User Manual Models 177CER200 Please read and keep these instructions Indoor use only 02 2020 ...

Page 2: ...User Manual 2 www AvantcoEquipment com Important Safety Information 3 Specifications 4 Installation 4 Operation 5 Cleaning 5 Troubleshooting 6 Parts Diagram 7 Equipment Limited Warranty 8 Index ...

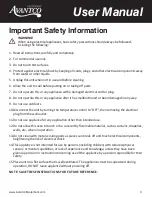
Page 3: ...onnect the unit by turning the temperature control to OFF then removing the electrical plug from the wall outlet 11 Do not use appliance for any application other than intended use 12 Do not allow this oven to touch or be covered by flammable material such as curtains draperies walls etc when in operation 13 Do not clean with metal scouring pads as pieces can break off and touch electrical compone...

Page 4: ... the threaded inserts on the unit 3 Turn the unit right side up and place in the intended operating location adjusting the legs to ensure the unit is level and secure 4 Remove any protective plastic sheeting from the range and wipe down all surfaces 5 Before initial use plug the unit in and turn the temperature control to the maximum setting and allow the equipment to warm up for 10 15 minutes You...

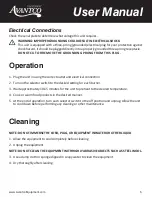
Page 5: ... Turn on the selector switch to the desired setting for each burner 3 Wait approximately 10 15 minutes for the unit to preheat to the desired temperature 4 Cook or warm food products in the desired manner 5 At the end of operation turn each selector switch to the off position and unplug Allow the unit to cool down before performing any cleaning or other maintenance Cleaning NOTE DO NOT IMMERSE THE...

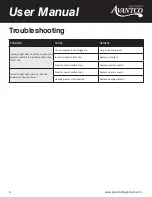
Page 6: ...sition other than OFF or 0 The equipment is not plugged in Plug in the equipment Indicator light malfunction Replace pilot light Selector switch malfunction Replace selector switch Indicator light does come on but the equipment does not heat Selector switch malfunction Replace selector switch Heating element malfunction Replace heating element ...

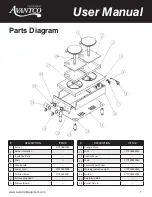
Page 7: ...4 Shell 5 Wire Buckle 6 Power Cord 177PCER2006 7 Terminal Block 177PCER2007 8 Surrounding Board 9 Bottom Board DESCRIPTION ITEM 10 Triangle Plate 11 Foot 177PCER20011 12 Control Panel 13 Knob 177PCER20013 14 Control Panel Sticker 15 Working Indication Light 177PCER20015 16 Switch 177PCER20016 17 Reinforced Plate 18 Burner Fixture ...

Page 8: ...serial number plate has been removed or altered Damage or failure due to improper installation improper utility connection or supply and issues resulting from improper ventilation or airflow Defects and damage due to improper maintenance wear and tear misuse abuse vandalism or Act of God Any action for breach of this warranty must be commenced within 1 year of the date on which the breach occurred...

Reviews: