


ZMPS
INSTALLATION AND OPERATION MANUAL
4
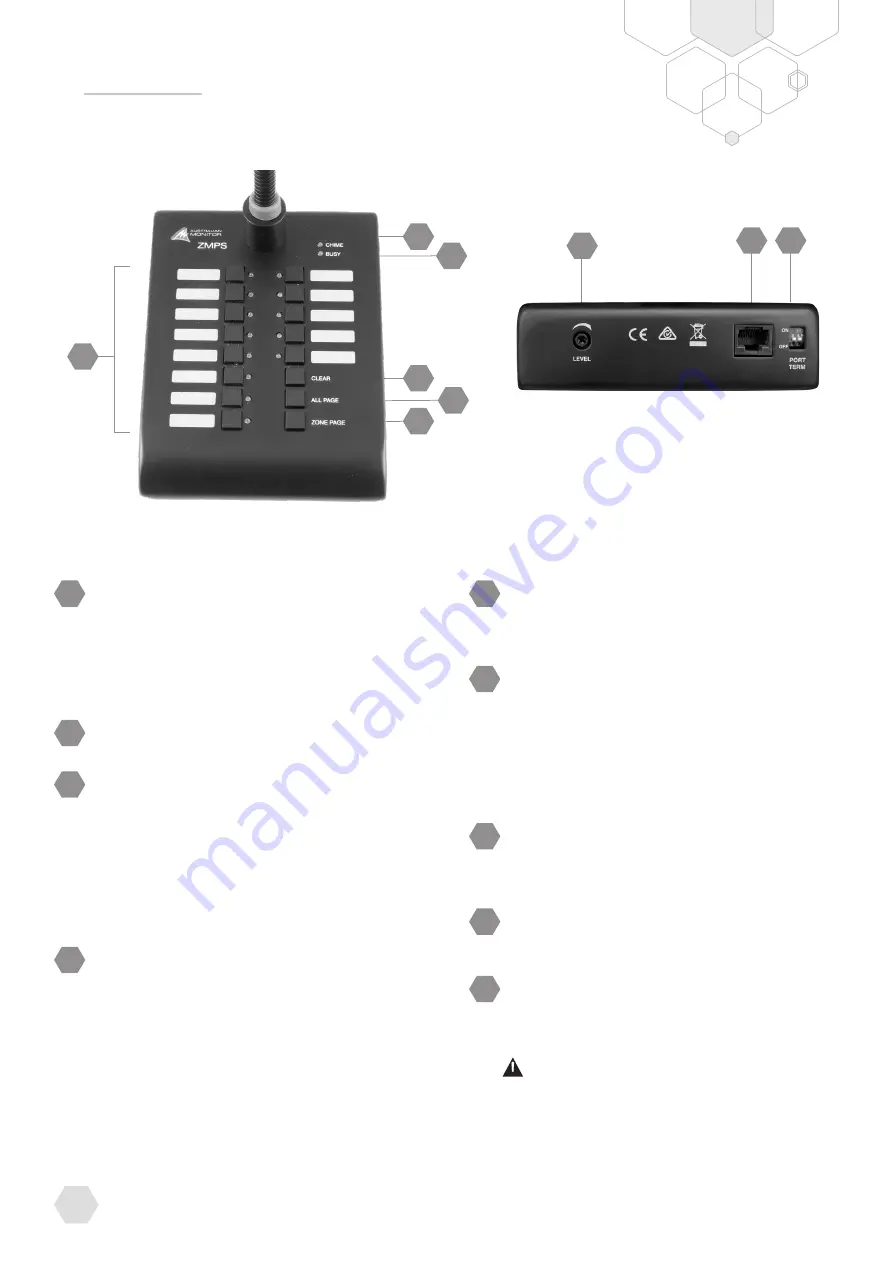
CONTROLS
1
2
5
4
3
6
2
This button clears all selected zones
CLEAR
3
This button pages to all zones. It is momentary so
must be held while talking into the microphone. It
activates the microphone and mutes or ducks the
program sources (depending on configuration).
It does NOT clear the current zone selection
configuration so the paging station will return to its
previous state (selected zones) once the ALL PAGE
button is released.
ALL PAGE
4
This button pages to the currently selected zone/s as
indicated by their respective LEDs. The zones being
paged have their program sources muted or ducked
(depending on configuration) and the microphone
becomes active.
ZONE PAGE
1
There are 13 software configurable buttons on the
ZMPS. Each button can be configured to select a
single zone, groups of zones or to activate a pre-
recorded announcement. Use the ZONEMIX PC
control software to assign the required function to
each button.
SOFTWARE DEFINED BUTTON
5
The chime LED will turn on to indicate the pre-
announce chime is playing. Do not speak through the
ZMPS until this LED is off.
CHIME
6
The busy LED will turn on when the system is busy
performing another page. This can be caused by
the local paging station (you are making a page) or a
remote paging station being in use.
Paging and messaging are not possible while the
system is busy, however zone selections can still be
made.
BUSY
8
To accommodate different speech levels, there is a
gain control on rear of the ZMPS. Adjust the level to
provide clear paging audio.
GAIN
9
Connect the ZMPS to the ZONEMIX accessory ports
using Cat5, Cat5e or Cat6 cable.
ACCESSORY PORT
8
9
10
Turn both switches ON (Up) if the ZMPS is the
last
device on an accessory cable run.
NOTE: Turn off the ZONEMIX when making wiring
or termination changes.
10
PORT TERMINATION SWITCHES
Top
Rear


