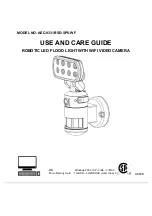
background image


<Place 

holder 

for 

website> 


Please contact 1-877-527-0313 for further assistance. 

Camera LED indicator 

  The LED light next to the card compartment 

indicates the function status of the camera by using 
different colored LED lights. 
- Flash slow in RED

:

 AP Mode 

- Remain in RED: P2P Mode 

Green:

 The unit is recording. 


NOTE:


Before removing the micro card from the slot, please 
press the mode button on the bottom of the 
Nightwatcher for 3 seconds to stop the light from 
turning – the “Mode” LED will flash orange. To resume 
working, press the mode button once.


NOTE:


When OFF/REC button is pressed, remove micro card 
within 30 seconds (now the LED will turn red after 
micro card is removed from the slot).


Static mode

 : this is a new option to allow the end-

user's or consumers to select between a motorized 
LED head or a standard static directional light head. 
Press the push-button for 3 seconds to stop the 
light turning, the hidden LED will flash RED in Night 
Mode and flash GREEN in ALL Day Mode in a 
quick flash pattern. To resume working, press the 
push-button for 3 seconds again. 


  Before removing the micro card from the card slot, 

please press the mode button on the bottom of the 
Nightwatcher for 3 seconds to stop the light from 
turning – the ‘Mode’ LED will flash orange. (To 
resume working, press the mode button again.) 

  To remove micro card, open the card compartment 

using the provided Allen key and push in Micro card 
to eject then pull out. 

  For viewing and/or formatting, please slide the micro 

card into the card adapter that has been provided.  
Then, slide the card adapter into the card slot on 
your laptop. 

Formatting the micro card 

  It is good practice to format the micro card each time 

it is removed and files are viewed on your PC. Once 
the necessary files have been saved to your 
computer, please follow these steps for formatting.  

To format the micro card 

  Please ensure that any required images are saved to 

an alternative folder prior to formatting. 
- Place micro card into the card adapter supplied 
- Place the adapter in a spare card slot on your PC / 
Laptop 
- Right click on the micro card location 
- Select Format 
- Ensure the correct file system is selected FAT16  
  (or FAT) for SD and FAT32 for SDHC 
- Select quick format 


Summary of Contents for AEC-9331BSD-SP8-WF

Page 1: ...USE AND CARE GUIDE ROBOTIC LED FLOOD LIGHT WITH WIFI VIDEO CAMERA OS Windows 2000 XP Vista 7 MAC Micro Memory Card 1GB SD 32GB SDHC max Class 4 LISTED MODEL NO AEC 9331BSD SP8 WF ...

Page 2: ...radio frequency energy and if not installed and used in accordance with the instructions may cause harmful interference to radio communications However there is no guarantee that interference will not occur in a particular installation 3 The installation of this light fixture must be done by a qualified electrician 4 The motion sensor may not operate correctly if it is installed Near the outlet of...

Page 3: ... a result of improper installation This product is designed to illuminate it will not prevent the perpetration of any act legal or illegal The manufacturer assumes no liability for any damage to property injury to person or death WARNING Changes or modification to this unit not expressly approved by the party responsible for compliance could void the user authority to operate the equipment This Ni...

Page 4: ... the electrical supply is switched off and the circuit fuses removed or the circuit breaker is in the OFF position TOOLS REQUIRED NOT INCLUDED Hammer Safety goggles Phillips screwdriver Level HARDWARE INCLUDED NOTE Hardware not shown to actual size Part Description Quantity AA Mounting screw 2 BB Drywall screw 2 CC Plastic masonry anchor 2 DD Wire nut 3 EE Cross bar 1 FF Allen Key 1 AA BB CC DD EE...

Page 5: ...eady inside the card compartment of the light 1 E User manual 1 F EVA gasket 1 NOTE Nightwatcher Wi Fi camera is designed to illuminate record video and produce audio warnings when a person enters the detection area While it will detect a moving heat source there is no guarantee implied that it will provide total security or prevent illegal entry D Records 20 second video events at 15 frames per s...

Page 6: ...6 Nightwatcher Overview Camera angle adjustable downward by 25 degrees Bottom View Top View Side View Camera 3 motion sensors Mode LED Indicator hidden inside LED Front View ...

Page 7: ...nlight window refection air condition units swimming pool reflection direct street lighting or large vegetation in the installation area To prolong the lifespan of the Night Watcher fixture it is advised to install the unit in a selected area that is not directly exposed to extreme weather conditions and if possible under an eave based on the recommended mounting height Installing your Nightwatche...

Page 8: ...ght will turn off after 30 seconds Mode 1 Recommended for home or business default setting Camera will follow motion and record during the day and night Light will illuminate at night only Speaker will operate at night only Mode 2 Light illuminates during the day and night Camera records motion during the day and night Speaker operates during the day and night Mode 3 Camera will follow motion and ...

Page 9: ...tern To resume working press the push button for 3 seconds again Before removing the micro card from the card slot please press the mode button on the bottom of the Nightwatcher for 3 seconds to stop the light from turning the Mode LED will flash orange To resume working press the mode button again To remove micro card open the card compartment using the provided Allen key and push in Micro card t...

Page 10: ...do not push the button again after you have recorded the message the recording will stop automatically after 10 seconds 2 The Nightwatcher can hold 2 custom recorded messages If you have recorded one message repeat above step for message 2 3 If you hear a series of 3 beeps when you want to record your message by pressing the SET REC button for 3 seconds this means the self recorded messages are fu...

Page 11: ...reader not supplied Once your computer is powered on insert the card adapter into your computer Regardless of whether you are using Windows or MAC OS your card should be recognized by your computer after a few seconds Follow the instructions of your computer to view the contents of the removable storage device micro card Each recorded event will be listed in order by date Simply click on the filen...

Page 12: ...UID Smart Guard HD Once the connection is established open Smart Guard HD app and the camera screen will appear on your smart phone or tablet If there has below message Cannot connect to internet through Smart Guard HD or Internet connection unstable Smart Guard HD shown on the screen please disregard the message and you still can continue next step The different smartphone tablet will show the di...

Page 13: ...AP allows user to watch their camera from anywhere in the world as long as they have internet access Touch the screen twice it will appear 5 red function keys on the right side Touch the screen twice again 5 red function keys will be hided On your smart phone tablet screen click on SETTING icon Enter camera default password 12346578 ...

Page 14: ...r If Join home AP connection is successful LED indicator besides waterproof cover will display a RED light If Join home AP connection is failed LED indicator on the sensor will flash quick in Red Green light Press Reset button to return to AP mode and follow up this step 1 2 Link camera with home AP to reset Join home AP again Make sure your router account and password is correct LED indicator ...

Page 15: ... SSID name and password Select Wi Fi Setting You can change SSID name and password the password should be 8 digital numbers or English letters After the change it will return to AP mode please go to smart phone s Wi Fi setting and site survey UID to find the name you have changed Please then follow up this step 1 2 Link camera with home AP to reset Join home AP router We recommend it is not necess...

Page 16: ...ation signal to your smartphone tablet Click OFF Not to send PIR Notification signal Click ON To send PIR Notification signal You also can go to Camera List and press for the selected camera Click Notification that also can send the PIR notification signal to your smartphpone tablet ...

Page 17: ...t settings and LED indicator on the product will flash quickly in RED light Please wait about 3 minutes till RED light to change to flash slowly Press this Reset to Default then press YES the camera will restore the functions to default settings LED indicator on the product will flash quick in RED light Please wait about 3 4 minutes till RED light will change to flash slow NOTE If you click on PIR...

Page 18: ...ottom side will show Red Ball icon Record a video at 20 seconds and video will be saved in smart phone When PIR is activated to start Auto Record the left bottom side will show Orange Ball icon Record a video at 20 seconds and video will be saved in Smart Guard SD card 2 3 PLAY BACK Click icon you can choose to view recording pictures or video from Camera SD card or Mobile phone ...

Page 19: ...he light will turn on automatically If the bulb icon is in GREEN color it means light is MANUAL control The light will stay on whatever there has detection or not If there has one user to click the bulb icon to be GREEN color at MANUAL control the other users also will see this bulb icon to be GREEN color When all the users close this SmartGuard software this icon will return to RED color at AUTO ...

Page 20: ... the product the screen will show this icon If there has no SD card inside or can not read SD card the screen will show this icon 1 7 Check APP version Press the bottom icon it will show APP version and Firmware version When you open APP software it also will show APP version in the top left corner ...

Page 21: ...newest version This upgrade will not change your network settings 2 8 Add Camera Delete Camera Add Camera Old smartphone Click to enter Camera Detail Click Generate QR code To provide this QR code to another new smartphone New smartphone Click to enter Camera Detail Click QR code scan Scan QR code provided from old smartphone and this new smartphone also can be viewed the real time video streams f...

Page 22: ...ow Camera disconnected press OK and it will go back to Camera List 2 9 LED indication on the product AP Mode Flash slow in RED P2P Mode Remain in RED Record Remain in GREEN Incorrect Router password Flash quick in RED and GREEN False System Flash quick in RED 2 10 Reset button Press this Reset button the camera will turn to AP mode Press this Reset button for 6 seconds the camera will restore the ...

Reviews: