For further information contact
Audix at 503.682.6933
www.audixusa.com
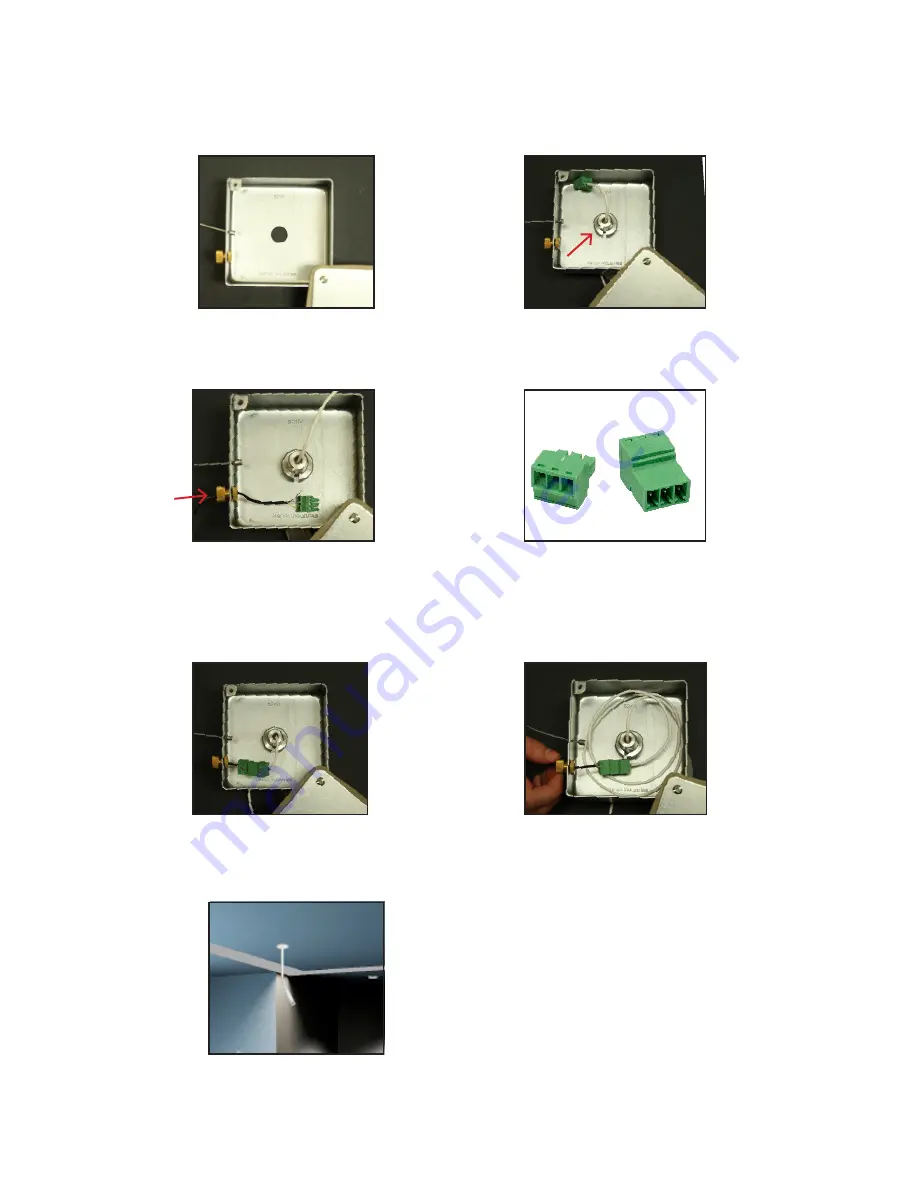
Open lid of JBM40 box and
place on top of ceiling tile
drilled hole.
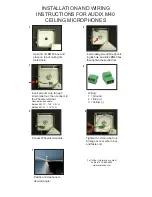
Wiring:
1 = Ground
2 = Blue (+)
3 = Yellow (-)
Insert ceiling mount through ceil-
ing tile hole, and into JBM40 box
then tighten the knurled nut.
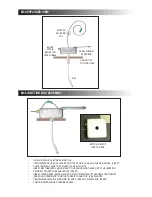
Connect Phoenix terminals.
Insert plenum wire through
strain relief nut, then connect to
the Phoenix terminal.
Recommended cable:
Belden 9451P - .124” O.D. or
Belden 82761 - .116” O.D.
Tighten the strain relief nut.
Arrange excess wire in box
and fasten lid.
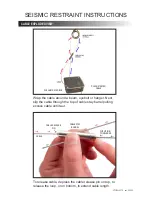
Position microphone to
desired angle.
3
3
2 1
2 1
1
4
2
5
3
6
7
INSTALLATION AND WIRING
INSTRUCTIONS FOR AUDIX M40
CEILING MICROPHONES


