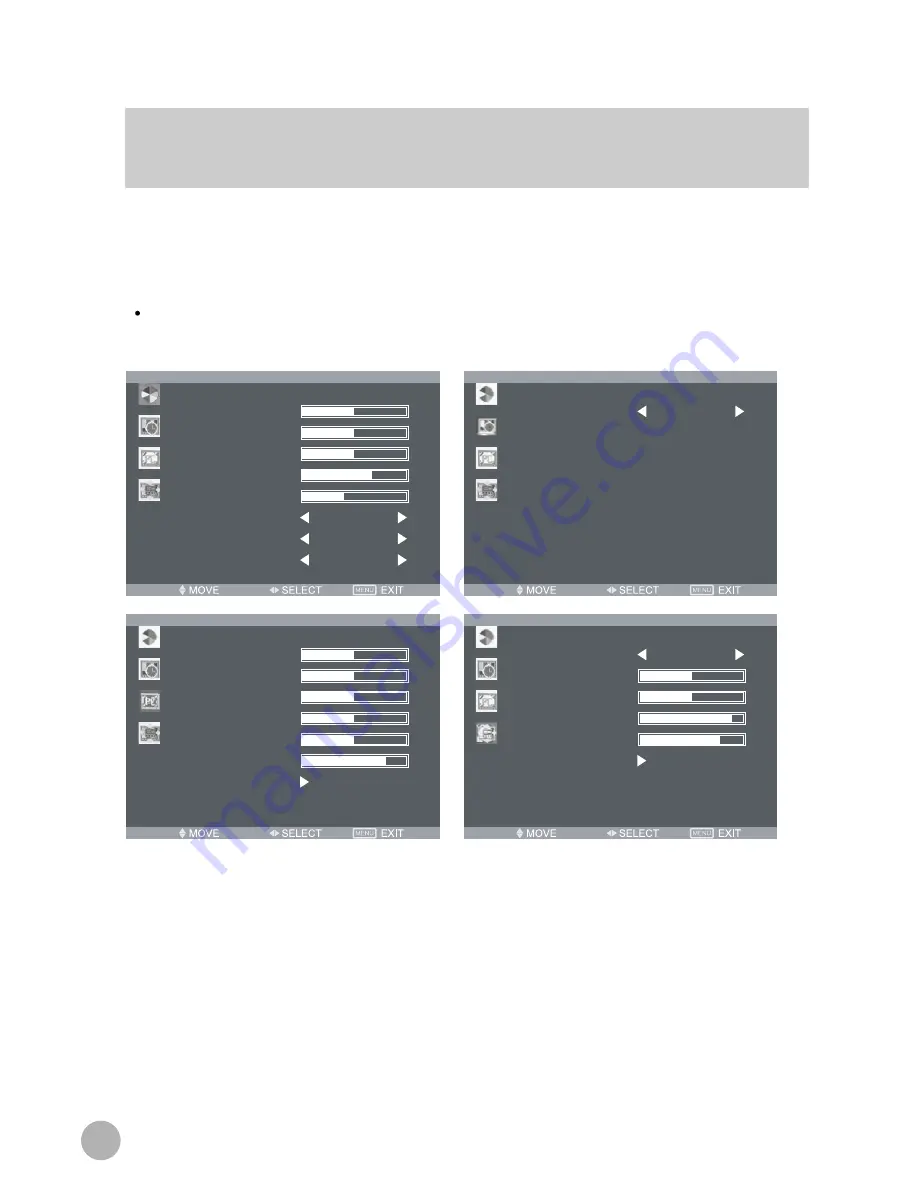
background image

12

OSD Menu Structure

OSD(On Screen Display) menu allows use to control or adjust various features and
setting in Accordance with his/her preferences.

Start Up

CONTRAST

PICTURE

BRIGHTNESS

HUE

COLOUR 

SHARPNESS

COLOUR TEMP.

Normal

FULL

User

SCALING

PICTURE MODE

FUNCTION

SLEEP TIMER

45

CONTRAST

PC

BRIGHTNESS

H-POSITION

V-POSITION

CLOCK

COLOUR MODE

AUTO COLOUR

LANGUAGE

OSD

H-POSITION

V-POSITION

OSD TIMER

TRANSPARENT

Information

RECALL

English

Summary of Contents for MLE800

Page 1: ......

Page 2: ......

Page 3: ...ted as household waste Please dispose of this equipment at your applicable collection point for the recycling of electrical electronic equipments waste In the European Union and Other European countri...

Page 4: ...facturer 6 Wall or Ceiling Mount When mounting the product on a wall or ceiling be sure to install the product using the designated mounting tools according to the method recommended by the manufactur...

Page 5: ...portant Safeguards 6 Supplied Accessories 8 Functional Overview 9 Preparation Case 11 Start Up OSD Menu Structure 12 Picture Menu 13 Function Menu 14 PC Menu 15 OSD Menu 16 Troubleshooting 17 5 Conten...

Page 6: ...the wall mounting bracket fix it carefully so it is secure Object Entry Do not insert foreign objects such as needles and coins into the ventilation openings Lightning Strikes You should disconnect yo...

Page 7: ...r more of the following measures Reorient or relocate the receiving antenna Increase the separation between the equipment and receiver Connect the equipment to an outlet on a circuit different from th...

Page 8: ...e provided with the product CCTV MONITOR Power Cord 15 Pin Signal Cable option Adapter User s Guide If any item is missing or damaged please contact your dealer Please keep the box and packaging mater...

Page 9: ...use the on screen controls to adjust the colour temperature for the best possible screen colour and intensity Selecting the Reset button in PC Mode will activate the Auto Colour to determine whether y...

Page 10: ...nnect the audio cable to the output port of the sound card in your computer Optional Plug the DC jack into the DC in port located on the back of the monitor Plug the power cord into the AC receptacle...

Page 11: ...ts menu functions 3 Down Selects menu 4 Up Selects menu While the PC mode launches the AUTO COLOUR function directly 5 POWER Switches the monitor on and off 6 Menu Turns the OSD window on Turns the OS...

Page 12: ...nce with his her preferences Start Up CONTRAST PICTURE BRIGHTNESS HUE COLOUR SHARPNESS COLOUR TEMP Normal FULL User SCALING PICTURE MODE FUNCTION SLEEP TIMER 45 CONTRAST PC BRIGHTNESS H POSITION V POS...

Page 13: ...ture c HUE This control allows you to adjust the hue d Colour This control allows you to adjust the edge definition of the picture e Sharpness This control allows you to compensate for the Colour vari...

Page 14: ...t Up 2 Function Menu Sleep Timer Press LEFT RIGHT button you can select your desirable setting time to turn off the LCD Screen The timer will start to count down just after you select FUNCTION SLEEP T...

Page 15: ...move the center of display image After selecting position menu you can move the image 5 Clock Press LEFT RIGHT button you can adjust the horizontal size of display 6 Phase Press LEFT RIGHT button you...

Page 16: ...SD window left and right 3 V Position Press LEFT RIGHT button you can move the OSD window up and down 4 OSD Timer Press LEFT RIGHT button you can adjust OSD Time 5 Transparent Press LEFT RIGHT button...

Page 17: ...e is detected in the OSD Menu No picture VGA mode Check mains switch and the PC power switch are ON Power LED not lit VGA mode Check main switch is ON Check if the power cord is connected Image is uns...

Page 18: ...MEMO...

Page 19: ......

Page 20: ...S N 9978641906B...

Reviews: