


User manual Version 1.3
4-Port DIN-Rail Serial Device Server SE5404D
Copyright © 2011 Atop Technologies, Inc.
All rights reserved. Designed in Taiwan.
- 58 -
4.2.2 Run Serial/IP on PC
In the Window Start Menu, go to “Programs”, select “Serial/IP” and select “Control Panel”. When “Select Port”
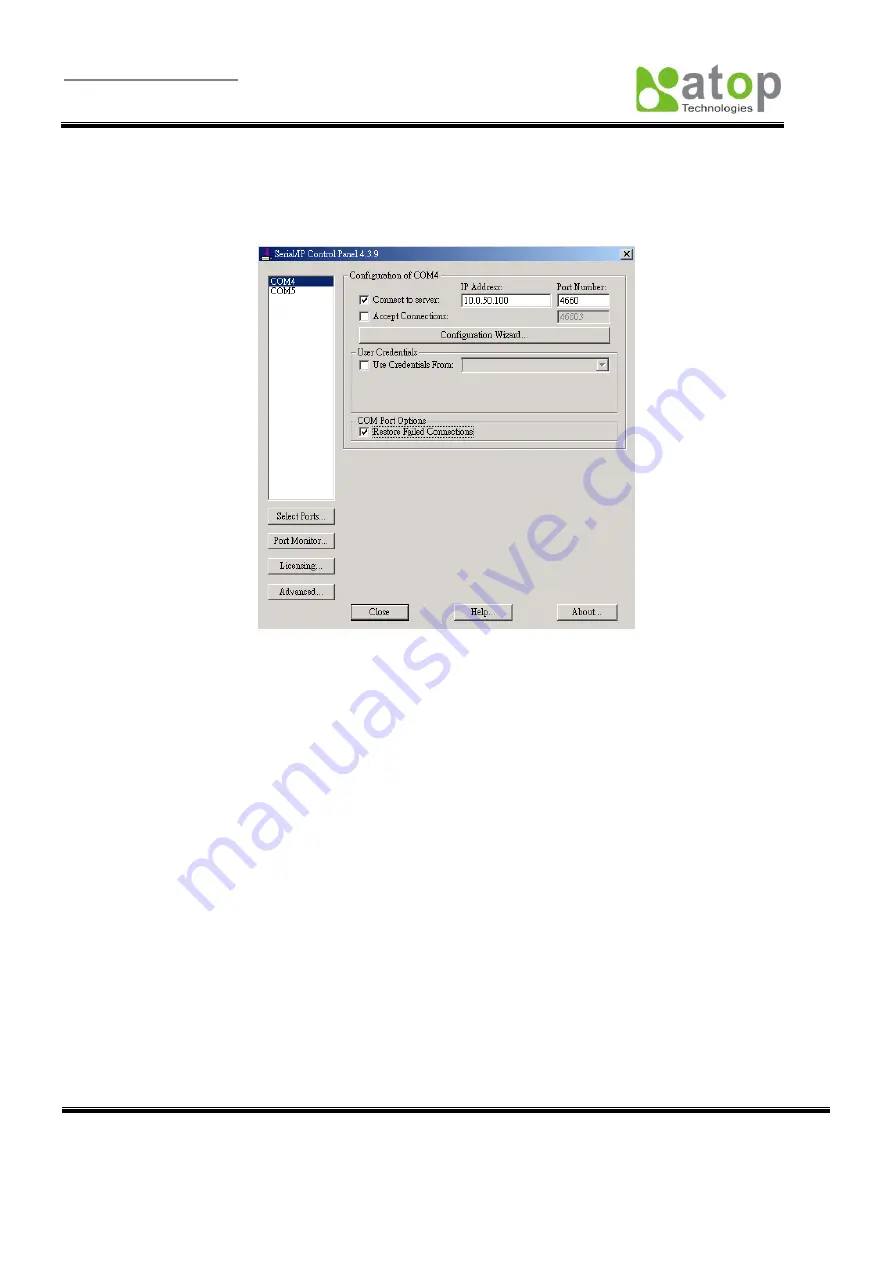
windows pop-up, please select the serial port you want to configure. Then the configuration window will appear.
(ref Figure 4.4)
Figure 4.4 Serial/IP configuration
At the right side of Figure 4.4 is a sample
Virtual COM
Control Panel window. At the left side is the list of the COM
ports that you have selected (in the
Select Ports
window) for use by the
Virtual COM
Redirector. If you wish to
change which ports appear in this list, use the
Select Ports
button.
Each COM port has its own settings. When you click on a COM port, the Control Panel display changes to reflect
the settings for that COM port.
NOTE:
When you change settings for a COM port, the changes are effective immediately. There is no separate
confirmation dialog to confirm or cancel your changes.
4.3 Configuring Virtual COM Ports
You configure each Serial/IP COM port as follows: (ref Figure 30)
1. Select a COM port in the list.
2. For
IP Address of Server
, enter a numeric IP address for the serial server.
3. For
Port Number
, enter the TCP port number that the serial server uses to provide its serial ports to the
network.
4. For
Server Credentials
, the default is
No Login Required
. If your serial server does require a login by
the Virtual COM Redirector, the Virtual COM Redirector needs to provide a username and/or password
every time an application tries to use the serial server.
5. Click the
Configuration Wizard
button and then click the
Start
button that appears in the wizard window.
This important step verifies that the Virtual COM Redirector can communicate with the serial server using


