Software Description
5-16
T8xC5121 Starter Kit User Guide
4186E–SCR–05/04
3.
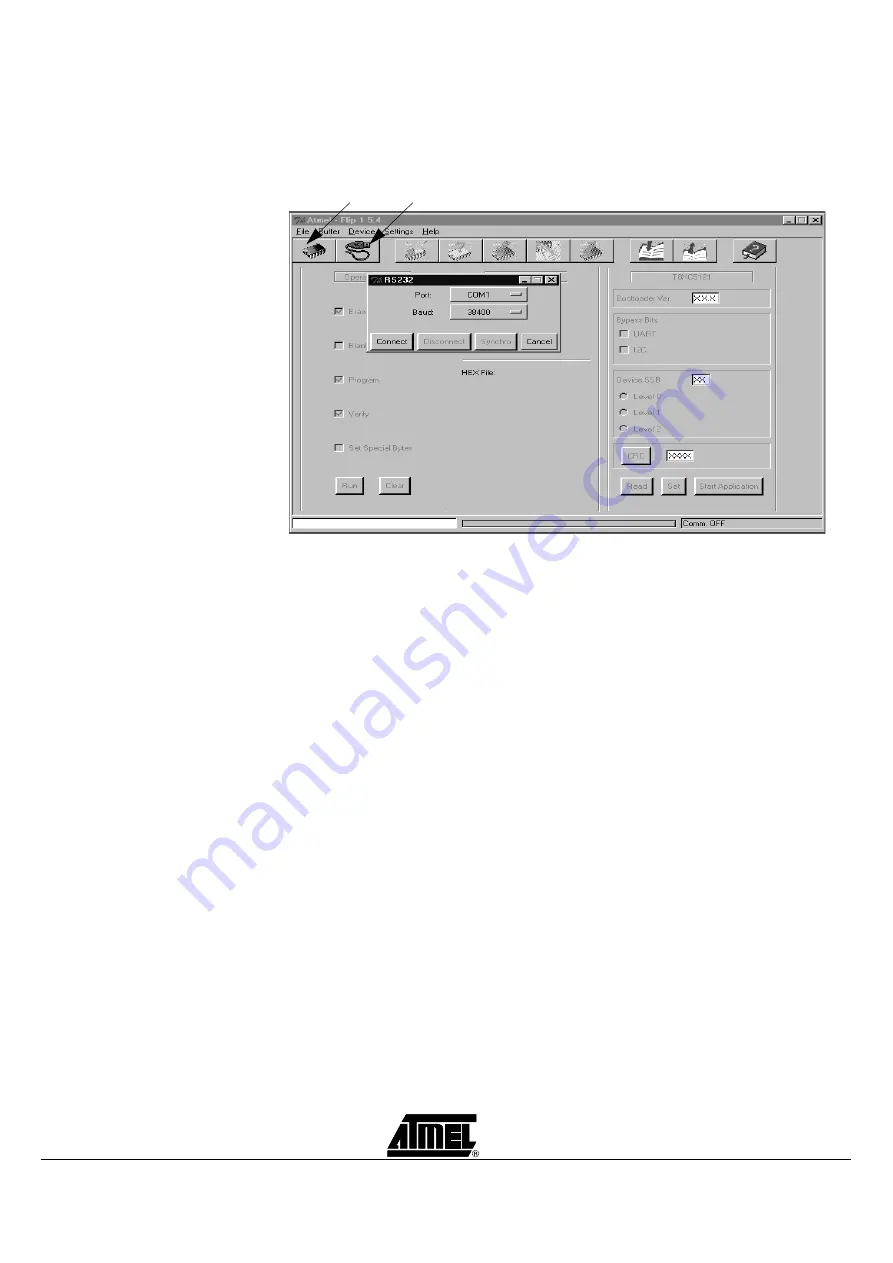
Click the ‘Set Communication’ button and indicate the COM port settings and
Baud Rate. The autobaud feature of the boot loader will configure the device
according to the baud rate.
4.
Initialize the communication by selecting the “Connect” button in RS232 pop-up
window.
5.
Reset the demonstration board (SW2 push button) see Figure 3-1.
The “Rs232 Communication Synchronized” message is displayed at the bottom
of the FLIP status window.
6.
Load the HEX file. This is the program that performs the demonstration data
exchange.
In the File menu select Load HEX and choose the demonstration program
‘Demo_CVCC5V.hex’ for 5V cards or ‘Demo_CVCC3V.hex’’ for 3V cards,
located in the directory:
– Starterkits\T89C5121-SK1\Software
Note:
The T8xC5121 card reader can adapt to 3V or 5V smart cards. Select the corre-
sponding demonstration software depending on your card.
The message ‘HEX file exchange.hex loading done’ is displayed at the bottom of the
FLIP window.
7.
Ensure the following check boxes are selected in the Operations Flow section of
FLIP:
- Erase
- Program
- Verify
These are the operations that will be performed on the microcontroller.
8.
Press the ‘Run’ button. Programming is executed.
The “Memory Verify Pass” message confirms programming is successful and
that the microcontroller has been programmed.
Set Communication
Device Selection


