AVR1921
8301A-AVR-04/10
4. Select the “Main” tab and choose the “AT90USB1287” from the dropdown list.
Choose “JTAG mode” as programming mode.
5. Select the “Program” tab and choose the USB bootloader hex file provided
with the application note as Flash input hex file
(/firmware/revision_XXX/AT90USB1287/ AT90USB1287.hex). Click Program.
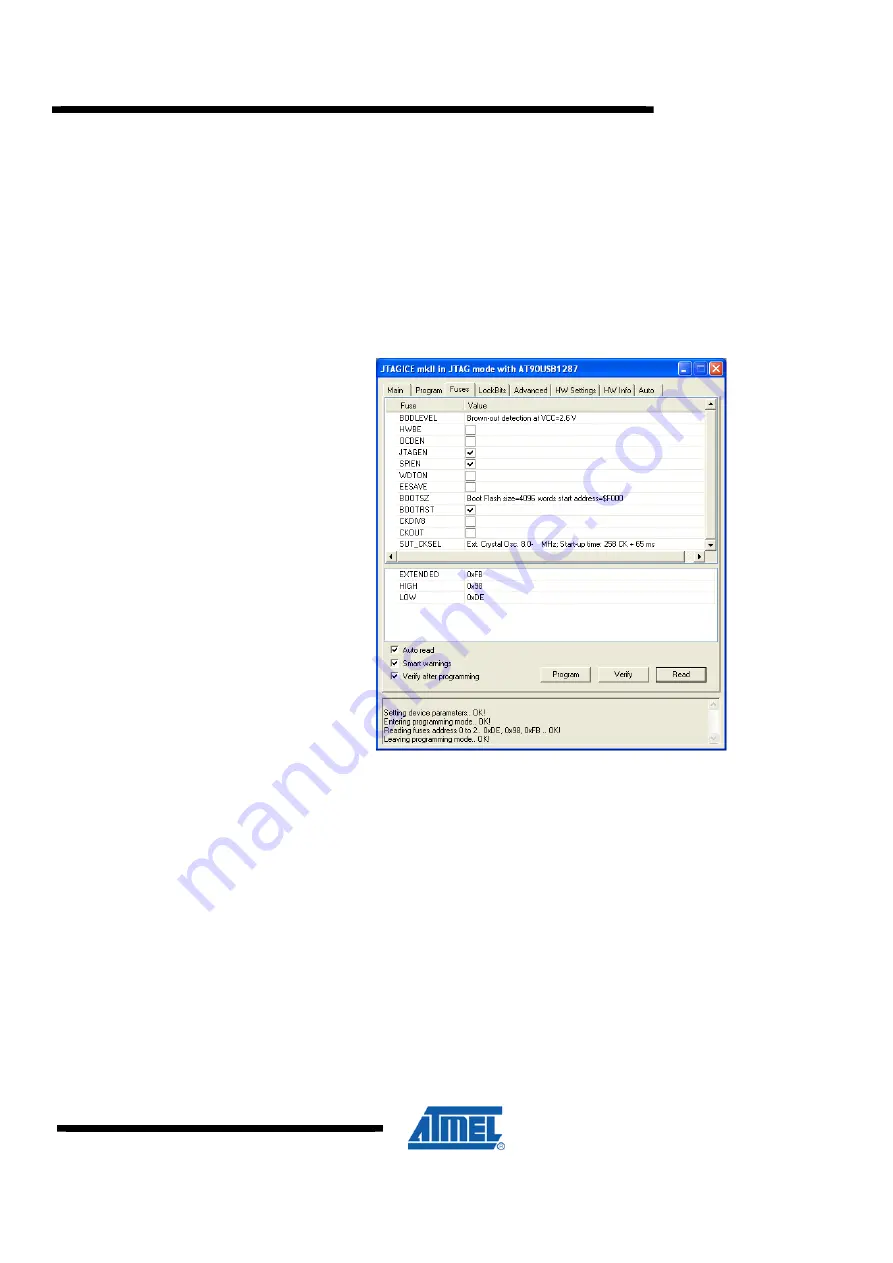
6. Select the “Fuses” tab in the programming dialog. The fuses should be set as
shown below. (Ext 0xFB, High 0x98, Low 0xDE)
Figure 2-2.
USB fuse settings
2.5 Reprogramming the AT90USB1287 application firmware using FLIP
This guide requires that both AVR Studio
®
and FLIP are installed. It is a walkthrough
which describes how to download the USB application firmware. To use FLIP as a
stand alone application, please refer to the application note: “AVR282: USB Firmware
Upgrade for AT90USB”
.
1. Disconnect the USB power source.
2. Unplug the JTAGICE mkII and place a jumper between pins 1 and 2 on the
“JTAG USB” pin header (J200).
3. Connect the USB cable to a computer.
4. The first time this is done, the bootloader driver will have to be installed. A
“Found new hardware wizard” will pop up. Select “No, not this time” and next
as shown bellow.


