www.atlona.com | toll free:
1-877-536-3976
For International: 1-
408-962-0515
7
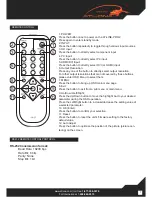
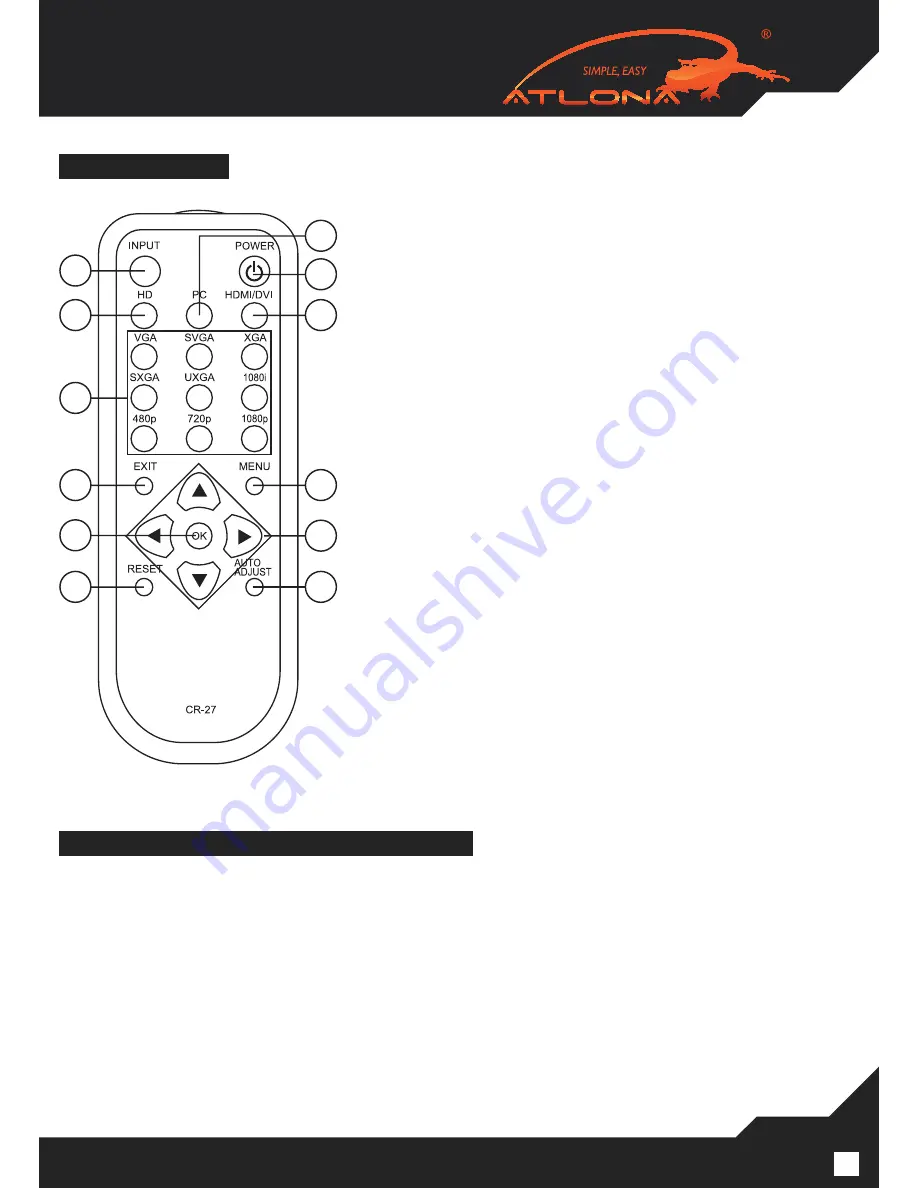
REMOTE CONTROL
1. POWER:
Press the button once to power on the AT-LINE-PRO2.
Press again to enter standby mode.
2. INPUT:
Press the button repeatedly to toggle through various input sources.
3. HD Input:
Press the button to directly select component input.
4. PC Input:
Press the button to directly select PC input.
5. HDMI/DVI Input:
Press the button to directly select DVI (or HDMI) input.
6. Output Resolution:
Press any one of the button to directly select output resolution.
For other output resolutions that are not covered by these buttons
please enter OSD Menu to select them.
7. MENU:
Press the button to bring up OSD main menu page.
8. Exit:
Press the button to exit from a sub menu or main menu.
9. Up/Down/Left/Right:
Press the Up/Down button to move the highlight bar to your desired
parameter during the OSD operation.
Press the Left/Right button to increase/decrease the setting value of
a selected parameter.
10. OK (Enter):
Press the button to confirm your selection.
11. Reset:
Press the button to reset the unit’s firmware setting to the factory
default value.
12. Auto Adjust:
Press the button to optimize the position of the picture (picture cen-
tering) on the screen.
2
3
6
8
10
11
1
5
4
7
9
12
RS232 REMOTE CONTROL PROTOCOL
RS-232 transmission format:
Baud Rate: 19200 bps
Data Bit: 8 bits
Parity: None
Stop Bit: 1 bit


