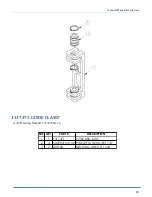
Technical Manual & Parts Lists
5
Important Notices
Reporting and Fighting Fires
Read the instructions posted in the factory with regard to reporting fires and the emergency exits. Make
sure you know exactly where the fire extinguishers and sprinkler systems are located and how they are
operated. Pass on the corresponding information to the firemen when they arrive. Ensure there are
enough signs to avoid fire hazards.
The following fire extinguishers may be used:
- Dry powder extinguishers, ABC fire-extinguishing powder.
- Carbon dioxide fire extinguishers to DIN 14461 for electronic components. Great care must be
exercised when using carbon dioxide fire extinguishers in confined, badly ventilated rooms (see DIN
14406 and 14270).
Isolate the machine from the power supply if a fire breaks out. Do not use water on burning electrical
parts until it is absolutely certain that they have been completely disconnected from the power supply.
Burning oils, lubricants, plastics and coatings on the machine can give off gases and vapors that may be
harmful to your health.
A qualified person should be consulted to repair the damage after a fire.
Electrical Power Supply
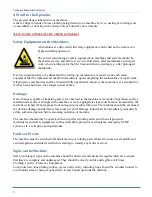
Before undertaking any maintenance or repair work on the machine, switch off the
electrical power to the machine at the main source and secure it with a padlock so
that it cannot be switched on again without authorization.
In practice, this may mean that the technician, electrician and operator all attach
their own padlock to the master switch simultaneously so that they can carry out
their work safely. Locking extension plates should be available for multiple locks if
required. The primary purpose for a lockout/tagout procedure is to protect workers
from injury caused by unexpected energizing or start-up of equipment.
Energy sources (electrical/pneumatic/hydraulic, etc.) for the equipment shall be turned off or
disconnected and the switches locked or labeled with a warning tag. It is the responsibility of the
employer to establish control procedures. Follow lockout/tagout procedures before, setup and/or any
service or maintenance work is performed, including lubrication, cleaning or clearance of jams.
Caution: The machine is still not completely de-energized even when the master
switch is off.
- Electricity - The machine is always isolated from the electrical power supply whenever the master
switch has been switched off. However, this does not apply for the power supply in the control cabinet,
nor for equipment that does not draw its power via the master switch.
- Pneumatic / hydraulic energy - Almost all our machines carry compressed air. In addition to switching
off the master switch, the air supply must also be disconnected and the machine checked to ensure it is
depressurized before starting any work on the machine; otherwise the machine may execute
uncontrolled movements.
Summary of Contents for 1317A
Page 2: ...Technical Manual Parts Lists 1 ...
Page 28: ...Technical Manual Parts Lists 23 ...
Page 30: ...Technical Manual Parts Lists 25 ...
Page 32: ...Technical Manual Parts Lists 27 ...
Page 34: ...Technical Manual Parts Lists 29 ...
Page 36: ...Technical Manual Parts Lists 31 ...
Page 39: ...Technical Manual Parts Lists 34 ...
Page 40: ...Technical Manual Parts Lists 35 ...
Page 42: ...Technical Manual Parts Lists 37 ...
Page 44: ...Technical Manual Parts Lists 39 ...
Page 48: ...Technical Manual Parts Lists 43 ...
Page 50: ...Technical Manual Parts Lists 45 ...
Page 51: ...Technical Manual Parts Lists 46 1318112 1 CONTROL PANEL AAC Drawing Number 1318112 Rev 2 ...
Page 52: ...Technical Manual Parts Lists 47 ...
Page 55: ...Technical Manual Parts Lists 50 ...
Page 56: ...Technical Manual Parts Lists 51 ...
Page 60: ...Technical Manual Parts Lists 55 ...
Page 63: ...Technical Manual Parts Lists 58 ...
Page 64: ...Technical Manual Parts Lists 59 ...
Page 71: ...Technical Manual Parts Lists 66 ...
Page 72: ...Technical Manual Parts Lists 67 ...
Page 79: ...Technical Manual Parts Lists 74 ...
Page 81: ...Technical Manual Parts Lists 76 ...
Page 83: ...Technical Manual Parts Lists 78 ...
Page 85: ...Technical Manual Parts Lists 80 1318356 CONVEYOR SUB ASSY 2 AAC Drawing Number 1318356 Rev 0 ...
Page 88: ...Technical Manual Parts Lists 83 ...
Page 89: ...Technical Manual Parts Lists 84 ...
Page 92: ...Technical Manual Parts Lists 87 ...
Page 93: ...Technical Manual Parts Lists 88 ...
Page 98: ...Technical Manual Parts Lists 93 ...
Page 100: ...Technical Manual Parts Lists 95 ...
Page 102: ...Technical Manual Parts Lists 97 ...
Page 104: ...Technical Manual Parts Lists 99 1317A PSM PROGRAM SETTINGS MAP ...
Page 105: ...Technical Manual Parts Lists 100 1317A WD WIRNG DIAGRAM CNTRL PNL ...
Page 106: ...Technical Manual Parts Lists 101 1317A PD PNEUMATIC DIAGRAM 1317A ...
Page 107: ...Technical Manual Parts Lists 102 ...


