background image


User’s Guide


21


5.3 Usi ng <Fun> Button 

Press <Fun> button and other buttons simultaneously can activate functions as below:   


Fun + button 

Descriptions 

<1> 

Enable  you t o canc el th e se lected co mmand  or th e pro grams  operating  or 

state.(ESC) 

<Up>, <Down> 

Enable you to increase or decrease the sound. 

<3>,<5>, <4>, <9> 

Enable you to perform page Up or page Down and HOME 

<6> 

Enable you to delete a letter which located after the cursor.(DEL) 

<7>, <2> 

Enable it has Tab button function and Space button function. 

<*>,<0>,<#>, <8> 

Enable you to input <+> <000> <–> symbols. 


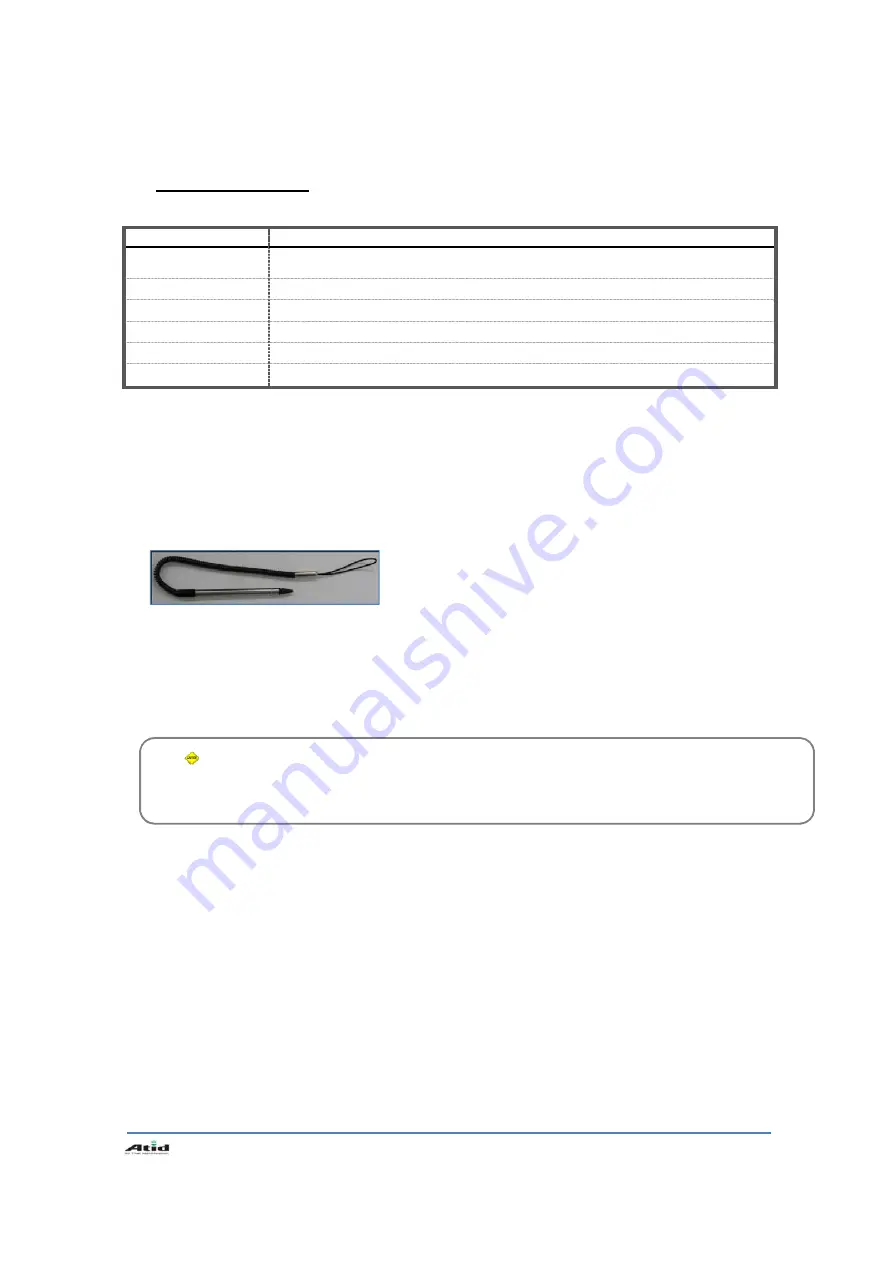
6. Using stylus


You can tie the stylus to the hand strap hole, so that enable you to use the stylus as like a mouse on 

a PC 


Caution: 

Please do not use sharp objects on the touch screen. Use only supplied stylus, otherwise would 
bring seriously damage to the touch screen.   

Use Stylus to: 

Select a letter on the soft keypad. 

Select a program on the desktop or 
taskbar. 

Select button, zone or tab bar in a 
window box or program.   

Summary of Contents for AT280

Page 1: ...ATID Co Ltd Product User s Guide Model AT280 Ver 2 0 ...

Page 2: ...rence to radio or television reception which can be determined by turning the equipment off and on the user is encouraged to try to correct the interference by one of the following measures Reorient or relocate the receiving antenna Increase the separation between the equipment and receiver Connect the equipment into an outlet on a circuit different from that to which the receiver is con nected Co...

Page 3: ...Settings 17 4 1 Setting Brightness 17 4 2 Screen Calibration 17 4 3 Setting Volume and Sounds 18 4 4 Setting Data and Time 18 5 Using keypad 20 5 1 Using keypad 20 5 2 Inputting Data 20 5 3 Using Fun Button 21 6 Using stylus 21 7 Using ActiveSync Program 22 7 1 Installing Microsoft ActiveSync Program 22 7 2 Connecting PC to PDA 23 7 3 Transmitting Data 24 8 Firmware Upgrade 26 Chapter4 Optional Mo...

Page 4: ...User s Guide 4 3 3 Bixolon SPP R200 Printer Demo 42 Chaptor5 Appendix 44 Specification with AT280 44 ...

Page 5: ...g the Si303 Si203 AT880 AT280 PDA Read and follow all warnings and cautions in this document before you handle and operate ATID equipment Safety Information Read a nd fo llow all warnings an d c autions in t his m anual before y ou h andle a nd op erate ATID equipment If you do not follow the safety warnings and cautions you might be seriously injured and the equipment and data are also might be d...

Page 6: ...ctory 2 Caution when using ATID PDA Product User car eless or pr oducts r epair ma y w ould d amage th e store d d ata Ma nufacture is n ot responsible for this damage so important data should be kept separately If your AT280 has problem do not try to repair or disassemble the product arbitrarily please contact customer service center Do n ot use y our AT280 where ha ve ele ctromagnetic wave or th...

Page 7: ...s various function applied to Industry Enterprise Logistics and so on can be used extensively in many fields 1 Package components After opening the product packaging box check the items listed as below M ODEL AT280 If there is missing or defective products on the above please contact the customer support center or your place of purchase 1 AT280 Body 2 Adaptor and AC Cable 3 Main Battery 4 USB Sync...

Page 8: ...0 1D 2D Scanner Window Touch Screen Volume Buttons Battery Latch Main Battery Speaker UHF Connecting Port Hand Strap Hole Function Button Ear Jack Microphone Sync Cradle Connector Adaptor Connecting Jack Reset Button Keypad Power LED WLAN BlueTooth LED ...

Page 9: ...usly to adjusting volume Function Buttons Enable you to scan Barcode and RFID Tag Speaker Build in speaker which could emit various sound effects Sync Cable Connector Enable you to connect and send data to PC via USB sync cable Ear Jack Enable you to connect to earphone Power LED Power LED will be Red when the battery is charging or will be green when it is charged completely Adaptor Connecting Ja...

Page 10: ...necting adaptor to the PDA adaptor connecting jack and check if the Power LED is Red and then charging the power completely until it get into Green 1 1 Power On and Off All Products are common Press Po wer b utton one time the de vice w ill e nter low Power mo de Sl eep M ode u nder t he system is started and the following window is displayed on the desktop or other programs is running in the syst...

Page 11: ...scharging If the main battery discharge completely the system will not turned on the device will get into low power mode sleep mode automatically and even press the Power button the system will not be turned on In this case you should charge the main battery or connect the adaptor to the adaptor connecting jack of main body then press the Power button to turn on the system Power Icon You can also ...

Page 12: ... to get charged completely Checking Battery Gauge Start Button Setting Control Panel Power Management Battery Low Power Warning If the remaining battery gauge cannot support the system running any more a low power warning message window will be popped up on the screen In this case you need to press the Power button to turn off the power and to charge the battery as soon as possible ...

Page 13: ... if the battery damaged or reached its end of life Warning Please dispose the used batteries in a designated place Caution If the main battery and the backup battery are both discharged the RAM date will disappear Among the running programs the RAM data will disappear in which are using and the system will not be restore to previous state but rebooting system after start charging ...

Page 14: ...l appear in about ten seconds User s changed registry information copied files and Installed programs will be restored 2 2 Ha rd Reset When do you need to perform Hard Reset Hard Reset which is a lso called Cold Rese t ena bles t o initiali ze har dware completely User s installed programs copied files and registry values will keep remained even Si303 performed Hard Reset but the real time a nd da...

Page 15: ...y an d t hen pr ess Reset button to perform Hard Reset Boot Menu window would appear in a couple of seconds Warning Except for Clean System please do not use other functions The system might be work not properly if you use other functions on the Boot Menu Boot Menu 0 Firmware Upgrade 1 Clean Without Flash 2 Clean With Flash 3 Exit Menu Select Enter NO Boot Menu WARNNING Your Information Will be er...

Page 16: ...mage as below is battery compartment of AT280 and there are 1EA SIM Card Slot 1EA SAM Card Slot Option and 1EA Micro SD Card Slot You can find the Micro SD Memory Card icon when executing the file explorer after the Micro SD 1 Micro SD Card Slot ...

Page 17: ... 2 Sc reen Calibration At first beginning of using the device after purchasing or need to use the device for a long period time if you cannot select the place where you touched with stylus you need to reset the coordinate calibration values Touch screen calibration Start Button Setting Control Panel Stylus Calibration Recalibration Press and hold stylus pen briefly on the center of cross symbol an...

Page 18: ... readjust you need volume at control panel Volume and Sounds Setting Volume and Sounds Start Button Setting Control Panel Volume and Sounds 4 4 Setting Data and Time Start Button Setting Control Panel Date and Time Setting Year Double Click the year and click the up and down arrow button to set year ...

Page 19: ...ck L R arrow button to set Month Setting Day Click the day directly to set day Setting Time Click AM PM Time area directly using up and down arrow button to set Time Setting Time Zone Click up and down arrow direction to select time zone and click apply button ...

Page 20: ... change to the numeric mode and directly press number on the keypad Alphabet Keypad Mode Press ALP button or keypad icon on the taskbar to change to the Lowercase or Uppercase and directly press alphabets or special symbols on the keypad Each button has 2 3 letters or symbols Press the button once the first letter or symbol will be inputted press twice continuously then the second letter or symbol...

Page 21: ...delete a letter which located after the cursor DEL 7 2 Enable it has Tab button function and Space button function 0 8 Enable you to input 000 symbols 6 Using stylus You can tie the stylus to the hand strap hole so that enable you to use the stylus as like a mouse on a PC Caution Please do not use sharp objects on the touch screen Use only supplied stylus otherwise would bring seriously damage to ...

Page 22: ...oad the latest version of ActiveSync program from Microsoft Windows CE Website and install it to your PC ActiveSync Windows XP Download Address http www microsoft com downloads Caution You must use ActiveSync v3 7 version or above Click Next Button Designate installation folder then click Next button The installation was finished and then uses the USB cable to connect to the USB port on the comput...

Page 23: ...PC to PDA Setting PC Start button Programs Microsoft ActiveSync Executing Microsoft ActiveSync program Click File Click Get Connected Select Allow USB connection with this desktop computer press OK button ActiveSync connected to PDA ...

Page 24: ... Connect USB cable to PC or Device Windows XP Double click PC Connection icon To check if set to connected to USB Sync cable You can check the ActiveSync connecting state on the taskbar 현재 이 이미지를 표시할 수 없습니다 현재 이 이미지를 표시할 수 없습니다 Connecting state Disconnecting state Start button Programs Microsoft ActiveSync ...

Page 25: ...User s Guide 25 After ActiveSync connected click Explore button Designate transmitting file path Transmit files ...

Page 26: ...User s Guide 26 8 Firmware Upgrade Start Button Setting Control Panel Firmware Upgrade ...

Page 27: ...T280 provided variety of optional modules and in this chapter will provide you the information of each module Optional modules as below 1 B arcode Scanner 1D Laser Barcode Scanner 2D Imager Barcode Scanner 2 Wireless LAN 802 11 b g 3 B luetooth ...

Page 28: ...ning Barcode 1 2 Setting Barcode Emulator Barcode Emulator program enables you to set the barcode value input type scan button scan sound on and off so on and could input the scan values to any program such Web program WordPad program so on where located the cursor Start Button Programs Demo Apps Scanner BarcodeDemo Press Scan Buttons to Read Barcode ...

Page 29: ...r BarcodeEmulator Run Barcode Emulator Program Barcode Emulator Icon will be showed on the taskbar Run WordPad Program then click the Emulator Icon Result Type Keyboard Event Barcode inputted one by one Copy Paste Barcode will be stored be stored in clipboard and shown at paste way ...

Page 30: ...l include an Enter Space Barcode value will include a Space Tab Inputting type as same as Tab Key Function Key Setup F1 F8 Key Hardware Keypad Gun1 Gun2 Gun Trigger Sound Set sound ON OFF after scanned barcode Vibrator Set vibrator ON OFF after scanned barcode Close Exit Emulator Program ...

Page 31: ...the various barcode by using barcode symbologies program Start Button Program Demo Apps Scanner BarcodeSetup Click Set Enable Status button Make a check mark on the barcode which you want to use and then click SET button Run BarcodeSetup Program Set Barcode Type in detail ...

Page 32: ...ading range 2D Symbology Selection 1 Initialize all the symbologies to factory default value 2 Unable to read all the symbologies 3 Enable to read all the symbologies 1 2 3 Warning Please do not look directly into the laser beam of barcode or it may do harm to your vision 1D Symbology selection 1 Initialize all the symbologies to factory default value 2 Unable to read all the symbologies 3 Enable ...

Page 33: ...ning rang of Si303 is from 40 300mm if failed to scan barcode please try to adjust scan angle and distance 2 The laser beam is a red thick line when scanning a barcode Incorrect Scanning Beam Position 1 The laser beam must across the barcode 2 It will couldn t scan barcode if the laser beam across only a fraction of barcode 1D 2D 1D 2D ...

Page 34: ...T280 supports TCP IP network protocol and communicate with a host computer directly 2 1 Connecting to Wlan Start Button Program Demo Apps Wireless Lan 2 2 Setting Wlan Manually Run the Wireless LAN program Select WLAN ON and then click Ok button Double click a suitable device from the list of AP Input Key Password and then click OK button ...

Page 35: ...on the taskbar to check Wlan information Start Button Programs ATID App Wireless Lan and then select WLAN OFF to stop Wlan communication Note The Wlan LED will changed to green and the Wlan icon on the taskbar will be lighted on if failed the Wlan icon will be light off ...

Page 36: ... described how to Pairing and Disconnecting between PDA and Bluetooth devices and also described basic testing method of Mobile Printer SPR R203 which launched by Bixolon as a sample device 3 1 Bluetooth Beginning and Closing AT280 is us ing S tack o f Windows b asically on ly co uld c ontrol th e p ower of Bluetooth M odule s ON OFF 1 Blueto oth Function Beginning A Executing the Bluetooth demo p...

Page 37: ...etooth ON item then press OK button C After Bluetooth executed the Bluetooth BTPAN1 icon will be appeared on the bottom of Windows Taskbar and the red cross mark on it shows that you access is available and prepared to be accessed ...

Page 38: ...User s Guide 38 2 Blueto oth Function Closing A Executing Bluetooth demo App from Windows CE Menu B Select Bluetooth OFF then to press OK button to off the Bluetooth power ...

Page 39: ...g each o ther throu gh pairing way Bluetooth d evices cou ld do its function properly 1 Executing Bluetooth program as below path Start Settings Control Panel Bluetooth Device Properties 2 Press Scan Device button to searching devices which could pairing ...

Page 40: ...es continually According to the devices need some devices have to input Pin Code password firstly SPP R200 printer factory setting Pin Code is 0000 4 The devices which can connect will be listed after finished searching If c annot find your need device please press Scan Device button to sea rching your device again ...

Page 41: ...rusted Tab to ad d the device to the pairing items then click Yes button to ending the Bluetooth Manager You can set the Password Authentication code according to the each device The Red Cross mark X on the Key icon will disappear if finished to registration ...

Page 42: ...rding to the Bixolon policy 1 Download SPP R200 Windows SDK from the Bixolon homepage www bixolon com to a suitable directory and unzip the file 2 Bluetooth Power ON 3 Executing Bluetooth Device Properties programs which located in Control Panel 4 SPP R200 printer power ON 5 Setting the SPP R200 printer to be in the status of pairing Please refer to the User Guide of SPP R200 Printer 6 Press Scan ...

Page 43: ...User s Guide 43 11 Change the COM8 to COM2 then press Open button to testing printer ...

Page 44: ...Backlight TFT LCD 240 320 Pixels 262 144 Color Stylus Touch Screen Interface Audio Phone Receiver Earphone Jack Communication Port RS 232Serial Port USB 1 1 Expansion Slot 1 Micro SD Slot SDHC Support Keypad 25ke y Notification Vibrator and LED Power Supply Main Battery Lithium ion 3 7V Above 3 000mAH rechargeable Up to 4 400mAH Option Backup Battery Lithium Polymer 3 7V 100mAH rechargeable Adapto...

Reviews: