BCLK Frequency [Auto]
This item allows you to set the BCLK (base clock) frequency to enhance the system
performance. Use the <+> or <‑> to adjust the value. The values range from 80.0 MHz to
300.0 MHz.
We recommend you to set the value based on the CPU specification, as high BCLK
frequencies may damage the CPU permanently.
Initial BCLK Frequency [Auto]
This item allows you to start overclocking the system from the initial BCLK (base clock)
frequency to the assigned BCLK frequency. Use the <+> or <‑> to adjust the value. The value
ranges depend on the value you set on BCLK Frequency.
2.5.2
ASUS MultiCore Enhancement [Auto]
[Auto]
This item allows you to maximize the oveclocking performance optimized
by ASUS core ratio settings.
[Disabled]
This item allows you to set to default core ratio settings.
2.5.3
CPU Core Ratio [Auto]
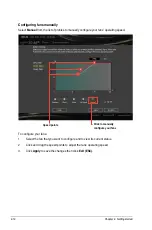
This item allows you to set the CPU core ratio limit per core or synchronize automatically to
all cores. Configuration options: [Auto] [Sync All Cores] [Per Core]
When the CPU Core Ratio is set to [
Sync All Cores
] or
[Per Core]
, the following items
appear:
1-Core Ratio Limit [Auto]
Select
[Auto]
to apply the CPU default Turbo Ratio setting or manually assign a 1‑Core Limit
value that must be higher than or equal to the 2‑Core Ratio Limit.
2-Core Ratio Limit [Auto]
Select
[Auto]
to apply the CPU default Turbo Ratio setting or manually assign a 2‑Core Limit
value that must be higher than or equal to the 3‑Core Ratio Limit.
If you assign a value for 2‑Core Ratio Limit, do not set the 1‑Core Ratio Limit to
[Auto]
.
3-Core Ratio Limit [Auto]
Select
[Auto]
to apply the CPU default Turbo Ratio setting or manually assign a 3‑Core Limit
value that must be higher than or equal to the 4‑Core Ratio Limit.
If you assign a value for 3‑Core Ratio Limit, do not set the 1‑Core Ratio Limit and 2‑Core
Ratio Limit to
[Auto]
.
4-Core Ratio Limit [Auto]
Select
[Auto]
to apply the CPU default Turbo Ratio setting or manually assign a 4‑Core Limit
value that must be higher than or equal to the 3‑Core Ratio Limit.
2-20
Chapter 2: Getting started

