background image

7

3. 

Writing the OS image

You may write your downloaded OS image to a microSD card or built-in eMMC using 

Etcher

 (supports Windows

®

, Mac OS, and Linux), or 

dd command

 (Linux only).

eMMC is only supported on Tinker Board S.

3.1 

Using Etcher (Cross-platform)

Etcher

 is an image file utility used for burning image files, and supports Windows

®

, Mac 

OS, and Linux. Etcher also supports burning images directly from the zip file, without 

having to unzip the zip file first. 

To write an image using Etcher:
1.  Insert a microSD card to a card reader connected to your PC,  

or  

connect your Tinker Board S to a PC via a micro USB cable. (Tinker Board S only)

Please refer to your Tinker Board product manual for the location of the microSD slot.

2. Download 

Etcher

 from http://etcher.io/, then launch it.

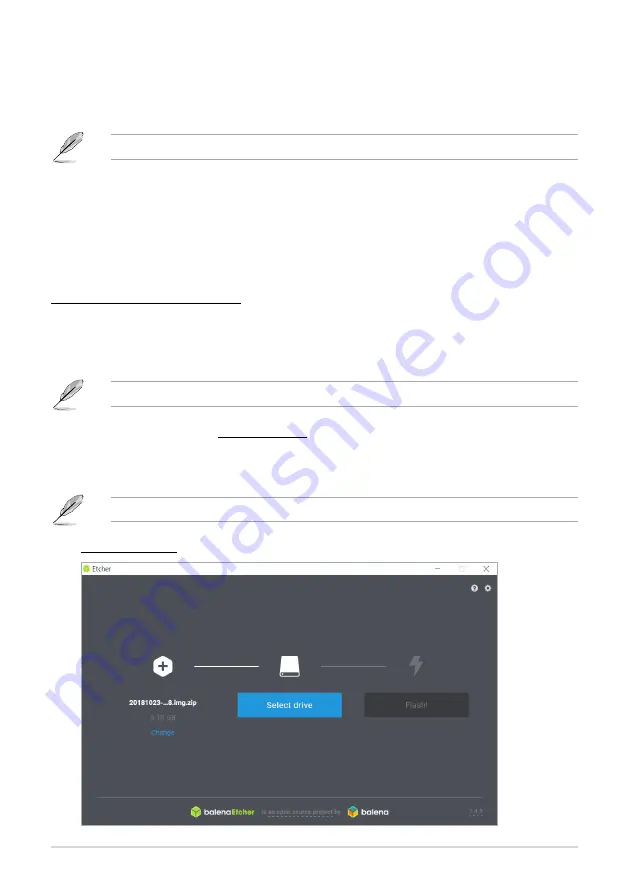
3.  Click on 

Select image

, then select the downloaded OS image. Please refer to the 

screenshots below for 

TinkerOS_Debian

 and 

Android

 OS examples:

The following screenshots are for reference only.


TinkerOS_Debian


Summary of Contents for Tinker Board Series

Page 1: ...Tinker Board Series User Manual ...

Page 2: ...respective companies and are used only for identification or explanation and to the owners benefit without intent to infringe Offer to Provide Source Code of Certain Software This product contains copyrighted software that is licensed under the General Public License GPL under the Lesser General Public License Version LGPL and or other Free Open Source Software Licenses Such software in this produ...

Page 3: ...er Board S only 5 2 2 Setting up using a microSD card 6 3 Writing the OS image 7 3 1 Using Etcher Cross platform 7 3 2 Using dd command Linux 9 4 OS Write Recovery Tinker Board S only 10 4 1 Rewriting the OS using UMS from eMMC 10 4 2 Rewriting the OS using UMS from a microSD card 10 ...

Page 4: ... task CAUTION Information to prevent damage to the components when trying to complete a task IMPORTANT Instructions that you MUST follow to complete a task NOTE Tips and additional information to help you complete a task Typography Bold text Indicates a menu or an item to select Italics Used to emphasize a word or a phrase Key Keys enclosed in the less than and greater than sign means that you mus...

Page 5: ...g the onboard eMMC Ensure to use the latest version of your downloaded OS to ensure the OS is supported by eMMC storage Ensure the eMMC s U Boot is functional and contains a built in UMS function 1 Connect your Tinker Board S to a PC using a Micro USB cable then wait for the PC to recognize the device DO NOT format the device while your Tinker Board S is connected to your PC If your PC doesn t rec...

Page 6: ...ge section of this manual for more information on writing the OS image Etcher is supported on Windows Mac and Linux Please refer to http etcher io for more information on Etcher Please refer to http sourceforge net for more information on Win32DiskImager 2 Insert the microSD card to your Tinker Board Please refer to your Tinker Board product manual for the location of the microSD slot 3 Connect yo...

Page 7: ...ctly from the zip file without having to unzip the zip file first To write an image using Etcher 1 Insert a microSD card to a card reader connected to your PC or connect your Tinker Board S to a PC via a micro USB cable Tinker Board S only Please refer to your Tinker Board product manual for the location of the microSD slot 2 Download Etcher from http etcher io then launch it 3 Click on Select ima...

Page 8: ...8 Android If a message pops up when booting an Android image click on Continue 4 Click on Select drive then select your connected device 5 Click on Flash to start the burning process ...

Page 9: ... of the microSD slot 2 Run the following command dd bs 4M if path to tinkeros img of dev sdx Replace dev sdx with your drive e g dev sdc Do not append a partition number to your drive name for example dev sdc1 Use the lsblk command to find the drive name of your device Make sure that no partition of the device is mounted 3 Only remove the microSD card or disconnect the Tinker Board S from the PC o...

Page 10: ... information on writing the OS image 4 2 Rewriting the OS using UMS from a microSD card When there is a problem booting from the eMMC s U Boot or if you are using a third party custom OS image which does not have a built in UMS function you may follow the steps below to trigger the UMS mode from a microSD card 1 Download a Tinker Board supported operating system image such as the Official ASUS Tin...

Page 11: ...e Tinker Board S using a third party ISO software such as Etcher or Win32DiskImager Please refer to the Using Etcher Cross platform section for more information on using Etcher 8 After the image has been successfully written remove the micro USB cable from the PC 9 Set the jumper to Parking no function Mode 10 Plug in the AC adapter to your Tinker Board S and boot it up It should boot up successfu...

Page 12: ......

Reviews: