2-36
Chapter 2: Hardware information
Chapter 2
2.3.10
Rear panel connection
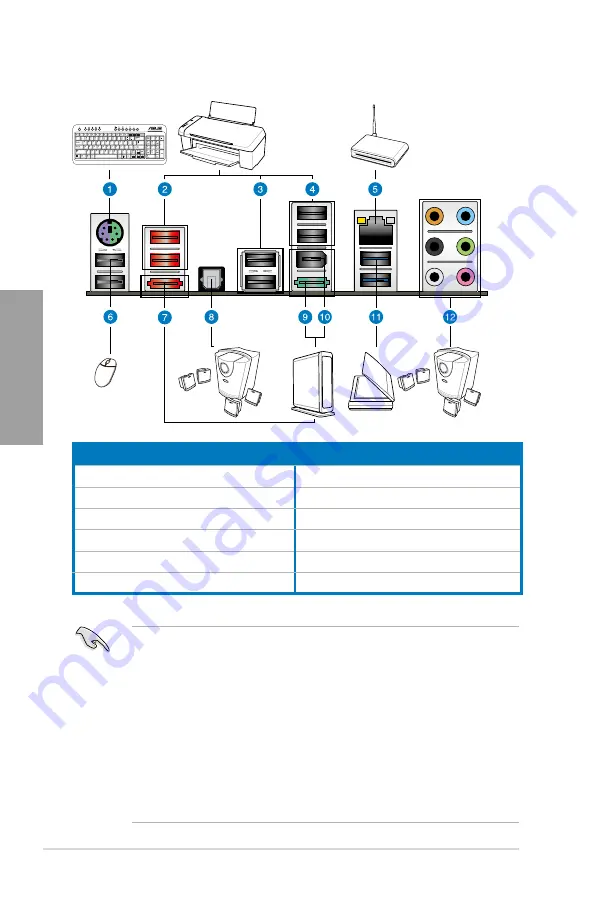
Rear panel connectors
1. PS/2 keyboard/mouse combo port
7. External SATA port
2. USB 2.0 ports 5 and 6
8. Optical S/PDIF Out port
3. USB 2.0 ports 3 and 4
9. Power External SATA port
4. USB 2.0 ports 1 and 2
10. IEEE 1394a port
5. LAN (RJ-45) port*
11. USB 3.0 ports 1 and 2
6. USB 2.0 ports 7 and 8
12. Audio I/O ports**
* and **: Refer to the tables on the next page for LAN port LED and audio port definitions.
•
DO NOT insert a different connector to the external SATA port.
•
DO NOT connect a keyboard/mouse to any USB 3.0 port when installing Windows
®
operating system.
•
Due to USB 3.0 controller limitation, USB 3.0 devices can only be used under
Windows
®
OS environment and after the USB 3.0 driver installation.
•
USB 3.0 devices can only be used as data storage only.
•
We strongly recommend that you connect USB 3.0 devices to USB 3.0 ports for faster
and better performance for your USB 3.0 devices.
•
If you want to use the hot-plug function of the external SATA ports, you have to set the
JMB Storage Controller
item in the BIOS setting to [Enabled] and install the
JMicron
JMB36X Controller Driver
from the motherboard support DVD. Refer to section
3.5.6
Onboard Devices Configuration for details.
Summary of Contents for SABERTOOTH P67
Page 1: ...Motherboard SABERTOOTH P67 ...
Page 18: ...1 6 Chapter 1 Product Introduction Chapter 1 ...
Page 44: ...2 26 Chapter 2 Hardware information Chapter 2 C B A 5 6 4 ...
Page 47: ...ASUS SABERTOOTH P67 2 29 Chapter 2 1 2 3 To remove a DIMM 2 3 4 DIMM installation B A ...
Page 50: ...2 32 Chapter 2 Hardware information Chapter 2 2 3 6 ATX Power connection 1 2 OR OR ...
Page 51: ...ASUS SABERTOOTH P67 2 33 Chapter 2 2 3 7 SATA device connection OR 2 OR 1 ...
Page 96: ...3 38 Chapter 3 BIOS setup Chapter 3 ...
Page 110: ...4 14 Chapter 4 Software support Chapter 4 ...
Page 118: ...5 8 Chapter 5 Multiple GPU technology support Chapter 5 ...


