ROG STRIX B660-G GAMING WIFI
2-7
Chapter 2
2.1.4
M.2 installation
Supported M.2 type varies per motherboard.
•
The illustrations only show the installation steps for a single M.2 slot, the steps are
the same for the other M.2 slots if you wish to install an M.2 to another M.2 slot.
•
Use a Phillips screwdriver when removing or installing the screws or screw stands
mentioned in this section.
•
If the thermal pad on the M.2 heatsink becomes damaged and needs to replaced, we
recommend replacing it with a thermal pad with a thickness of 1.25mm.
•
The M.2 is purchased separately.
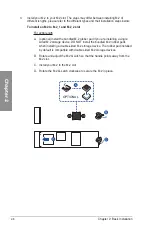
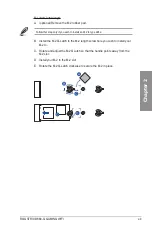
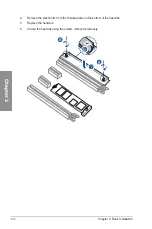
1.
Loosen the screws from the M.2 heatsink.
2.
Lift and remove the heatsink.
1
1
1
2
Summary of Contents for ROG STRIX B660-G GAMING WIFI
Page 1: ...Motherboard ROG STRIX B660 G GAMING WIFI ...
Page 12: ...xii ...
Page 34: ...1 22 Chapter 1 Product Introduction Chapter 1 ...
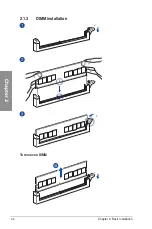
Page 40: ...2 6 Chapter 2 Basic Installation Chapter 2 2 1 3 DIMM installation To remove a DIMM ...
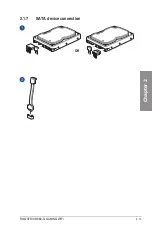
Page 47: ...ROG STRIX B660 G GAMING WIFI 2 13 Chapter 2 2 1 7 SATA device connection OR ...
Page 58: ...2 24 Chapter 2 Basic Installation Chapter 2 ...

