background image

5 - 2 7

5 - 2 7

5 - 2 7

5 - 2 7

5 - 2 7

A S U S   P u n d i t   P 2 - A E 2

A S U S   P u n d i t   P 2 - A E 2

A S U S   P u n d i t   P 2 - A E 2

A S U S   P u n d i t   P 2 - A E 2

A S U S   P u n d i t   P 2 - A E 2

CPU Temperature [xxxºC/xxxºF]

CPU Temperature [xxxºC/xxxºF]

CPU Temperature [xxxºC/xxxºF]

CPU Temperature [xxxºC/xxxºF]

CPU Temperature [xxxºC/xxxºF]
MB Temperature [xxxºC/xxxºF]

MB Temperature [xxxºC/xxxºF]

MB Temperature [xxxºC/xxxºF]

MB Temperature [xxxºC/xxxºF]

MB Temperature [xxxºC/xxxºF]

The onboard hardware monitor automatically detects and displays the
motherboard and CPU temperatures. Select [Disabled] if you do not wish to
display the detected temperatures.

Q-Fan Control [Enabled]

Q-Fan Control [Enabled]

Q-Fan Control [Enabled]

Q-Fan Control [Enabled]

Q-Fan Control [Enabled]

Allows you to enable or disable the ASUS Q-Fan feature that smartly
adjusts the fan speeds for more efficient system operation. Configuration
options: [Disabled] [Enabled]

CPU Target Temperature [xxºC]

CPU Target Temperature [xxºC]

CPU Target Temperature [xxºC]

CPU Target Temperature [xxºC]

CPU Target Temperature [xxºC]

Allows you to set the CPU temperature threshold when the CPU fan speed
is increased to lower the CPU temperature. The configuration options for
this item depend on the recommended Intel

®

 Fan Speed Control (FSC)

temperature settings. The Intel

®

  FSC provides target temperature options

at 15 ºC with 3 ºC interval.

CPU Fan Speed [xxxxRPM] or [N/A]

CPU Fan Speed [xxxxRPM] or [N/A]

CPU Fan Speed [xxxxRPM] or [N/A]

CPU Fan Speed [xxxxRPM] or [N/A]

CPU Fan Speed [xxxxRPM] or [N/A]

The onboard hardware monitor automatically detects and displays the CPU
fan speed in rotations per minute (RPM). If the fan is not connected to the
motherboard, the field shows N/A.

Chassis Fan Speed [xxxxRPM] or [N/A]

Chassis Fan Speed [xxxxRPM] or [N/A]

Chassis Fan Speed [xxxxRPM] or [N/A]

Chassis Fan Speed [xxxxRPM] or [N/A]

Chassis Fan Speed [xxxxRPM] or [N/A]

The onboard hardware monitor automatically detects and displays the
chassis fan speed in rotations per minute (RPM). If the fan is not connected
to the motherboard, the field shows N/A.

VCORE Voltage, 3.3V Voltage, 5V Voltage, 12V Voltage

VCORE Voltage, 3.3V Voltage, 5V Voltage, 12V Voltage

VCORE Voltage, 3.3V Voltage, 5V Voltage, 12V Voltage

VCORE Voltage, 3.3V Voltage, 5V Voltage, 12V Voltage

VCORE Voltage, 3.3V Voltage, 5V Voltage, 12V Voltage

The onboard hardware monitor automatically detects the voltage output
through the onboard voltage regulators.

5.5.6

5.5.6

5.5.6

5.5.6

5.5.6

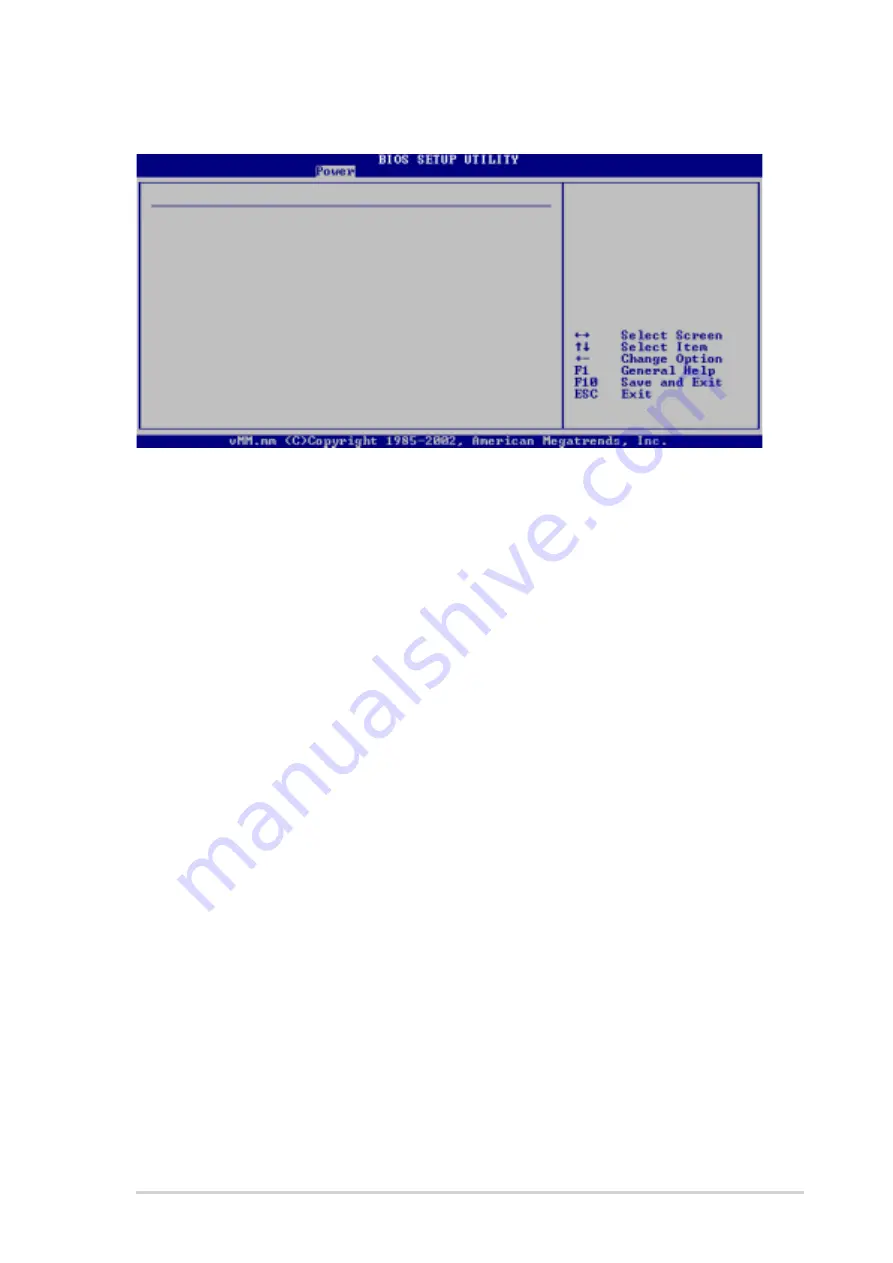
Hardware Monitor

Hardware Monitor

Hardware Monitor

Hardware Monitor

Hardware Monitor

Hardware Monitor

CPU Temperature

[32.5ºC/90.5ºF]

MB Temperature

[36.0ºC/96.5ºF]

Q-Fan Control

[Enabled]

CPU Target Temperature

[53ºC]

CPU Fan Speed

[1798RPM]

Chassis Fan Speed

[1534RPM]

VCORE Voltage

[ 1.320V]

3.3V Voltage

[ 3.345V]

5V Voltage

[ 5.094V]

12V Voltage

[11.880V]

Summary of Contents for PUNDIT P2-AE2

Page 1: ...Pundit P2 AE2 Barebone System ...

Page 2: ...S OR CONDITIONS OF MERCHANTABILITY OR FITNESS FOR A PARTICULAR PURPOSE IN NO EVENT SHALL ASUS ITS DIRECTORS OFFICERS EMPLOYEES OR AGENTS BE LIABLE FOR ANY INDIRECT SPECIAL INCIDENTAL OR CONSEQUENTIAL DAMAGES INCLUDING DAMAGES FOR LOSS OF PROFITS LOSS OF BUSINESS LOSS OF USE OR DATA INTERRUPTION OF BUSINESS AND THE LIKE EVEN IF ASUS HAS BEEN ADVISED OF THE POSSIBILITY OF SUCH DAMAGES ARISING FROM A...

Page 3: ... proceed 2 2 2 3 Removing the top cover 2 3 2 4 Installing a hard disk drive HDD 2 4 2 5 Installing a CPU 2 6 2 5 1 Removing the CPU fan and heatsink assembly 2 6 2 5 2 CPU installation 2 7 2 5 3 Reinstalling the CPU fan and heatsink assembly 2 8 2 6 Installing a DIMM 2 9 2 7 Replacing the top cover 2 10 2 8 Connecting the power cable 2 11 2 9 Connecting external devices 2 12 2 9 1 To the front pa...

Page 4: ...IOS Information BIOS Information BIOS Information BIOS Information BIOS Information 5 1 Managing and updating your BIOS 5 2 5 1 1 ASUS EZ Flash utility 5 2 5 1 2 ASUS CrashFree BIOS utility 5 4 5 1 3 ASUS Update utility 5 5 5 2 BIOS setup program 5 8 5 2 1 BIOS menu screen 5 9 5 2 2 Menu bar 5 9 5 2 3 Navigation keys 5 9 5 2 4 Menu items 5 10 5 2 5 Sub menu items 5 10 5 2 6 Configuration fields 5 ...

Page 5: ...23 5 5 1 Suspend Mode 5 23 5 5 2 Repost Video on S3 Resume 5 23 5 5 3 ACPI 2 0 Support 5 23 5 5 4 ACPI APIC Support 5 23 5 5 5 APM Configuration 5 24 5 5 6 Hardware Monitor 5 27 5 6 Boot menu 5 28 5 6 1 Boot Device Priority 5 28 5 6 2 Boot Settings Configuration 5 29 5 6 3 Security 5 30 5 7 Exit menu 5 33 ...

Page 6: ...ry to correct the interference by one or more of the following measures Reorient or relocate the receiving antenna Increase the separation between the equipment and receiver Connect the equipment to an outlet on a circuit different from that to which the receiver is connected Consult the dealer or an experienced radio TV technician for help Canadian Department of Communications Statement Canadian ...

Page 7: ...ay from connectors slots sockets and circuitry Avoid dust humidity and temperature extremes Do not place the product in any area where it may become wet Place the product on a stable surface If you encounter technical problems with the product contact a qualified service technician or your retailer Lithium Ion Battery Warning Lithium Ion Battery Warning Lithium Ion Battery Warning Lithium Ion Batt...

Page 8: ...stallation Chapter 2 Basic installation Chapter 2 Basic installation Chapter 2 Basic installation Chapter 2 Basic installation This chapter provides step by step instructions on how to install components in the system 3 3 3 3 3 Chapter 3 Getting started Chapter 3 Getting started Chapter 3 Getting started Chapter 3 Getting started Chapter 3 Getting started This chapter helps you power up the system...

Page 9: ...completing a task Where to find more information Where to find more information Where to find more information Where to find more information Where to find more information Refer to the following sources for additional information and for product and software updates 1 1 1 1 1 ASUS Websites ASUS Websites ASUS Websites ASUS Websites ASUS Websites The ASUS websites worldwide provide updated informat...

Page 10: ...system with ASUS Pundit P2 AE2 barebone system with ASUS motherboard CPU fan and heatsink assembly IDE cable 2 2 2 2 2 Accessories Accessories Accessories Accessories Accessories AC adapter and power plug Screws DC IN power cable and plug SATA signal cable SATA power cable 3 3 3 3 3 Support CD Support CD Support CD Support CD Support CD 4 4 4 4 4 User guide User guide User guide User guide User gu...

Page 11: ...P2 AE2 ASUS Pundit P2 AE2 ASUS Pundit P2 AE2 Chapter 1 System introduction This chapter gives a general description of the barebone system The chapter lists the system features including introduction on the front and rear panel and internal components ...

Page 12: ...ED HDD LED HDD LED This LED lights up when data is being read from or written to the hard disk drive 3 3 3 3 3 Optical drive Optical drive Optical drive Optical drive Optical drive This is a slim optical disk drive 4 4 4 4 4 STOP EJECT button STOP EJECT button STOP EJECT button STOP EJECT button STOP EJECT button Press this button to eject the disc loading tray 5 5 5 5 5 Drive activity LED Drive a...

Page 13: ...1 11 11 11 11 Headphone port Headphone port Headphone port Headphone port Headphone port This port connects a headphone with a stereo mini plug 12 12 12 12 12 Microphone port Microphone port Microphone port Microphone port Microphone port This Mic pink port connects a microphone 13 13 13 13 13 USB 2 0 ports USB 2 0 ports USB 2 0 ports USB 2 0 ports USB 2 0 ports These Universal Serial Bus 2 0 USB ...

Page 14: ...rnet connection to a Local Area Network LAN through a network hub 5 5 5 5 5 PS 2 mouse port PS 2 mouse port PS 2 mouse port PS 2 mouse port PS 2 mouse port This green 6 pin connector is for a PS 2 mouse 6 6 6 6 6 PS 2 keyboard port PS 2 keyboard port PS 2 keyboard port PS 2 keyboard port PS 2 keyboard port This purple 6 pin connector is for a PS 2 keyboard 7 7 7 7 7 USB 2 0 ports USB 2 0 ports USB...

Page 15: ...nector HDD power plug to HDD power connector HDD power plug to HDD power connector HDD power plug to HDD power connector 3 3 3 3 3 IDE cable to HDD connector IDE cable to HDD connector IDE cable to HDD connector IDE cable to HDD connector IDE cable to HDD connector 4 4 4 4 4 Chassis fan Chassis fan Chassis fan Chassis fan Chassis fan 5 5 5 5 5 CPU fan CPU fan CPU fan CPU fan CPU fan 6 6 6 6 6 DIMM...

Page 16: ...1 6 1 6 1 6 1 6 1 6 Chapter 1 System introduction Chapter 1 System introduction Chapter 1 System introduction Chapter 1 System introduction Chapter 1 System introduction ...

Page 17: ...undit P2 AE2 ASUS Pundit P2 AE2 ASUS Pundit P2 AE2 ASUS Pundit P2 AE2 ASUS Pundit P2 AE2 Chapter 2 Basic installation This chapter provides step by step instructions on how to install components in the system ...

Page 18: ...ponent The illustration below shows the location of the onboard LED Unplug the AC adapter cable from the wall socket before touching any component Use a grounded wrist strap or touch a safely grounded object or to a metal object such as the power supply case before handling components to avoid damaging them due to static electricity Hold components by the edges to avoid touching the ICs on them Wh...

Page 19: ... two screws that secure the top cover to the chassis 2 Use a Phillips cross screw driver to remove the top cover screws Keep the screws for later use 3 Pull the top cover slightly toward the rear panel until the side tabs are disengaged from the chassis 4 Hold the center edge of the top cover then lift Set the top cover aside 1 1 1 1 1 1 1 1 1 1 2 2 2 2 2 3 3 3 3 3 2 2 2 2 2 3 3 3 3 3 4 4 4 4 4 ...

Page 20: ...nnect the 4 pin power plug to the HDD power connector Set your hard disk drive as Master device before connecting the IDE cable and power plug Refer to the HDD documentation on how to set the drive as Master device 2 4 Installing a hard disk drive HDD The system supports one UltraATA133 IDE hard disk drive HDD To install a hard disk drive 1 Remove the two metal cover screws Keep the screws for lat...

Page 21: ... on the tray Insert the tray metal tacks into the drive screw holes two at the side and two at the bottom Insert the side metal tacks before inserting the bottom metal tacks 6 Secure the drive with two side screws Metal tacks Metal tacks Metal tacks Metal tacks Metal tacks To side of the drive Metal tacks Metal tacks Metal tacks Metal tacks Metal tacks To bottom of the drive 5 5 5 5 5 6 6 6 6 6 A ...

Page 22: ...PU fan and heatsink assembly You must remove the CPU fan and heatsink assembly before you can install a CPU 4 Disconnect the chassis fan cable from the chassis fan connector 5 Remove the chassis fan and heatsink assembly screw from the rear panel 6 Move the chassis fan and heatsink assembly toward the direction of the front panel then lift Set the chassis fan and heatsink assembly aside The system...

Page 23: ...ng it up to a 90 angle 3 Position the CPU above the socket such that its marked corner gold mark matches the base of the socket lever 4 Carefully insert the CPU to the socket until it fits in place The CPU fits only in one correct orientation Do not force the CPU into the socket to prevent bending the pins and damaging the CPU 5 When the CPU is in place push down the socket lever to secure the CPU...

Page 24: ... 5 3 2 5 3 2 5 3 2 5 3 2 5 3 Reinstalling the CPU fan and heatsink Reinstalling the CPU fan and heatsink Reinstalling the CPU fan and heatsink Reinstalling the CPU fan and heatsink Reinstalling the CPU fan and heatsink assembly assembly assembly assembly assembly To reinstall the CPU fan and heatsink assembly 1 Place the chassis fan and heatsink assembly on top of the installed CPU Make sure that ...

Page 25: ...o install a DDR DIMM 1 Locate the two DIMM sockets on the motherboard 2 Unlock a socket by pressing the retaining clips outward 4 Firmly insert the DIMM into the socket until the retaining clips snap back in place and the DIMM is properly seated 3 Align a DIMM on the socket such that the notch on the DIMM matches the break on the socket 3 A DDR DIMM is keyed with a notch so that it fits in only on...

Page 26: ...op cover 1 Position the front edge of the top cover at least two inches from the front panel cover 2 Fit the top cover hooks with the chassis side tabs and the front panel cover tabs 3 Lower the rear edge of the top cover as shown 4 Push the top cover slightly toward the front panel until it fits in place 5 Secure the top cover with two screws that you removed earlier 4 4 4 4 4 5 5 5 5 5 5 5 5 5 5...

Page 27: ...dapter 2 Connect the other end of the power cable male plug to a power outlet 3 Check the AC power adapter LED The LED lights up to indicate that the power from the source is within the operating range 4 Connect the DC IN power plug to the system DC IN socket Use an outlet adapter if the power plug does not fit the power outlet in your area Power LED Power LED Power LED Power LED Power LED Power c...

Page 28: ...t panel To the front panel M i c M i c M i c M i c M i c Headphone Headphone Headphone Headphone Headphone H D D H D D H D D H D D H D D Scanner Scanner Scanner Scanner Scanner Camera Camera Camera Camera Camera PS 2 KB PS 2 KB PS 2 KB PS 2 KB PS 2 KB PS 2 Mouse PS 2 Mouse PS 2 Mouse PS 2 Mouse PS 2 Mouse Line Out Line Out Line Out Line Out Line Out L i n e I n L i n e I n L i n e I n L i n e I n ...

Page 29: ...dit P2 AE2 ASUS Pundit P2 AE2 ASUS Pundit P2 AE2 ASUS Pundit P2 AE2 ASUS Pundit P2 AE2 Chapter 3 Getting started This chapter helps you power up the system and install drivers and utilities from the support CD ...

Page 30: ...em features 3 2 1 3 2 1 3 2 1 3 2 1 3 2 1 Running the support CD Running the support CD Running the support CD Running the support CD Running the support CD Place the support CD to the optical drive The CD automatically displays the Drivers Drivers Drivers Drivers Drivers menu if Autorun is enabled in your computer Motherboard settings and hardware options vary Use the setup procedures presented i...

Page 31: ...y Driver Installs the chipset display driver AD1888 SoundMAX Audio Driver AD1888 SoundMAX Audio Driver AD1888 SoundMAX Audio Driver AD1888 SoundMAX Audio Driver AD1888 SoundMAX Audio Driver Installs the AD1888 audio driver and the SoundMAX application See page 3 6 for details VIA Rhine Family Fast Ethernet Adapter Driver VIA Rhine Family Fast Ethernet Adapter Driver VIA Rhine Family Fast Ethernet ...

Page 32: ...healthy operating condition ASUS Update ASUS Update ASUS Update ASUS Update ASUS Update The ASUS Update utility allows you to update the motherboard BIOS in a Windows environment This utility requires an Internet connection either through a network or an Internet Service Provider ISP See page 5 5 for details Anti Virus Utility Anti Virus Utility Anti Virus Utility Anti Virus Utility Anti Virus Uti...

Page 33: ...lick the Contact Contact Contact Contact Contact tab to display the ASUS contact information You can also find this information on the inside front cover of this user guide 3 2 5 3 2 5 3 2 5 3 2 5 3 2 5 Other information Other information Other information Other information Other information The icons on the top right corner of the screen give additional information on the motherboard and the cont...

Page 34: ...dMAX SoundMAX SoundMAX SoundMAX Audio Driver and Application Audio Driver and Application Audio Driver and Application Audio Driver and Application Audio Driver and Application from the support CD that came with the system package to activate the 6 channel audio feature If the SoundMAX 4 XL software is correctly installed you will find the SoundMAX 4 XL icon on the taskbar SoundMAX 4 XL icon From ...

Page 35: ...izard initial window appears You can also launch the wizard by clicking the Configuration Configuration Configuration Configuration Configuration button when AudioESP detects and verifies a newly connected peripheral 2 Click Next Next Next Next Next 3 Select the speaker configuration from the drop down list Select 5 1 5 1 5 1 5 1 5 1 Speakers Speakers Speakers Speakers Speakers if you have a 6 cha...

Page 36: ...ings Changing the audio settings Changing the audio settings Changing the audio settings Changing the audio settings You can change the general audio listening environment synthesizer and microphone settings using the Preferences window of the SoundMAX application To change the audio settings using the Preferences window 1 Click the Preferences icon from the SoundMAX control panel The Preferences ...

Page 37: ... to select and adjust the playback and recording devices and the SoundMAX application preferences Listening Environment The Listening Environment Listening Environment Listening Environment Listening Environment Listening Environment tab allows you to select the speaker setup set the acoustic environment enable the Virtual Theater TM Surround feature and set the VirtualEar TM mode ...

Page 38: ...Music Synthesizer The MIDI Music Synthesizer MIDI Music Synthesizer MIDI Music Synthesizer MIDI Music Synthesizer MIDI Music Synthesizer tab allows you to set the MIDI and synthesizer settings for your selected audio configuration Microphone The Microphone Microphone Microphone Microphone Microphone tab allows you to select the microphone setup and environment ...

Page 39: ...e II main window allows you to view the current status of your system and change the utility configuration By default the main window displays the Preference Preference Preference Preference Preference section You can close or restore the Preference Preference Preference Preference Preference section by clicking on the triangle on the main window right handle Click to close the Click to close the ...

Page 40: ...eference section in the main window Click the box before each preference to activate or deactivate Refer to the table below Preference Preference Preference Preference Preference When checked When checked When checked When checked When checked Always on top the utility main window always appear on top of all opened windows Enable Monitoring Panel the utility displays large hexagonal or small recta...

Page 41: ...t another position from the list box Click OK OK OK OK OK when finished Large display Large display Large display Large display Large display Small display Small display Small display Small display Small display Moving the monitor panels Moving the monitor panels Moving the monitor panels Moving the monitor panels Moving the monitor panels All monitor panels move together using a magnetic effect I...

Page 42: ...y Large display Large display Large display Large display Small display Small display Small display Small display Small display WMI browser WMI browser WMI browser WMI browser WMI browser Click to display the WMI Windows Management Instrumentation browser This browser displays various Windows management information Click an item from the left panel to display on the right panel Click the plus sign...

Page 43: ...ion Click the plus sign before DMI Information DMI Information DMI Information DMI Information DMI Information to display the available information PCI browser PCI browser PCI browser PCI browser PCI browser Click to display the PCI Peripheral Component Interconnect browser This browser provides information on the PCI devices installed on your system Click the plus sign before the PCI Information ...

Page 44: ... information on the CPU hard disk drive space and memory usage Click to display the Usage browser CPU usage CPU usage CPU usage CPU usage CPU usage The CPU CPU CPU CPU CPU tab displays real time CPU usage in line graph representation If the CPU has an enabled Hyper Threading two separate line graphs display the operation of the two logical processors On Intel On Intel On Intel On Intel On Intel CP...

Page 45: ...d blue and the available physical memory Hard disk drive space usage Hard disk drive space usage Hard disk drive space usage Hard disk drive space usage Hard disk drive space usage The Hard Disk Hard Disk Hard Disk Hard Disk Hard Disk tab displays the used and available hard disk drive space The left panel of the tab lists all logical drives Click a hard disk drive to display the information on th...

Page 46: ...er Power Power Power Power menu then set the ACPI 2 0 Support ACPI 2 0 Support ACPI 2 0 Support ACPI 2 0 Support ACPI 2 0 Support item to Y e s Y e s Y e s Y e s Y e s See section 5 5 Power Menu for details 4 Save your changes then exit the BIOS Setup 5 Set the Power Option Properties Power Option Properties Power Option Properties Power Option Properties Power Option Properties depending on the o...

Page 47: ...art Start button 2 Select Programs ASUS Cool Quiet Cool Quiet Programs ASUS Cool Quiet Cool Quiet Programs ASUS Cool Quiet Cool Quiet Programs ASUS Cool Quiet Cool Quiet Programs ASUS Cool Quiet Cool Quiet Windows XP OS 1 Click the Start Start Start Start Start button 2 Select All Programs ASUS Cool Quiet Cool All Programs ASUS Cool Quiet Cool All Programs ASUS Cool Quiet Cool All Programs ASUS Co...

Page 48: ...3 20 3 20 3 20 3 20 3 20 Chapter 3 Getting started Chapter 3 Getting started Chapter 3 Getting started Chapter 3 Getting started Chapter 3 Getting started ...

Page 49: ... Pundit P2 AE2 ASUS Pundit P2 AE2 ASUS Pundit P2 AE2 Motherboard info Chapter 4 This chapter gives information about the motherboard that comes with the system This chapter includes the motherboard layout jumper settings and connector locations ...

Page 50: ...t Motherboard layout Motherboard layout DDR DIMM1 64 72 bit 184 pin module Socket 754 27 2cm 10 7in 26 9cm 10 6in DDR DIMM2 64 72 bit 184 pin module AUX CD AUD_CON PWRSW1 AD1888 VIA K8M800 CPU_FAN1 Super I O 4Mb BIOS VIA VT8237R LAN_USB34 PS 2 T Mouse B Keyboard CHA_FAN1 BUZZER1 ADAPTER1 IDE_PWR SB_PWR1 PRI_IDE CR2032 3V Lithium Cell CMOS Power PCI1 LED_CON1 CLRTC VIA VT6307 USB12 FONT MIC FONT LO...

Page 51: ...e time and system setup parameters by erasing the CMOS RTC RAM data The onboard button cell battery powers the RAM data in CMOS which include system setup information such as system passwords To erase the RTC RAM 1 Turn OFF the computer and unplug the power cord 2 Remove the onboard battery 3 Move the jumper cap from pins 2 3 default to pins 1 2 Keep the cap on pins 1 2 for about 5 to 10 seconds t...

Page 52: ...ctor 40 1 pin PRI_IDE This connector is for an Ultra DMA 133 100 66 signal cable The Ultra DMA 133 100 66 signal cable has three connectors a blue connector for the primary IDE connector on the motherboard a black connector for an Ultra DMA 133 100 66 IDE slave device optical drive hard disk drive and a gray connector for an Ultra DMA 133 100 66 IDE master device hard disk drive If you install two...

Page 53: ...e ground pin of the connector You can monitor the CPU and chassis fan rotations using the ASUS PC Probe utility Refer to page 3 9 for details Do not forget to connect te fan cables to the fan connectors Insufficient air flow inside the system may damage the motherboard components These are not jumpers Do not place jumper caps on the fan connectors 3 3 3 3 3 Internal audio connectors 4 pin CD AUX I...

Page 54: ...R IDE power connector 4 pin IDE_PWR The IDE power connector is for the IDE power cable This connector supplies power to the hard disk drive and the slim optical drive 5 5 5 5 5 Power switch connector 2 pin PWRSW Power switch connector 2 pin PWRSW Power switch connector 2 pin PWRSW Power switch connector 2 pin PWRSW Power switch connector 2 pin PWRSW This connects to the the system power switch but...

Page 55: ... connector is for the ASUS proprietary rear panel audio board that supports the rear panel audio I O ports 7 7 7 7 7 Front panel LED connector 6 pin LED_CON1 Front panel LED connector 6 pin LED_CON1 Front panel LED connector 6 pin LED_CON1 Front panel LED connector 6 pin LED_CON1 Front panel LED connector 6 pin LED_CON1 The connector is for the power and HDD activity LED in the system front panel ...

Page 56: ... ATA connector 7 pin SATA1 Serial ATA connector 7 pin SATA1 Serial ATA connector 7 pin SATA1 Serial ATA connector 7 pin SATA1 This connector is for the Serial ATA signal cables for a Serial ATA hard disk drive You must install Windows 2000 Service Pack 4 or the Windows XP Service Pack 1 before using a Serial ATA hard disk drive SATA connector SATA1 GND RSATA_TXP1 RSATA_TXN1 GND RSATA_RXN1 RSATA_RX...

Page 57: ...2 AE2 ASUS Pundit P2 AE2 ASUS Pundit P2 AE2 ASUS Pundit P2 AE2 ASUS Pundit P2 AE2 BIOS setup Chapter 5 This chapter tells how to change system settings through the BIOS Setup menus and describes the BIOS parameters ...

Page 58: ...g sections for details on these utilities 5 1 1 5 1 1 5 1 1 5 1 1 5 1 1 ASUS EZ Flash utility ASUS EZ Flash utility ASUS EZ Flash utility ASUS EZ Flash utility ASUS EZ Flash utility The ASUS EZ Flash feature allows you to update the BIOS without having to go through the long process of booting from a floppy disk and using a DOS based utility The EZ Flash utility is built in the BIOS chip so it is ...

Page 59: ...o not shut down or reset the system while updating the BIOS to prevent system boot failure A CD ROM not found error message appears if there is no CD in the optical drive A K8VQ ROM not found error message appears if the correct BIOS file is not found in the CD Make sure that you rename the BIOS file to K8VQ ROM EZFlash starting BIOS update Checking for floppy Floppy not found Checking for CD ROM ...

Page 60: ...ing for CD ROM CD ROM found Reading file P4SQ X BIN Completed Start flashing When the original updated BIOS file is found the utility automatically updates the corrupted BIOS file 5 1 2 5 1 2 5 1 2 5 1 2 5 1 2 ASUS CrashFree BIOS utility ASUS CrashFree BIOS utility ASUS CrashFree BIOS utility ASUS CrashFree BIOS utility ASUS CrashFree BIOS utility The ASUS CrashFree BIOS is an auto recovery tool t...

Page 61: ...US Update utility is copied to your system 5 1 3 5 1 3 5 1 3 5 1 3 5 1 3 ASUS Update utility ASUS Update utility ASUS Update utility ASUS Update utility ASUS Update utility The ASUS Update is a utility that allows you to manage save and update the system BIOS file in Windows environment The ASUS Update utility allows you to Save the current BIOS file Download the latest BIOS file from the Internet...

Page 62: ...the Internet Updating the BIOS through the Internet To update the BIOS through the Internet 1 Launch the ASUS Update utility from the Windows desktop by clicking Start Start Start Start Start Programs Programs Programs Programs Programs ASUS ASUS ASUS ASUS ASUS ASUSUpdate ASUSUpdate ASUSUpdate ASUSUpdate ASUSUpdate ASUSUpdate ASUSUpdate ASUSUpdate ASUSUpdate ASUSUpdate The ASUS Update main window ...

Page 63: ...e ASUSUpdate ASUSUpdate ASUSUpdate ASUSUpdate ASUSUpdate ASUSUpdate ASUSUpdate The ASUS Update main window appears 2 Select Update BIOS from a Update BIOS from a Update BIOS from a Update BIOS from a Update BIOS from a file file file file file option from the drop down menu then click Next Next Next Next Next 4 From the FTP site select the BIOS version that you wish to download Click Next 5 Follow...

Page 64: ... Press Del during the Power On Self Test POST to enter the Setup utility otherwise POST continues with its test routines If you wish to enter Setup after POST restart the system by pressing Ctrl Alt Delete or by pressing the reset button on the system chassis You can also restart by turning the system off and then back on Do this last option only if the first two failed The Setup program is design...

Page 65: ...xit Exit Exit Exit For selecting the exit options and loading default settings To select an item on the menu bar press the right or left arrow key on the keyboard until the desired item is highlighted 5 2 3 5 2 3 5 2 3 5 2 3 5 2 3 Navigation keys Navigation keys Navigation keys Navigation keys Navigation keys At the bottom right corner of a menu screen are the navigation keys for that particular m...

Page 66: ...7 5 2 7 5 2 7 5 2 7 5 2 7 Pop up window Pop up window Pop up window Pop up window Pop up window Select a menu item then press Enter to display a pop up window with the configuration options for that item 5 2 8 5 2 8 5 2 8 5 2 8 5 2 8 Scroll bar Scroll bar Scroll bar Scroll bar Scroll bar A scroll bar appears on the right side of a menu screen when there are items that do not fit on the screen Pres...

Page 67: ... devices There is a separate sub menu for each IDE device Select a device item then press Enter to display the IDE device information Refer to section 5 2 1 BIOS menu screen for information on the menu screen items and how to navigate through them Use ENTER TAB or SHIFT TAB to select a field Use or to configure system time Select Screen Select Item Change Field Tab Select Field F1 General Help F10...

Page 68: ...Disabled Auto Block Multi sector Transfer Auto Block Multi sector Transfer Auto Block Multi sector Transfer Auto Block Multi sector Transfer Auto Block Multi sector Transfer Auto Enables or disables data multi sectors transfers When set to Auto the data transfer from and to the device occurs multiple sectors at a time if the device supports multi sector transfer feature When set to Disabled the da...

Page 69: ...s serial number System Serial System Serial System Serial System Serial System Serial Displays the system serial number Asset Tag Asset Tag Asset Tag Asset Tag Asset Tag Displays the system s asset tag Acoustics Maximum Performance Acoustics Maximum Performance Acoustics Maximum Performance Acoustics Maximum Performance Acoustics Maximum Performance Allows you to manage the hard disk drive acousti...

Page 70: ...ool N Quiet Enabled Allows you to enable or disable the AMD cool and quiet function Configuration options Enabled Disabled 5 4 1 5 4 1 5 4 1 5 4 1 5 4 1 CPU Configuration CPU Configuration CPU Configuration CPU Configuration CPU Configuration The items in this menu show the CPU related information auto detected by BIOS HyperTransport HT Configuration Memory Configuration Processor Type AMD Athlon ...

Page 71: ...ection of the HyperTransport downstream data width Configuration options 16 BIT 8 BIT HyperTransport Configuration HT Frequency 800 MHz HT DATA Width Upstream 16 BIT HT DATA Width Downstream 16 BIT Enable link tristate during the disconnected state of an LDTSTOP Memory Configuration Memory Configuration Memory Configuration Memory Configuration Memory Configuration The Memory Configuration menu al...

Page 72: ...Memcheck to CPU Ratio Auto Memcheck to CPU Ratio Auto Allows you to set the memory to CPU ratio Configuration options 1 1 DDR 200 4 3 DDR 266 3 2 5 3 DDR 333 2 1 DDR 400 MCT Timing Mode Auto MCT Timing Mode Auto MCT Timing Mode Auto MCT Timing Mode Auto MCT Timing Mode Auto Allows you to set the MCT timing mode Configuration options Auto Manual User Config Mode Auto User Config Mode Auto User Conf...

Page 73: ...outhBridge Configuration USB Configuration Options for VIA AGP chipset AGP Bridge Configuration AGP Bridge Configuration AGP Bridge Configuration AGP Bridge Configuration AGP Bridge Configuration OnChip VGA Frame Buffer Size 64MB VLink 8X Supported Enabled AGP Mode AGP 8X AGP Fast Write Enabled Graphics Aperture Size 64MB AGP 3 0 Calibration Cycle Disabled DBI Output for AGP Trans Disabled Enable ...

Page 74: ...ibration Cycle Enabled Enables or disables the AGP Fast Write feature Configuration options Enabled Disabled DBI Output for AGP Trans Disabled Enables or disables the DBI Output for the AGP Configuration options Disabled Enabled MPS Revision 1 4 MPS Revision 1 4 MPS Revision 1 4 MPS Revision 1 4 MPS Revision 1 4 Sets the MPS revision value Configuration options 1 1 1 4 PCI Delay Transaction Disabl...

Page 75: ...ons Disabled USB 2 Ports USB 4 Ports USB 6 Ports USB 8 Ports USB 2 0 Controller Enabled USB 2 0 Controller Enabled USB 2 0 Controller Enabled USB 2 0 Controller Enabled USB 2 0 Controller Enabled Allows you to enable or disable the USB 2 0 controller Configuration options Enabled Disabled Legacy USB Support Auto Legacy USB Support Auto Legacy USB Support Auto Legacy USB Support Auto Legacy USB Sup...

Page 76: ...A BOOT ROM Enabled OnChip SATA BOOT ROM Enabled Allows you to enable or disable the onboard SATA boot ROM Configuration options Enabled Disabled Onboard LAN Enabled Onboard LAN Enabled Onboard LAN Enabled Onboard LAN Enabled Onboard LAN Enabled Allows you to enable or disable the onboard LAN controller Configuration options Disabled Enabled Onboard LAN BOOT ROM Enabled Onboard LAN BOOT ROM Enabled...

Page 77: ...ures the Plug and Play devices not required for boot Configuration options No Yes PCI Latency Timer 64 PCI Latency Timer 64 PCI Latency Timer 64 PCI Latency Timer 64 PCI Latency Timer 64 Allows you to select the value in units of PCI clocks for the PCI device latency timer register Configuration options 32 64 96 128 160 192 224 248 Allocate IRQ to PCI VGA Yes Allocate IRQ to PCI VGA Yes Allocate I...

Page 78: ... IRQ xx assigned to PCI Device IRQ xx assigned to PCI Device IRQ xx assigned to PCI Device IRQ xx assigned to PCI Device IRQ xx assigned to PCI Device When set to Available the specific IRQ is free for use of PCI PnP devices When set to Reserved the IRQ is reserved for legacy ISA devices Configuration options PCI Device Reserved ...

Page 79: ...me No Repost Video on S3 Resume No Repost Video on S3 Resume No Determines whether to invoke VGA BIOS post on S3 STR resume Configuration options No Yes 5 5 3 5 5 3 5 5 3 5 5 3 5 5 3 ACPI 2 0 Support No ACPI 2 0 Support No ACPI 2 0 Support No ACPI 2 0 Support No ACPI 2 0 Support No Allows you to add more tables for Advanced Configuration and Power Interface ACPI 2 0 specifications Configuration op...

Page 80: ... suspend mode when the power button is pressed Configuration options On Off Suspend Suspend Power Saving Type C3 Suspend Power Saving Type C3 Suspend Power Saving Type C3 Suspend Power Saving Type C3 Suspend Power Saving Type C3 Allows you to set the suspend power saving type Configuration options C3 S1 Restore on AC Power Loss Last State Restore on AC Power Loss Last State Restore on AC Power Los...

Page 81: ...em and press the or key to make the selection Configuration options 00 1 59 RTC Alarm Second Seconds To set the alarm second highlight this item and press the or key to make the selection Configuration options 00 1 59 Power on External Modems Disabled Power on External Modems Disabled Power on External Modems Disabled Power on External Modems Disabled Power on External Modems Disabled Allows eithe...

Page 82: ...options Disabled Enabled Power On PS 2 Mouse Disabled Power On PS 2 Mouse Disabled Power On PS 2 Mouse Disabled Power On PS 2 Mouse Disabled Power On PS 2 Mouse Disabled When set to Enabled this parameter allows you to use the PS 2 mouse to turn on the system This feature requires an ATX power supply that provides at least 1A on the 5VSB lead Configuration options Disabled Enabled Power On Onboard...

Page 83: ... temperature options at 15 ºC with 3 ºC interval CPU Fan Speed xxxxRPM or N A CPU Fan Speed xxxxRPM or N A CPU Fan Speed xxxxRPM or N A CPU Fan Speed xxxxRPM or N A CPU Fan Speed xxxxRPM or N A The onboard hardware monitor automatically detects and displays the CPU fan speed in rotations per minute RPM If the fan is not connected to the motherboard the field shows N A Chassis Fan Speed xxxxRPM or ...

Page 84: ...ice Priority 1st 3rd Boot Device PM XXXXXXXXXX 1st 3rd Boot Device PM XXXXXXXXXX 1st 3rd Boot Device PM XXXXXXXXXX 1st 3rd Boot Device PM XXXXXXXXXX 1st 3rd Boot Device PM XXXXXXXXXX These items specify the boot device priority sequence from the available devices The number of device items that appears on the screen depends on the number of devices installed in the system Configuration options xxx...

Page 85: ...Enabled Full Screen Logo Disabled Full Screen Logo Disabled Full Screen Logo Disabled Full Screen Logo Disabled Full Screen Logo Disabled This allows you to enable or disable the full screen logo display feature Configuration options Disabled Enabled Set this item to Enabled to use the ASUS MyLogo feature Add On ROM Display Mode Force BIOS Add On ROM Display Mode Force BIOS Add On ROM Display Mode...

Page 86: ...essage Press DEL to run Setup during POST Configuration options Disabled Enabled Interrupt 19 Capture Disabled Interrupt 19 Capture Disabled Interrupt 19 Capture Disabled Interrupt 19 Capture Disabled Interrupt 19 Capture Disabled When set to Enabled this function allows the option ROMs to trap Interrupt 19 Configuration options Disabled Enabled Change Supervisor Password Change Supervisor Passwor...

Page 87: ...Settings Supervisor Password Not Installed User Password Not Installed Change Supervisor Password User Access Level Full Access Change User Password Clear User Password Password Check Setup User Access Level Full Access User Access Level Full Access User Access Level Full Access User Access Level Full Access User Access Level Full Access This item allows you to select the access restriction to the...

Page 88: ... Enter 2 On the password box that appears type a password composed of at least six letters and or numbers then press Enter 3 Confirm the password when prompted The message Password Installed appears after you set your password successfully To change the user password follow the same steps as in setting a user password Clear User Password Clear User Password Clear User Password Clear User Password ...

Page 89: ...ks for a confirmation before exiting Discard Changes Discard Changes Discard Changes Discard Changes Discard Changes This option allows you to discard the selections you made and restore the previously saved values After selecting this option a confirmation appears Select OK OK OK OK OK to discard any changes and load the previously saved values If you attempt to exit the Setup program without sav...

Page 90: ...ts Load Setup Defaults This option allows you to load the default values for each of the parameters on the Setup menus When you select this option or if you press F5 a confirmation window appears Select OK OK OK OK OK to load default values Select Exit Save Changes Exit Save Changes Exit Save Changes Exit Save Changes Exit Save Changes or make other changes before saving the values to the non vola...

Reviews: