


2 - 1 0
2 - 1 0
2 - 1 0
2 - 1 0
2 - 1 0
C h a p t e r 2 : H a r d w a r e i n f o r m a t i o n
C h a p t e r 2 : H a r d w a r e i n f o r m a t i o n
C h a p t e r 2 : H a r d w a r e i n f o r m a t i o n
C h a p t e r 2 : H a r d w a r e i n f o r m a t i o n
C h a p t e r 2 : H a r d w a r e i n f o r m a t i o n
2.3
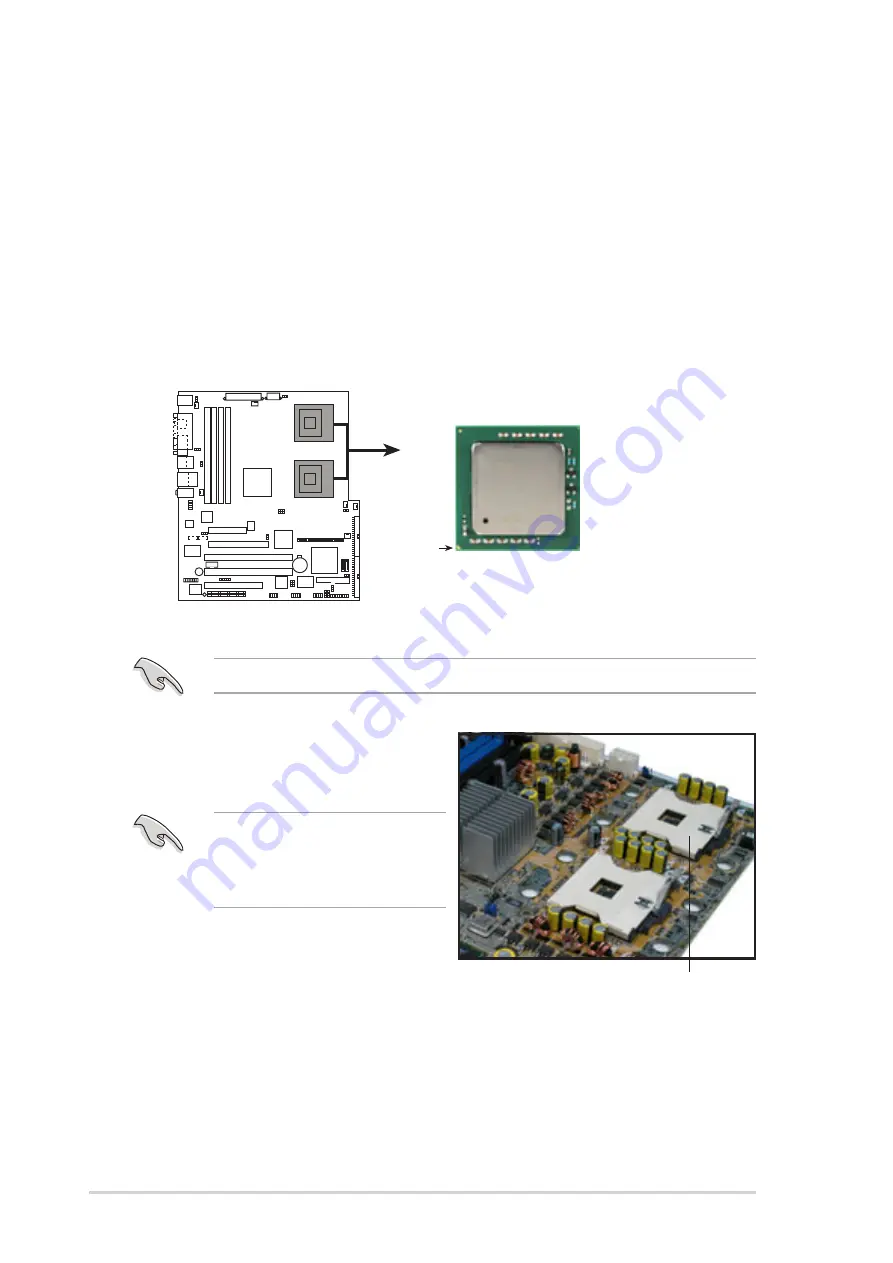
Central Processing Unit (CPU)
The motherboard comes with surface mount 604-pin Zero Insertion Force
(ZIF) sockets. The sockets are designed for the Intel
®
Xeon™ processor in
the 604-pin package with 1 MB L2 cache. The new generation Intel
®
Xeon™
processor supports 800 MHz system bus and Extended Memory 64-bit
Technology (EM64T).
2.3.1
2.3.1
2.3.1
2.3.1
2.3.1
Installling the CPU
Installling the CPU
Installling the CPU
Installling the CPU
Installling the CPU
To install a CPU:
1.
Locate the CPU sockets on the motherboard.
If installing only one CPU, use the socket CPU1.
2.
Flip up the socket lever and push
it all the way to the other side.
Make sure that the socket
lever is pushed back all the
way, otherwise the CPU does
not fit in completely.
Socket for CPU1
NCT-D
NCT-D Socket 604
Gold Arrow
Intel Xeon
Summary of Contents for NCT-D
Page 1: ...Motherboard NCT D A ...
Page 12: ...x i i x i i x i i x i i x i i ...