background image

1-6

ASUS GigaX1105/GigaX1108

English

Placement options

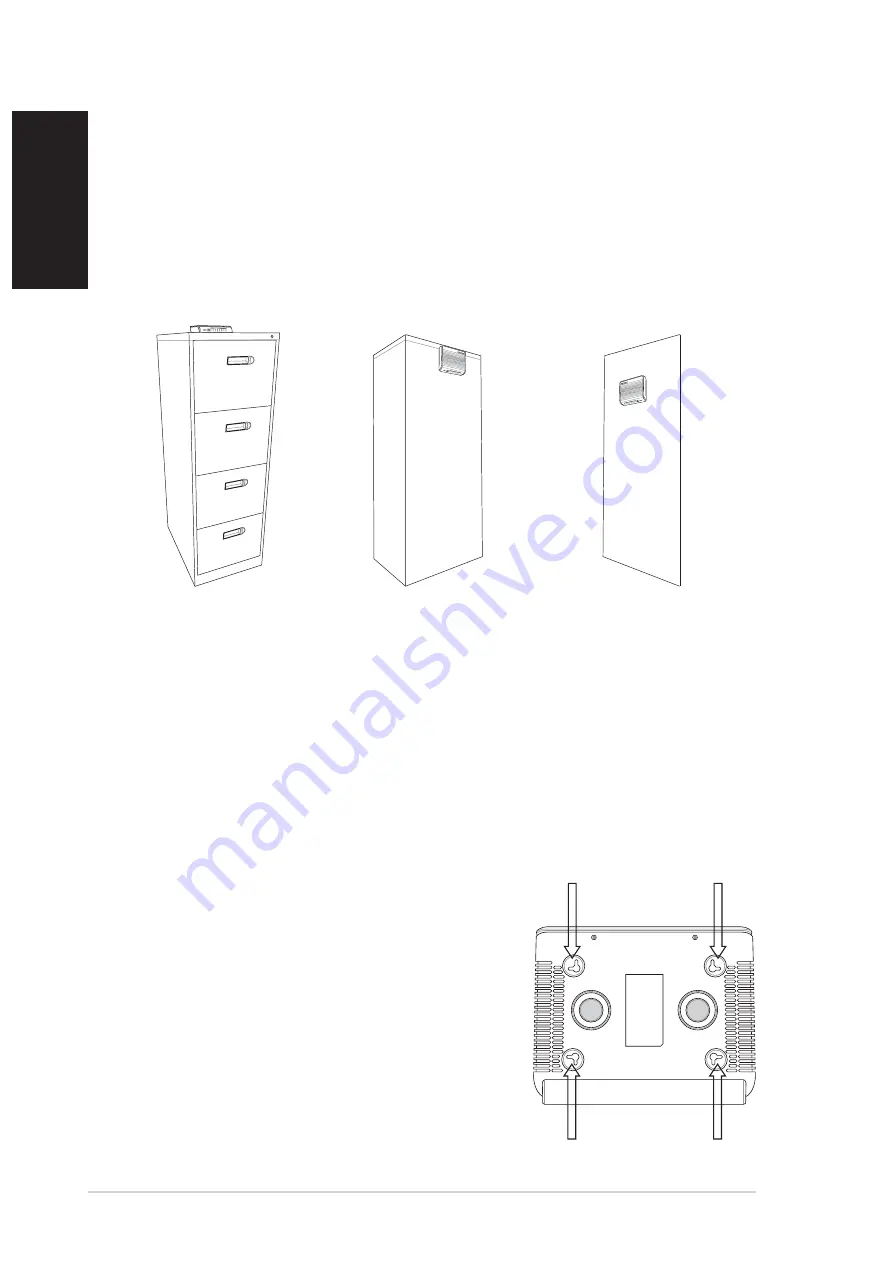
Depending on your environment, you may choose one of the three
supported placement options for GigaX1105 and GigaX1108 – desktop
placement, magnet mount, and wall mount. The following pictures show
the three available placement options.

Desktop placement

You may place the GigaX1105 or GigaX1108 on any flat surface. The
space-saving design of the GigaX1105 and GigaX1108 occupies only a
small area on your desk.

Magnet mount instructions

Attach the switch onto any metal surface that attracts magnets, such as
most desktop computer housings and file cabinets.

Wall mount instructions

1. Attach two screws on the wall in-line with

the screw slots on the bottom of the switch
as indicated in the following figure. There
are 4 screw slots, but you may choose
any two adjacent screw slots for wall
mounting.

2. Maneuver the switch so that both screws

are inserted into the wall mount slots.

Desktop Placement

Magnet Mount

Wall Mount

Summary of Contents for GIGAX1105 - GigaX 1105 Switch

Page 1: ...English Quick Installation Guide GigaX1105 GigaX1108 Copyright 2003 ASUSTeK COMPUTER INC All Rights Reserved ...

Page 2: ... packed with Gigabit power that easily satisfies the bandwidth hungry network applications and devices Features Plug and play with your networks auto MDI MDIX and auto sensing for speed and duplex mode on all ports Fan less design provides quiet operation Space saving form factor that fits on a desk mounts on a wall or attaches to metal surface Flow control schemes to support zero loss under tempo...

Page 3: ... number identifies the port 1 8 GigaX1108 white text Each number identifies the port STATUS Green ON A link is established Blinking A link is established and data is being transmitted or received OFF No link is established SPEED Green ON 1000Mbps Amber ON 100Mbps OFF 10Mbps or no link is established DUPLEX Amber ON Switch is operating in full duplex mode Blinking Switch is operating in half duplex...

Page 4: ...r only in the number of Ethernet ports GigaX1108 GigaX1105 Label LED Color Status Indication 1 5 GigaX1105 RJ 45 ports for connecting to other network devices 1 8 GigaX1108 RJ 45 ports for connecting to other network devices POWER Connects to the supplied AC adapter Rear Panel Table ...

Page 5: ...tor on the switch rear panel then plug the other end to an electrical outlet 3 The Power LED and LED indicators for active Ethernet ports light up indicating that the device is turned on and in use Refer to the front panel table for LED indications NOTES Use Category 5 Ethernet cables not exceeding 100 meters 328 feet otherwise there will be connection problems or a decrease in data transfer speed...

Page 6: ...sign of the GigaX1105 and GigaX1108 occupies only a small area on your desk Magnet mount instructions Attach the switch onto any metal surface that attracts magnets such as most desktop computer housings and file cabinets Wall mount instructions 1 Attach two screws on the wall in line with the screw slots on the bottom of the switch as indicated in the following figure There are 4 screw slots but ...

Page 7: ...the Ethernet cable is securely connected to the switch and your network device Make sure that the switch and your network device are powered ON Verify that your cable is sufficient for your network requirements Make sure that Category 5 cable is used 10Mbit sec connections may tolerate lower quality cables Make sure that the cable used are Category 5 certified The STATUS LED does not light up afte...

Page 8: ...gh or crossover cables Ethernet The most commonly installed computer network technology usually using twisted pair wiring Ethernet data rates are 10 Mbps 100 Mbps and 1000 Mbps Mbps Abbreviation for Megabits per second or one million bits per second Network data rates are often expressed in Mbps network A group of computers that are connected together allowing them to communicate with each other a...

Page 9: ...y 10 90 non condensing Storage humidity 10 95 non condensing Operating altitude up to 10 000 ft 3 000m Storage altitude up to 40 000 ft 12 000m Vibration Shock Drop IEC 68 2 36 IEC 68 2 29 IEC 68 2 32 Power External AC DC adaptor Input voltages varies depending on region China AC 220V 50Hz Europe AC 230V 50Hz Japan AC 100V 50Hz US AC 120V 60Hz Output voltage Current DC 12V 1 25A Certification Safe...

Page 10: ... 1 510 608 4555 E mail tmd1 asus com Web site usa asus com Technical Support Telephone General 1 502 995 0883 Notebook 1 510 739 3777 Support fax 1 502 933 8713 Support e mail tsd asus com ASUS COMPUTER GmbH Germany and Austria Address Harkort Str 25 D 40880 Ratingen Germany Telephone 49 2102 95990 Fax 49 2102 959911 Online contact www asuscom de sales Technical Support Telephone 49 2102 95990 Fax...

Reviews: