


42
Chapter 4: BIOS Setup
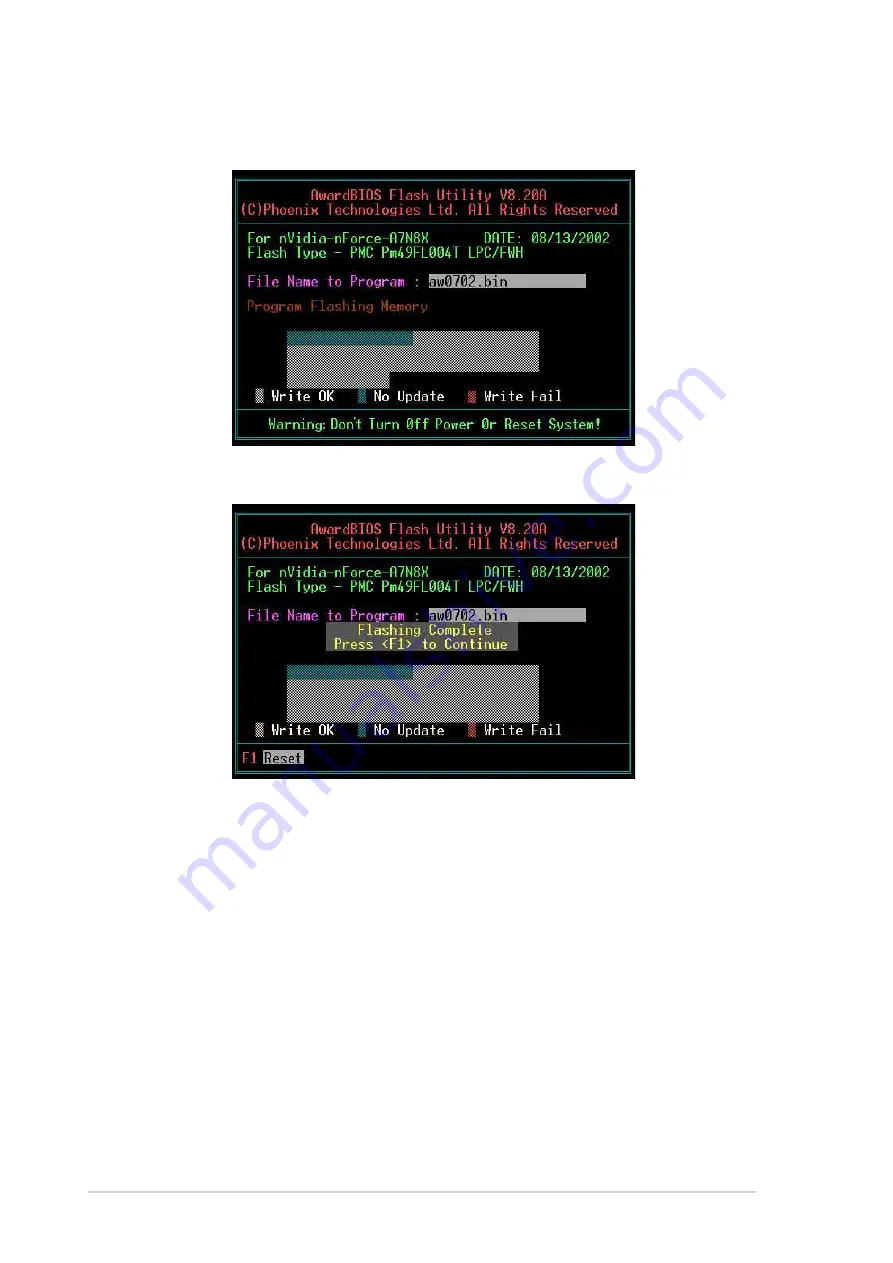
8. Type <Y> and Press <Enter> to flash the new Bios file. NOTE: Do not
shut off system power or unplug the supply during the flash process.
9. The BIOS flashes and displays the results. Press <F1> to restart.
1. Boot from the floppy disk.
2. At the “A:\” prompt, type “C:\” and then press <Enter>.
3. At the “C:\” prompt, type “AWDFLASH /qi BIOSFILE” and then <Enter>.
For example: “AWDFLASH /qi aw0702.bin” The AWDFLASH screen
appears, and the BIOS file appears in the space, “File Name to Program”.
4. Type the name of the new BIOS file, for example: “AW0702.BIN” then
press <Enter>. The program asks if you want to save the previous BIOS.
Select <Y> since it is advisable to back-up the original BIOS in case you
need to reprogram it.
5. Follow steps 6 to 9 in “4.1.2.1 Updating BIOS via Built-in Award BIOS
Flash Utility.”
4.1.2.2 Updating BIOS via Bootable Floppy Disk
Summary of Contents for A7N8X Series
Page 1: ...Motherboard A7N8X User Manual Series ...
Page 11: ...Chapter 1 Product introduction ...
Page 12: ...ASUS A7N8X motherboard ...
Page 19: ...Chapter 2 Hardware information ...
Page 20: ...ASUS A7N8X motherboard ...
Page 49: ...Chapter 3 Powering up ...
Page 50: ...ASUS A7N8X motherboard ...
Page 55: ...Chapter 4 BIOS ...
Page 56: ...ASUS A7N8X motherboard ...
Page 88: ...70 Chapter 4 BIOS Setup ...
Page 89: ...Chapter 5 Software support ...
Page 90: ...ASUS A7N8X motherboard ...
Page 114: ...94 Chapter 5 Software reference ...
Page 115: ...Chapter 6 Appendix ...
Page 116: ...ASUS A7N8X motherboard ...
Page 121: ...Index ...
Page 122: ...ASUS A7N8X motherboard ...


