


Chapter 4 Useful Functions
4.1 Assigning Menu Items to Buttons [1] to [3] for the Operation
Section/4.2 Removing and Installing the Eyepiece
16
Chapter 4 Useful Functions
4.1 Assigning Menu Items to Buttons
[1] to [3] for the Operation Section
You can assign functions to buttons [1] to [3] on the menu screen in the
operation section panel.
1
Configure the settings on the menu screen.
2
Press and hold down the button to which you want to assign the
function on the menu screen for at least three seconds.
• The following functions cannot be assigned.
‒
Picture Settings
Red Max
Red Min
Blue Max
Blue Min
‒
Picture Quality
Luminance
Offset (G, B, R)
Gain (G, B, R)
Gamma (G, B, R)
‒
Memory
Load
Save
Delete
Boot Select
‒
Information
FPGA Ver.
Firmware Ver.
Factory Default
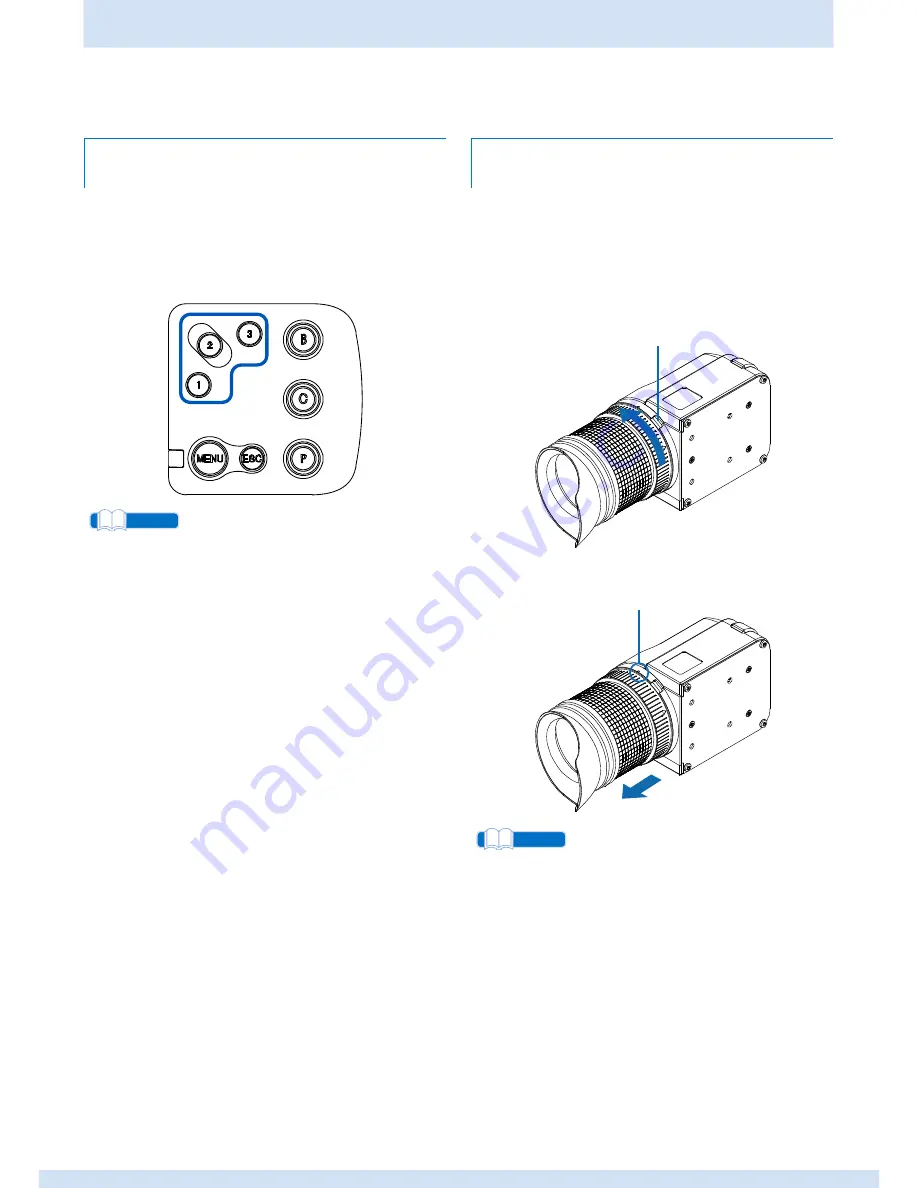
4.2 Removing and Installing the
Eyepiece
The following section explains how to remove and attach the
eyepiece.
Removing the eyepiece
1
Press the lock switch on the product, and rotate the eyepiece in the
direction indicated by the arrow.
2
Align the red mark on the side of the product with the
▲
mark on the
eyepiece, and then carefully pull out the eyepiece.
When rotating the eyepiece, make sure you rotate the large section with
the
▲
mark.
Reattaching the eyepiece
1
Align the red mark on the side of the product with the
▲
mark on the
eyepiece.
2
Rotate the eyepiece in the opposite direction to the arrow shown in
step 1 from "Removing the eyepiece".
3
Rotate the eyepiece until the lock switch clicks.
M E M O
M E M O
Lock switch
▲
mark


