background image

Basic Playback

Basic Operation

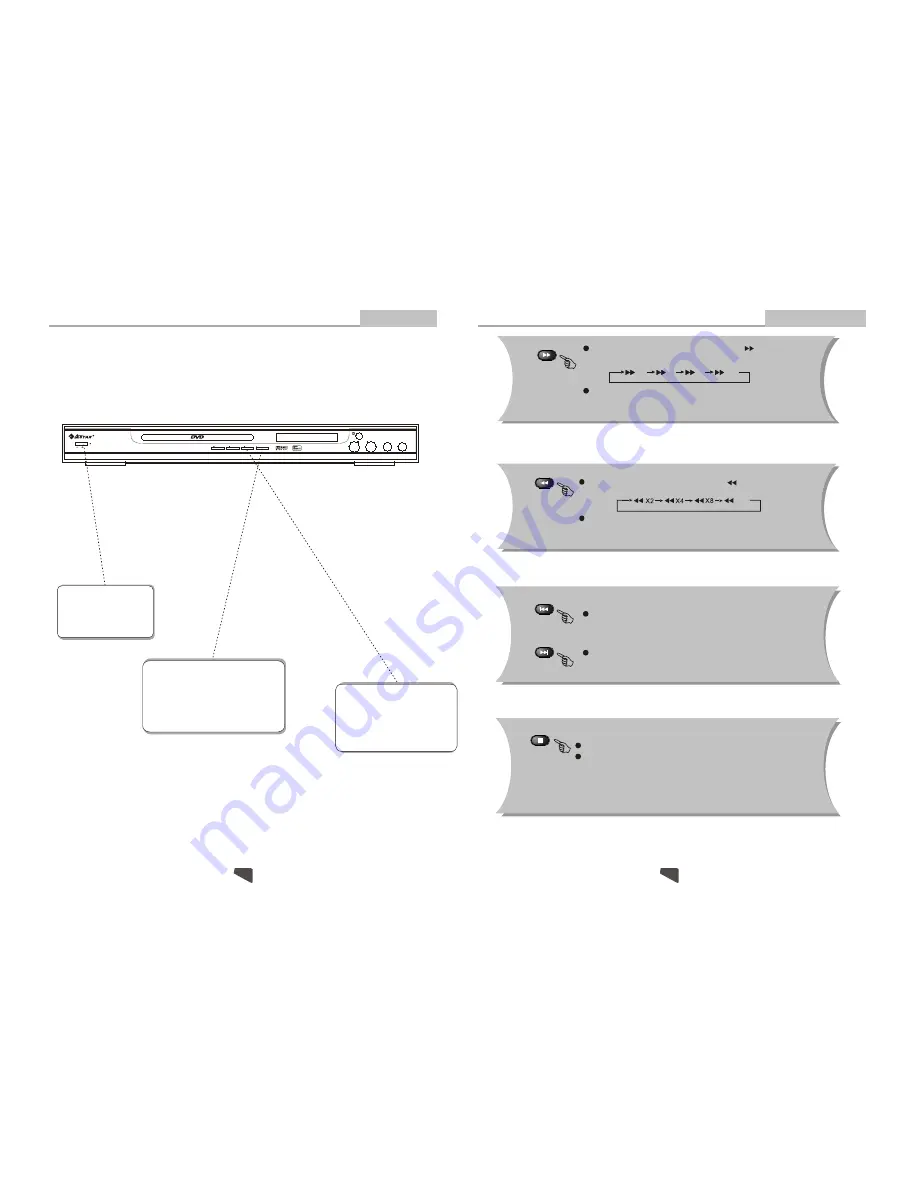
STEP 3 - Press the PLAY button 
on the front panel or remote con-
trol. The player will automatical-
ly read and identify the disc, and 
begin playback.

STEP 2 - Press  OPEN/CLOSE either on
the front panel or remote control. When
the tray is opened, place the disc on the
tray with the label side up. Press OPEN/
CLOSE again to close the disc tray.

STEP 1 - Press POWER to 
start the player. The DVD 
logo appears on the TV 
screen.

1. Connect the DVD player to your TV and amplifier.

2. Turn on the TV.

3. 

4. Turn down the volume on your amplifier, and then power it on.

5. 

Set the TV to the AV input connected to the DVD player.

Set the amplifier to the AV input connected to the DVD player.

Preparation before playing:

X2

X4

X8

X20

X2

X4

X8

PREV

 Press 

PREV 

to skip to previous chapter or track.

Press 

NEXT

 to skip to the next chapter or track. 

 During DVD or CD playback, press and hold       to scan in reverse.

The player will review the disc at 2, 4, 8 and 20 times normal speed as follows:

 Press 

PLAY

 to resume normal playback.

 During DVD or CD playback, press and hold       to  scan forward. 

     The player will review the disc at 2, 4, 8 and 20 times normal speed 
     as follows:

 Press 

PLAY

 to resume normal playback.

X20

NEXT

Remote Control Operation

Advanced Features

21

12

Note: 

T

f playback is 

           stopped about 5 minutes(when Screen Saver is set to on).

he screen saver will automatically turn on i

 Press 

STOP

  to stop and hold playback.

 Press RESUME to resume playback from the point you pressed STOP.

STOP

STOP

PAUSE

MIC VOL

MIC ECHO

MIC IN

1

2

DVD-6800

ON

OFF

OPEN/CLOSE

PLAY

POWER

DVD/CD/CD-R/CD-RW/DVD-R/DVD-RW/HDCD/JPEG PLAYER

Summary of Contents for DVD-6800

Page 1: ...er Manual carefully to ensure proper use of this product and keep this manual for further reference DVD 6800 STOP PAUSE MIC VOL MIC ECHO MIC IN 1 2 DVD 6800 ON OFF OPEN CLOSE PLAY POWER DVD CD CD R CD RW DVD R DVD RW HDCD JPEG PLAYER ...

Page 2: ...V set Connecting to an AV Receiver with 5 1 Channel Analog Audio Input Connecting to an AV Receiver with Digital Audio Input Connections 9 10 11 Basic Operation Basic Playback Modes and Features Setup Remote Control Operation KODAK Picture CD playback Advanced Features 12 20 Others 27 Troubleshooting 28 Remote Control Preparation 29 13 Content 1 Specifications 30 ...

Page 3: ...PLOYS A LASER SYSTEM TO EN SURE THE PROPER USE OF THE UNIT READ THIS MANUAL CAREFULLY AND KEEP IT FOR FUTURE REFERENCE IF THE UNIT REQUIRES SERVICING CONTACT THE SELLER OR SEE TROUBLESHOOTING TO PREVENT DIRECT EXPOSURE TO THE LASER RADIATION DO NOT OPEN THE CABINET VISIBLE LASER MAY RADIATE WHEN THE CABINET IS OPENED OR THE INTERLOCKS ARE DEFEATED DO NOT STARE INTO THE LASER BEAMS THE LIGHTNING FL...

Page 4: ...ed to operate from battery power or other sources refer to the operating instructions 12 Grounding or Polarization This product may be equipped with a polarized alternating current line plug a plug having one blade wider than the other This plug will fit into the power outlet only one way This is a safety feature If you are unable to insert the plug fully into the outlet try reversing the plug If ...

Page 5: ...g periods of time unplug it from the wall outlet and disconnect the antenna or cable system This will prevent damage to the product due to lightning and power lines surges 17 Power Lines An outside antenna system should not be located in the vicinity of overhead power lines or other electric light or power circuits or where it can fall into such power lines or circuits When installing an outside a...

Page 6: ... have put the disc on the tray Ensure the disc is not upside down Ensure the disc is not distorted stained or scratched Ensure the audio jacks are securely connected Ensure the audio connector is not damaged Ensure the volume is turned up in VOL CH setup Ensure you have set the player s AUDIO settings correctly Ensure you have ENTERed the correct AVinput for your TV Ensure the audio is not set to ...

Page 7: ...lide show transition modes for any pictures Press PAUSE to stop playing Press PLAY to continue slideshow transitions Press or to see the previous or next picture Press STOP to return to root menu Zoom Function Note During the ZOOM function slideshow transitions and image rotation are disabled Q off close zoom press PLAY again to resume slideshow transition mode This player provides both Zoom in ou...

Page 8: ... playback Press SUBTITLE repeatedly to select from up to 32 subtitle languages 5 1 CH SW output jack 5 1 CH CEN output jack 5 1 CH SUR output jack 5 1 CH FRONT output jack S Video output jack Video output jack Component output jack Digital signal coaxial output jack Digital signal optical output jack 2 8 3 9 1 7 5 6 4 7 26 90 240V 50 60Hz DVD 6800 90 240V 50 60Hz 1 CONFORMS TO UL STD 6500 CERTIFIE...

Page 9: ...volume till to no volume output ZOOM Q1 Q2 Q3 Q Off During DVD playback press ZOOM to magnify the image as follows 25 8 1 2 3 4 5 6 7 8 9 0 10 A B N P SUBTITLE AUDIO ANGLE SETUP ZOOM VOCAL TITLE PREV NEXT OPEN CLOSE REPEAT STOP MIC K Shift MENU REV PBC SLOW TIME PROG DISPLAY VOL VOL STANDBY PLAY RESUME STEP MUTE PAUSE RETURN STANDBY PROGRAM NTSC PAL SUBTITLE AUDIO ANGLE REPEAT TITLE FAST REV FAST ...

Page 10: ...k to pause playback Press STEP repeatedly to play frame Press play to resume normal playback Select to press REPEAT to select Repeat Title Repeat chapter Repeat off During DVD playback Press REPEAT to select Repeat Single Repeat All and Repeat off CD or Others REPEAT SLOW Press slow repeatedly to slow motion playback at variable speeds 9 24 CENT SW FRONT L FRONT R SUR L SUR R VIDEO IN VIDEO S VIDE...

Page 11: ...play the chapters in the order you have set Select Clear All and press ENTER to clear all the numbers you have input Others PROG Play Program Clear All 23 10 CENT SW FRONT L FRONT R SUR L SUR R C C BASS TREBLE ECHO DOWN UP VOLUME INPUT SELECTOR MUTE KARAOKE CHANNEL TEST MODE 3 STEREO PRO LOGIC BYPASS EXCITE POWER MIC 2 1 1 MIC VOL 2 MIC DVD IN VIDEO IN VIDEO FRONT R YELLOW WHITE RED Amplifier SUR ...

Page 12: ...able if the elapsed time of current track is less than 10 seconds During DVD playback press MENU to return to the program menu In the Setup Menu press MENU to return to the main menu or stop mode Any time press MENU to cancel the current OSD or some menus During DVD playback press TITLE to display the DVD title menu or play the first title PAUSE Press PAUSE during playback to pause playback Press ...

Page 13: ...tion before playing X2 X4 X8 X20 X2 X4 X8 PREV Press PREV to skip to previous chapter or track Press NEXT to skip to the next chapter or track During DVD or CD playback press and hold to scan in reverse The player will review the disc at 2 4 8 and 20 times normal speed as follows Press PLAY to resume normal playback During DVD or CD playback press and hold to scan forward The player will review th...

Page 14: ...m B Press SETUP to exit the Setup Menu A or Press ENTER to set B Press to go back one menu C Press OR repeatedly to return to the Setup Menu OSD Menu Subtitle Audio DVD Menu English English English English Setup Menu Advanced Features TIME CD Search Time Track Notes Time searches for an exact time in the movie In Title Chapter mode you cannot SELECT a value outside the range of the total number of...

Page 15: ... display the Subtitle submenu Advanced Features Remote Control Operation During playback press DISPLAY to display the current time counter position Elapsed time of the current track chapter Press DISPLAY again to display additional information about the playing disc 0 04 45 Other Track CD 1 15 Disc type Elapsed time of the current track Total tracks Current track 0 04 45 DVD Title 1 10 Audio Subti...

Page 16: ...lection A Press ENTER to confirm B Press SETUP to exit the Setup Menu TV shape TV system Video Output NTSC Select if you are using NTSC signal system to match your TV set PAL Select if you are using PAL signal system to match your TV set AUTO Select if you are using AUTO signal system to match your TV set 4 3 PS NTSC S Video 4 3 PS S Video NTSC Note 1 During CD playback points A and B must be with...

Page 17: ...tal audio outputs to correspond with the external components you have co nnected to the player For example if you connected the player to a TV using the Stereo Audio jacks you should set Dolby Digital and others settings to 2 channel to enjoy downmixed stereo audio You can set the audio format for each of the following sources Dolby Digital MP3 CD and DVD playback must be stopped in order to adjus...

Reviews: