


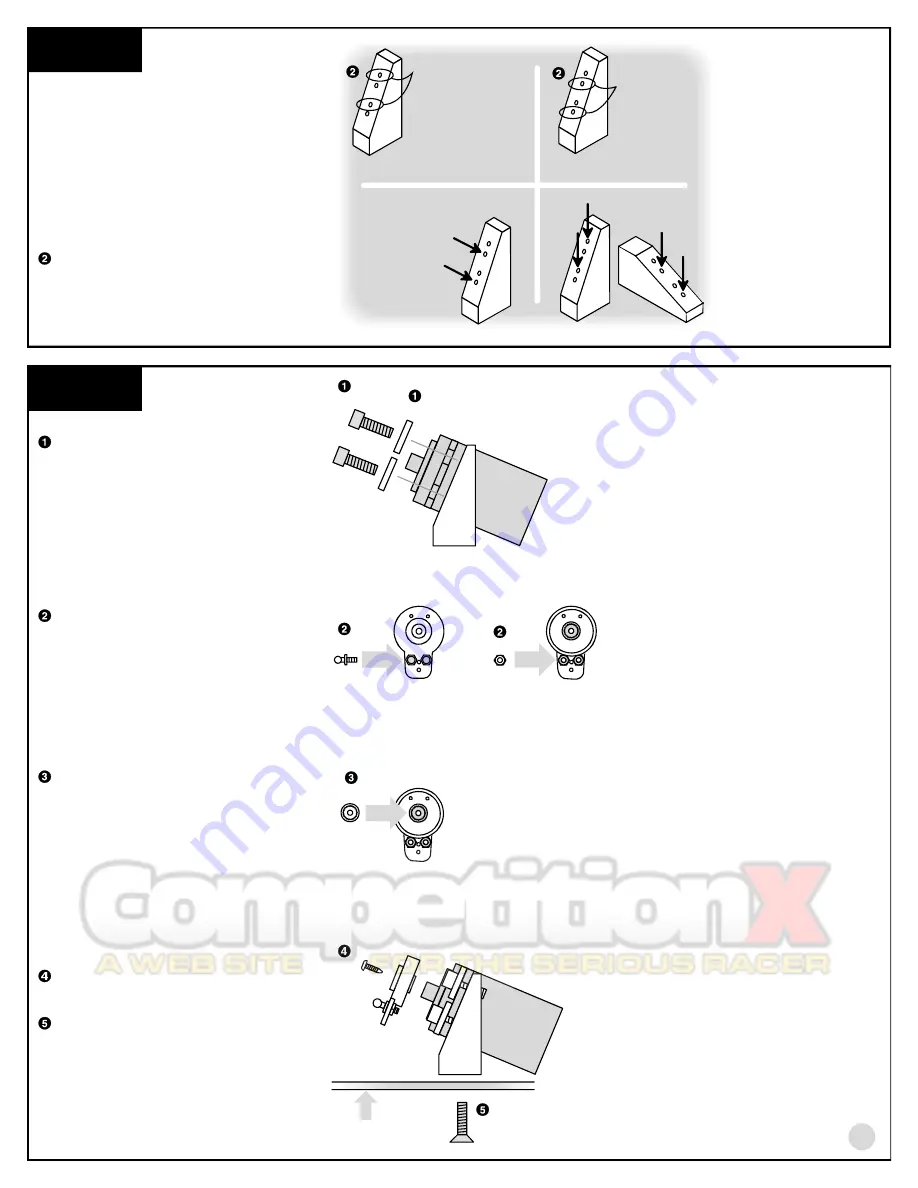
step 1
for large servos,
drill these two
for small servos
(not recommended
for 1:10 scale)
drill into block
perpendicular to
the slanted face
NO! Don't drill into the
block at an angle to the
slanted face
DRILLING STEERING SERVO BLOCKS
For the 1:10 scale cars we recommend you
use a larger, more standard size servo.
This would be:
Airtronics:
94102 or 94737
Futaba:
S148 or 9101
HiTec:
HS225BB, HS235AG, or HS525AG.
Drill two holes with a #43 (or 3/32") drill into
the #8435 servo blocks where shown for
your servo size.
DO NOT drill at an angle
to the slanted face!
step 2
MOUNTING THE SERVO
Secure the servo to the blocks with four
#4145 blue aluminum screws and four
#7337 #4 washers.
4145
blue aluminum
7337
8445
4448
8445
8445
6934
ASSEMBLING THE SERVO SAVER
Thread two #4448 ball ends into the front
side of the #8445 servo saver. Secure the
ball ends with the #4449 locknuts.
MOUNTING THE SERVO ASSEMBLY
Mount the servo saver to the servo with the
#8445 screw.
Note:
If you have a metal
gear servo, use the stock mounting screw.
Mount the servo mounting blocks to the
chassis with two #6934 screws.
Be sure to
use the forward set of holes in the
chassis.
this side away
from servo
this side
toward servo
8445
edge view
of chassis
FRONT
REAR
13
Try the three #8445 adapters on the servo
until you find one that fits. Push that
adapter into the servo saver.
this side
toward servo
4449
REAR
1
Airtronics:
94102 or 94737
Futaba:
S148 or 9101
HiTec:
HS225BB,
HS235AG, or
HS525AG


