background image

9

back coupler collar and inserting it into the discharge 
nipple then pulling back on coupler collar to lock into 
place.


»

Attach spray gun to hose.


»

Attach water supply hose to the water supply.


»

Verify that the GFCI power cord/plug if equipped is 
fully inserted into the electrical receptacle or that the 
power cord is fully seated in a GFCI protected outlet.  
Press reset button on the GFCI.


»

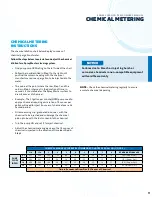
If using a cleaning chemical, place chemical pickup 
line into chemical container.


»

This machine will siphon chemical and mix with water 
at the Venturi Injector.  Injector is located close to 
where the high-pressure hose connects to unit.

OPERATION


»

Turn the water on at the supply valve.


»

Firmly grasp spray gun.


»

Point the spray gun in safe direction.


»

Flip the OFF/ON switch to “ON 


»

Direct the spray gun nozzle toward the surface or 
equipment to be cleaned and squeeze the spray gun 
trigger. (Note:  Use low-pressure for SOAP application 
and high-pressure for RINSE.)


»

If using a cleaner, priming will best occur by turning 
the black dial at the Venturi Injector counterclockwise 
to open all the way.  Turn clockwise after cleaner 
starts to flow till you get the desired ratio.  If using a 
thick cleaning agent then first prime with water and 
switch to cleaner after primed.


»

Apply chemical solution on low-pressure to the 
surface or equipment to be cleaned and let soak 
according to the instructions for the chemical you are 
using.  


»

Use high-pressure spray to rinse the surface or 
equipment being cleaned.  Rinse thoroughly.


»

Upon completion of the cleaning job, flush the 
chemical from the chemical injector by removing 

the chemical feed line and place into a clean 
container of water.  Operate the spray gun on 
low-pressure for one minute.


»

Turn the OFF/ON switch to “OFF”.


»

Squeeze the spray gun trigger to release system 
pressure.  Hose and spray guns cannot be 
disconnected while the system is pressurized.


»

Disconnect and store all equipment.

ACCESSORIES

The accessories listed below are available for use 
with your Spray Master Technologies high-pressure 
cleaning system. 


»

Hummer Jet™ Jr.

  – Indoor floor surface cleaner.  

Focuses high-pressure spray in centralized area 
for thorough cleaning. Reduces misting and 
overspray.


»

Dual-Nozzle Spray Gun

 – Single spray gun unit 

designed to quickly change from low pressure 
soap to high pressure rinse with the flip of a 
wrist.


»

Vari-Nozzle Spray Gun

 – Single spray gun unit 

designed to quickly change from low pressure 
soap to high pressure rinse by a simple push/
pull on the nozzle head.


»

Tornado Spray Gun

 – High impact spray gun 

used to focus on small trouble areas.


»

Foamer Gun

 – Specialized low-pressure spray 

gun that foams cleaning chemicals.  Ideal for 
soak operations. 


»

6” Shorty Spray Gun

 – Specialized spray gun for 

tight spots.


»

Wall and Tile Brush

 – 10” scrub brush hooks up 

to pressure hose and enables soap and rinse 
features.


»

Trap Shooter

 – Specialized spray gun for 

cleaning drains and interior of containers.

Summary of Contents for SprayMaster POWER CLEAN GO 1100SS

Page 1: ...POWER CLEAN GO 1100SS OWNER S MANUAL IMPORTANTDOCUMENT DONOTDISCARD FOR COMMERCIAL USE ONLY www spraymastertech com A brand line of MANUFACTURED DATE SHIPPED SERIAL NUMBER ...

Page 2: ...casters and handles check valves and chemical injectors The following items are covered by the above warranty for 1 year from the date of shipment Unloaders Chemical Valves Electrical Components float switch temperature switch Solid State Relay Master Control Panel electronic injectors wiring harnesses and flow switch LABOR AND TRAVEL Labor and travel to repair or replace defective parts shall be ...

Page 3: ...NCE General Maintenance Moving Storage CHEMICAL METERING Chemical Metering Instructions Manufacturer s Recommended Dilution Chart OWNER USER RESPONSIBILITY The owner and or user must understand the operating instructions and warnings before using this pressure washer Warning information should be emphasized and understood Owner and operator must study this manual and keep handy for future referenc...

Page 4: ...ESSURE WASHER UTILITY REQUIREMENTS WATER Flow Rate Minimum 5 GPM Pressure 30 PSI min to 80 PSI max Temperature 150 F max 65 5 C ELECTRICAL Power Clean Go 1100SS 120V 60Hz 20AMP RETURNING YOUR PRESSURE WASHER Any item returned for warranty or for credit must have a Returned Authorization Number Call our Customer Service Department to discuss your return request Please note that all items returned m...

Page 5: ... of the machine and result in death serious bodily injury and or property damage 1 Read these instructions before using the product 2 To reduce the risk of injury close supervision is necessary when a product is used near children 3 Know how to stop the machine and bleed pressure quickly Be thoroughly familiar with the controls 4 Stay alert Watch what you are doing 5 Do not operate the product whe...

Page 6: ...utes Keep operating area clear of all persons RISK OF INJECTION OR SEVERE INJURY TO PERSONS KEEP CLEAR OF NOZZLE To reduce the risk of injury close supervision is necessary when a machine is used near children Do not allow children to operate the pressure washer This machine must be attended during operation Never make adjustments on machine while in operation Be certain all quick coupler fittings...

Page 7: ...ed frayed or worn EXTENSION CORDS Use only 3 wire extension cords that have 3 prong grounding type plugs and 3 pole cord connectors that accept the plug from the products Use only extension cords that are intended for outdoor use These extension cords are identified by a marking Acceptable for use with outdoor appliances store indoors while not in use Use only extension cords having an electrical ...

Page 8: ...e spray gun handle To vary the spray pattern of the nozzle twist the black nozzle body clock ways to narrow pattern and counter clock ways to widen the spray pattern Chemical Metering Knob The chemical metering knob is located at the front end of the spray washer on top of the chemical injector where the chemical pick up occurs The chemical pickup line feeds into one end of the metering knob It is...

Page 9: ...ng to the instructions for the chemical you are using Use high pressure spray to rinse the surface or equipment being cleaned Rinse thoroughly Upon completion of the cleaning job flush the chemical from the chemical injector by removing the chemical feed line and place into a clean container of water Operate the spray gun on low pressure for one minute Turn the OFF ON switch to OFF Squeeze the spr...

Page 10: ...ife longevity Do not operate your pump without a water supply filter Replace with 5 micron water supply filter every 3 months or as needed to ensure an adequate supply of clean water to the pump A dirty water filter can restrict water flow and cause intermittent shutdown of the pump Chemical Foot Screen Flush the chemical foot screens and injector with warm water to remove chemical buildup that ca...

Page 11: ...ounces per gallon will need to inject 5 ounces of chemical over a 36 second period Fill a measuring cup graduated in ounces with the chemical to be injected and submerge the chemical pick up tube with the foot screen into the chemical Turn the pump ON and set it to inject chemical Adjust the chemical metering device so that 5 ounces of chemical is injected in the duration of time identified in Ste...

Page 12: ... 2020 Assembled Products Corp Inc 200519_SMT_1100SS_PCG OM_EN Rev 00 115 Linden St Rogers AR 72756 USA 800 548 3373 A brand line of ...

Reviews: