42
BIOS Setup Utility (BIOS Features)
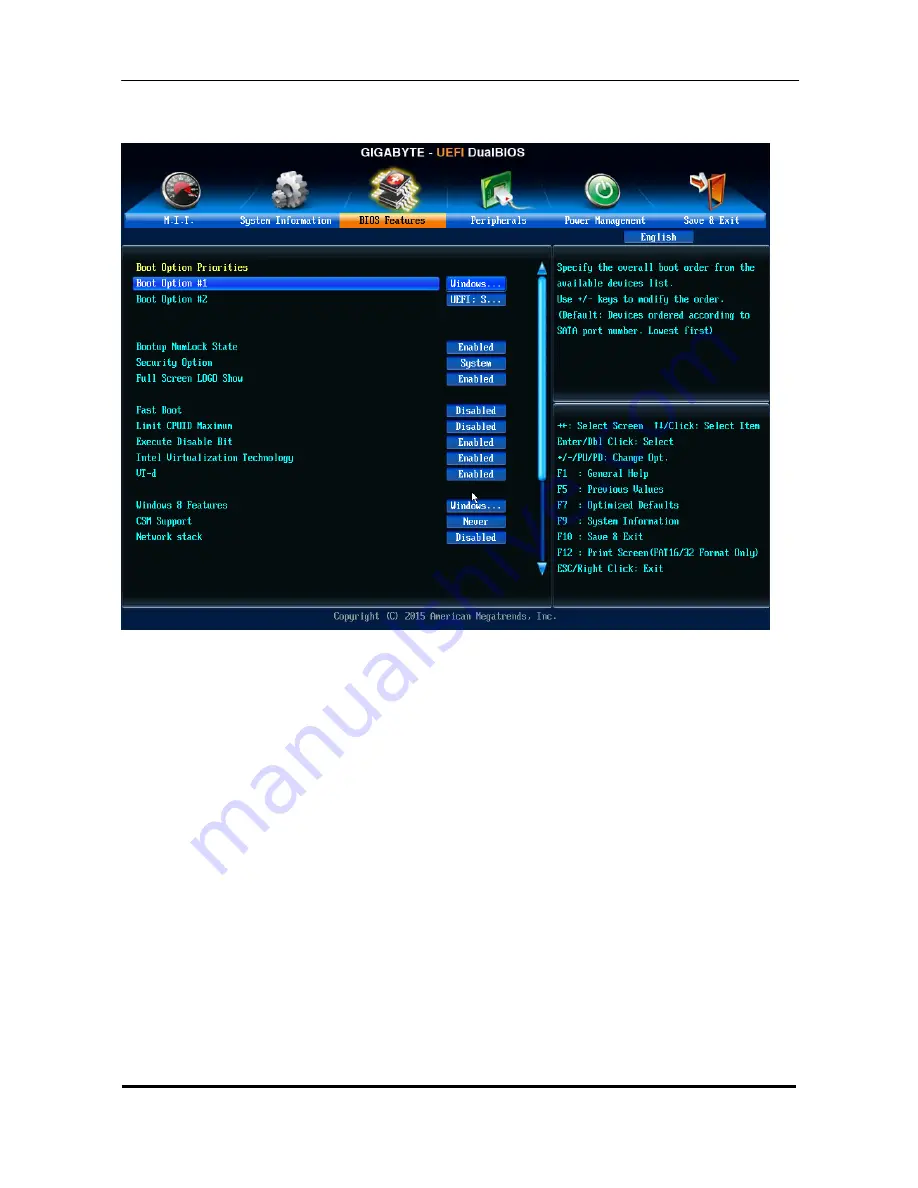
Boot Option Priorities
Specifies the overall boot order from the available devices. For example, you can set hard drive as the first
priority (Boot Option #1) and DVD ROM drive as the second priority (Boot Option #2). The list only displays
the device with the highest priority for a specific type. For example, only hard drive defined as the first
priority on the Hard Drive BBS Priorities submenu will be presented here.
Removable storage devices that support GPT format will be prefixed with "UEFI:" string on the boot device
list. To boot from an operating system that supports GPT partitioning, select the device prefixed with "UEFI:"
string.
Or if you want to install an operating system that supports GPT partitioning such as Windows 7 64-bit, select
the optical drive that contains the Windows 7 64-bit installation disk and is prefixed with "UEFI:" string.
Hard Drive/CD/DVD ROM Drive/Floppy Drive/Network Device BBS Priorities
Specifies the boot order for a specific device type, such as hard drives, optical drives, floppy disk drives,
and devices that support Boot from LAN function, etc. Press <Enter> on this item to enter the submenu that
presents the devices of the same type that are connected. This item is present only if at least one device for
this type is installed.
Bootup NumLock State
Enables or disables Numlock feature on the numeric keypad of the keyboard after the POST. (Default:
Enabled)
Security Option
Specifies whether a password is required every time the system boots, or only when you enter BIOS Setup.
After configuring this item, set the password(s) under the Administrator Password/User Password item.
Setup A password is only required for entering the BIOS Setup program.
System A password is required for booting the system and for entering the BIOS Setup program. (Default)
Summary of Contents for TC-651
Page 13: ...7 Block Diagram...
Page 28: ...22 Press F12 Key Boot Menu Page...
Page 29: ...23 Press ALT F10 Key Copy Main BIOS to Backup BIOS Non Acer Recovery Function Page1 Page2...
Page 32: ...26 Press F1 Key Page General Help...
Page 33: ...27 Press F5 Key Page Previous Values...
Page 34: ...28 Press F7 Key Page Optimized Default...
Page 35: ...29 Press F9 Key Page System Information...
Page 36: ...30 Press F10 Key Page Save Exit...
Page 37: ...31 Press ESC Key Right Click Mouse Exit...
Page 46: ...40 Page1...
Page 50: ...44 Page...
Page 64: ...58 2 Setting the Motherboard 2 1 Motherboard view 2 2 Install the CPU...
Page 72: ...66 10 Overview...
Page 114: ...108...
Page 115: ...109 FRU List The FRU list will be updated later...


