background image

LUBRICATION 

41 

D

RIVE 

S

HAFT 

B

EARINGS


Every month or every 25 hours of operation.  

Grease  the  pillow  block  bearings  on  the  front and 
rear  bearings  on  the  hammermill  jack  shaft.  (See 
Figure  71  and  Figure  72)  Grease  pillow  block 
bearings on the lower line shaft. (See Figure 73 and 
Figure 74) Use SAE multi-purpose type grease for 
these lubrications. 


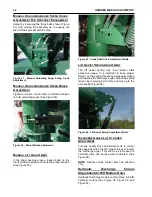
Figure 71 - Jack Shaft Front Bearing, Front (Shields 
Removed For Clarity).


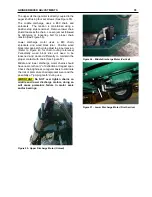
Figure  72  -  Jack  Shaft  Front  Bearing,  Rear  (Shields 
Removed For Clarity). 


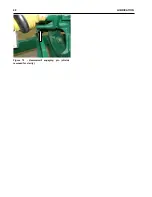
Figure 73 - Mixer Drive Shaft Bearing, Front.


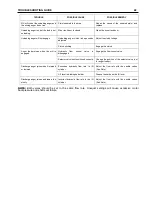
Figure 74 - Mixer Drive Shaft Bearing, Rear. 

C

HAINS


Chains  should  be  lubricated  at  frequent  intervals. 
Apply a light engine oil to the chain. Oil the chain on 
the  inside  located  in  the  upper  side  of  lower  the 
strand. (See Figure 75) 

The  chains  should  also  be  cleaned  regularly. 
Remove  the  chains  and  dip  or  soak  them  in 
kerosene. Once the chains have been cleaned, dry 
and oil them thoroughly. 


Figure 75 - Oiling Roller Chains.


The  split  end  of  the  chain  clip  must  face  the 
direction opposite of the chain travel. Make sure the 
clip is properly seated in the groove on the ends of 
the pin. (See Figure 76) 


Figure 76 - Chain Spring Clip.


Summary of Contents for CATTLEMAXX 6105

Page 1: ...O P E R A T O R S M A N U A L Art s Way Manufacturing Co Inc Model 6105 6105 CATTLEMAXX Grinder Mixer Operator s Manual 560500 Issued 07 20 6105 6105 CATTLEMAXX ...

Page 2: ...R READS AND UNDERSTANDS THE OPERATOR S MANUAL FOR THIS MACHINE IMPROPER OPERATION OF THIS MACHINE CAN CAUSE INJURY OR DEATH BEFORE STARTING THE ENGINE DO THE FOLLOWING 1 READ THE OPERATOR S MANUAL 2 READ ALL SAFETY DECALS ON THE MACHINE 3 CLEAR THE AREA OF OTHER PERSONS LEARN AND PRACTICE SAFE USE OF MACHINE CONTROLS IN A SAFE AND CLEAR AREA BEFORE YOU OPERATE THIS MACHINE ON A JOB SITE It is your...

Page 3: ...ations are to be made without the written permission of Art s Way Manufacturing Co Inc Any modification made without the written permission of Art s Way Mfg Co shall void the warranty of this product In the interest of continued safe operation of this 6105 Grinder Mixer pay particular attention to the safety alert symbol s throughout this Manual ART S WAY MANUFACTURING CO INC STATEMENT OF PRODUCT ...

Page 4: ...l number ready This will allow the dealer to fill your order as quickly as possible For your convenience we have provided this space for you to record your model number serial number and the date of purchase as well as your dealer s name and address Owner s Name Owner s Address Purchase Date Dealership Name Dealership Address Dealership Phone No 6105 Grinder Mixer Serial Number Location The placar...

Page 5: ... ADJUSTMENTS 32 DRIVE CHAIN ADJUSTMENTS 32 MAIN DRIVE CHAIN 32 MAIN DRIVE BELTS 32 HAMMERMILL DOOR 33 MANUAL UNLOADING AUGER SWING CRANK ADJUSTMENT FOR SPROCKET ENGAGEMENT 34 MANUAL UNLOADING AUGER SWING BRAKE ADJUSTMENT 34 MANUAL LIFT ADJUSTMENT 34 LIFT ASSIST SPRING ADJUSTMENT 34 DISCHARGE AUGER LIFT CYLINDER ADJUSTMENT 34 HYDRAULIC SWING ADJUSTMENT 36 SWIVEL STOP 36 SWIVEL STOP ADJUSTMENT 37 OP...

Page 6: ...OLL PARALLELISM 78 ROLL SCRAPERS 78 MANUAL UNLOADING AUGER SWING CRANK ADJUSTMENT FOR SPROCKET ENGAGEMENT 79 MANUAL UNLOADING AUGER SWING BRAKE ADJUSTMENT 79 MANUAL LIFT ADJUSTMENT 79 HYDRAULIC SWING DRIVE ADJUSTMENT 79 HYDRAULIC SWING SPEED ADJUSTMENT 80 LIFT ASSIST SPRING ADJUSTMENT 80 POSITIONING THE UNLOADING AUGER TO OPPOSITE SIDE OF MACHINE 81 SWIVEL STOP ADJUSTMENT 81 OPEN AND CLOSED HYDRAU...

Page 7: ...TABLE OF CONTENTS 5 ...

Page 8: ... conscious equipment operator makes an effective accident prevention program complete Safety features and instructions for the Grinder Mixer are detailed in the section of this Operator s Manual It is the responsibility of the owner to ensure that all operators read and understand the manual before they are allowed to operate the Grinder Mixer Occupational Safety and Health Administration OSHA reg...

Page 9: ...NY ADJUSTMENTS WAIT FOR ALL MOVEMENT TO STOP BEFORE APPROACHING THE MACHINE DURING OPERATION Keep hands feet hair and clothing away from moving parts Keep all guards doors and shields in place and in good working condition Keep all bystanders especially children away from the grinder mixer while in operation Do not allow riders while the grinder mixer is in operation Do not attempt to unclog clean...

Page 10: ...0 mph 32 km h when transporting the grinder mixer Always reduce speed on rough roads and surfaces or when going down inclines Use caution when turning and always use the turn signals on the tractor to indicate your turning intentions to the other traffic The weight of the trailed machine should NEVER exceed the weight of the towing vehicle Check all clearances carefully whenever the machine is tow...

Page 11: ...low easy access to all sides of the machine Use only forklifts lift cranes jacks and tools with sufficient capacity for the loads Do not allow spectators especially children in the working area Remember The Best Operator is a Safe Operator ...

Page 12: ...bes and the area where it is located on the grinder mixer See Figure 4 and Figure 5 Safety awareness is the responsibility of each operator of the grinder mixer Keep safety decals and signs clean and legible and be sure replacement parts display the current safety decals and signs as well Remember Always replace missing damaged or illegible safety decals New decals and signs are available from an ...

Page 13: ...ARD 7 368350 1 DECAL WARNING MOVING FLYWHEEL HAZARD 8 467450 4 DECAL WARNING MOVING PART HAZARD 9 368040 1 DECAL CAUTION SAFETY INSTRUCTIONS 10 377280 4 DECAL CAUTION DO NOT OPEN 11 383970 1 DECAL CAUTION HITCH INSTRUCTIONS 12 476450 2 TAPE RED RETRO REFLECTIVE 13 476460 1 TAPE YELLOW RETRO REFLECTIVE NOTE Keep all decals clean and free of dirt for maximum visibility Replace all individual decals ...

Page 14: ...12 INTRODUCTION Figure 5a Safety Decals ...

Page 15: ...3 Figure 5b Safety Decals NOTE Keep all decals clean and free of dirt for maximum visibility Replace all individual decals that are no longer legible Read and obey all safety decals and be familiar with their meaning ...

Page 16: ...tractors Figure 6 Detail A When using tractors over 150 hp limit input It is available only with a 540 RPM drive Hammermill respective speed should be maintained as the hammermill cylinder operates best at 2800 to 3000 RPM Figure 6 Detail B Hammermill cylinder must not exceed 3000 PRM CAUTION NEVER OPERATE A 540 RPM PROCESSOR WITH A 1000 RPM TRACTOR Before operating your grinder mixer select and i...

Page 17: ...der is located at the front left corner of the mixing tank along with a handle on top of the tank to gain access to the spring loaded mixing tank lid CAUTION DO NOT OPEN SPRING LOADED MIXING TANK LID WHILE PTO IS ENGAGED AND TRACTOR IS RUNNING Many convenient features are standard equipment on the Art s Way 6105 grinder mixer including 105 bu 6105 1 10 00 x 15 tires 2 Magnet in the hammermill thro...

Page 18: ...astening it to the input jackshaft with the 5 16 inch x 3 1 2 inch clevis pin and cotter pin provided Spread the cotter pin and make sure the proper PTO is used The 6105 is supplied with 540 RPM only CAUTION NEVER OPERATE A 540 RPM GRINDER MIXER WITH A 1000 RPM TRACTOR NOTE Height of the unloading auger tube needs to be checked Move the saddle on the side of the mixing tank so the tube will proper...

Page 19: ...s 40 psi GUARDS DOORS AND SHIELDS Make sure that all of the guards doors and shields are in place and functioning BOLTS AND NUTS Cap screws except for shear bolts used on the grinder mixer are Grade 5 and if replaced cap screws of equal or greater strength should be used Grade 5 cap screws are identified by three radial dashes on the hex head Refer to the SAE bolt identification guide See Figure 1...

Page 20: ... drawbar so it is 13 to 17 inches above the ground See Figure 11 Extend or shorten the tractor drawbar so the horizontal distance from the end of the tractor PTO shaft to the center of the hitch pin hole is 14 inches for 540 RPM drives Lock the drawbar in its crossbar parallel with the centerline of the PTO Place locking pins on each side of the drawbar If the tractor has an offset drawbar the off...

Page 21: ... After connecting the PTO driveline to the tractor anchor the driveline implement shield chain located in the main shield base slot and the tractor shield chain to the tractor drawbar BEFORE GRINDING New machines should be operated before preparing feed A few hundred pounds of coarse material such as shelled corn or ground cobs should be ran through the grinder mixer This will remove the protectiv...

Page 22: ...20 PREPAIRING THE GINDER MIXER FOR OPERATION Figure 15 PTO Support ...

Page 23: ...omplete stop and shut off the tractor before proceeding with the next step To engage the hammermill turn the fly wheel by hand to align one of the six slots in the fly wheel with the pin Push in the pin and turn 1 4 turn in either direction to lock it in place To disengage the hammermill push in the pin turn 1 4 turn and release CAUTION ALWAYS OPERATE PTO AT THE SAME SPEED FOR WHICH THE GRINDER MI...

Page 24: ...ure 18 Hay Retard Bolts A Lock Nut B Adjustable Retard Bolt HAMMERMILL SCREENS Hammermill screens are available in sizes ranging from 1 8 inch up to 2 inch openings The screen size needed will be determined by the material and degree of fineness desired A B ...

Page 25: ...HUT OFF THE TRACTOR ENGINE AND PLACE THE KEY IN YOUR POCKET BEFORE INSTALLING OR CHANGING HAMMERMILL SCREENS NEVER OPEN THE HAMMERMILL COVER UNTIL THE HAMMERMILL HAS COME TO A COMPLETE STOP Extra screens are carried in the screen rack located over the left fender To install or change the screen open the hammermill door and remove the screen with the hook provided See Figure 19 Figure 19 Changing s...

Page 26: ... OF AUGER MAKE SURE GRATE IS ALWAYS IN PLACE For best results add the concentrate or supplement before grinding operation Do not add ingredients to the supplement hopper while grinding this will over load the auger Figure 21 Supplement hopper located on right hand side of machine If micro ingredients are to be added to the feed the best results are obtained with a pre mix or by adding the suppleme...

Page 27: ...OPERATION OF GRINDER MIXER 25 cleaned out Keep all bystanders away from the machine ...

Page 28: ... tank windows If the top window is covered this does not mean the tank is full as the mixing auger throws material away from the center of the tank Continue loading until the top window clears feed drops and then becomes covered again about half way See Figure 23 Stop feeding material into the processor at this point but continue operating until the processor has had time to clear Do not overload ...

Page 29: ...Manual Swing Figure 26 Manual Lift Figure 27 Manual Break B Tractor Hydraulic Lift And Swing Hydraulic lift and swing is accomplished by using the hydraulic system valves If a hydraulic auger feeder is present a double selector valve is required to direct flow of the hydraulic fluid Either the swing motor or the auger feeder may be operated independently but not at the same time See Figure 28 Posi...

Page 30: ...discharge hoses to desired hydraulic circuit on tractor Hoses come installed with Pioneer style male quick connectors from factory See Figure 31 Slowly engage the hydraulic discharge with tractor Gradually increase speed to at least 2 3 throttle to reduce the risk of bogging machine down or potentially plugging an auger Open the unloading door slowly The eccentric may be used to hold the door open...

Page 31: ...er feeder slightly and pull the rope on the right hand side to disengage the height adjustment ratchet bar Raise or lower to the desired height and release the rope Remove the clip pin holding the auger feeder folding hopper up and then swing the hopper down See Figure 36 Figure 35 Auger Feeder Operation When processing material such as ear corn the grate must be left in the up position CAUTION IF...

Page 32: ... 36 Figure 36 Auger Feeder Swing Brake NOTE If a more accurate reading is desired and the machine is equipped with an electronic scale DO NOT rest the auger feeder on the ground Place it in the desired position and set the swing brake Figure 37 Auger Feeder Positioner and Spring Adjustment A Spring B Positioner Handle C Positioner Lock The auger feeder is shipped with a transport locking plate See...

Page 33: ...l valve to off See Figure 39 and Figure 40 Figure 39 Hydraulic auger feeder controls See arrows Figure 40 Hydraulic Auger Feeder Control See Arrow For the tractor hydraulic auger feeder when equipped with a hydraulic lift and swing unloading auger a selector valve will be located to the left rear side of the processor The handle on this valve must be out to divert the oil to the auger feeder If th...

Page 34: ...rocket toward the chain See Figure 44 Re tighten the idler roller bolt and make sure the chain deflection is 1 2 inch total at the longest span NOTE The chain should be checked and oiled daily Figure 44 Drive Chain Adjustment Shields Removed For Clarity MAIN DRIVE BELTS Belts on new machines have been properly tensioned at the factory To re tension the belts on a machine which has been in operatio...

Page 35: ...Belts should be checked periodically for proper tension and alignment especially when the machine is new or when a new set of belts are installed See Figure 49 During operation if the drive belts are very hot or are smoking due to being loose do not shut off the machine but stop grinding and allow the mill to continue to run for several minutes until the belts have cooled After the belts have cool...

Page 36: ...Adjustment Bolts LIFT ASSIST SPRING ADJUSTMENT The lift assist spring may lose tension after excessive usage It is important to keep proper tension on the spring this spring helps ease raising and lowering the discharge auger Adjust the spring tension by removing bolt in hole and moving to the hole shown Figure 54 Figure 54 Lift Assist Spring Adjustment Bolts DISCHARGE AUGER LIFT CYLINDER ADJUSTME...

Page 37: ...to proper tension Refer to Figure 43 for chain routing reference Periodically wood block idler will need to be loosened and clocked differently to maintain the proper contact with chain See Figure 57 Middle and lower discharge motor chains should have no more than of deflection at longest span Check chain tightness on regular basis to eliminate the risk of premature chain sprocket wear and the pos...

Page 38: ... the sprocket teeth loosen the 10 bolts that hold the sprocket to the upper ring holding the chain across the split areas re tighten the bolts so the chain properly seats into the sprocket teeth 3 Re tighten the hydraulic motor bolts then check the alignment of the sprocket If the sprocket is not aligned properly loosen the set screws on the 10 tooth sprocket and re align 4 Adjust the spring tensi...

Page 39: ...hose to tractor from the tee and elbow then remove the nipple 3 Install the plugs in the valve and tee where the nipple was removed 4 Connect the hydraulic hoses to the tee and elbow 5 Tie the hoses together for additional support 6 If equipped with hydraulic roll feed do not change the control valve for auger feed change it for the roll feed POSITIONING THE UNLOADING AUGER TO THE OPPOSITE SIDE OF...

Page 40: ...o the opposite side of the mixing tank Lower the unloading auger and rotate the hood so it faces downward WHEEL BEARINGS Raise the frame and make sure it is blocked securely so the wheels may turn freely make sure the opposite wheel is also blocked securely To tighten the wheel bearing remove the hub cap Remove the cotter pin from the slotted nut and tighten the slotted nut while rotating the whee...

Page 41: ...them PTO DRIVELINE Grease the bearing crosses telescoping and plastic shield rotation every 20 hours The zerk is located on the sliding shaft See Figure 66 and Figure 67 Figure 66 PTO Driveling Shield Removed For Clarity Figure 67 Plastic Shaft Bearings See Arrow HAMMERMILL SHAFT BEARINGS Grease the front and rear pillow block bearings on the hammermill cylinder shaft every week or every 10 hours ...

Page 42: ...40 LUBRICATION Figure 70 Hammermill engaging pin shields removed for clarity ...

Page 43: ...or Clarity Figure 73 Mixer Drive Shaft Bearing Front Figure 74 Mixer Drive Shaft Bearing Rear CHAINS Chains should be lubricated at frequent intervals Apply a light engine oil to the chain Oil the chain on the inside located in the upper side of lower the strand See Figure 75 The chains should also be cleaned regularly Remove the chains and dip or soak them in kerosene Once the chains have been cl...

Page 44: ... Figure 78 Clean Out Door in Mixing Tank Cone And Grease Zerk For Seal At Bottom Of Vertical Mixing Auger UPPER VERTICAL MIXING AUGER Grease the upper vertical mixing auger bearing weekly or every 10 hours of operation with SAE multi purpose type grease Access to this bearing can be gained through the top of the mixing tank See Figure 79 Figure 79 Upper Vertical Mixing Auger Bearing UNLOADING AUGE...

Page 45: ...rtical Auger Bevel Gears Shield HYDRAULIC LIFT Periodically grease the two locations on the hydraulic lift lever arm using SAE multi purpose grease See Figure 85 Figure 85 Hydraulic Lift Grease Locations RING AND WORM GEAR MECHANICAL Grease at two locations on large ring gear on unloading auger and apply grease at ring gear and worm gear periodically Use SAE multi purpose type grease Also every si...

Page 46: ...Figure 87 Ring and Worm Gear Fittings WHEELS Remove clean and repack the wheel bearings once a year or every 100 hours of operation using SAE multi purpose type grease See Figure 88 Figure 88 Wheel Bearing Lubrication ...

Page 47: ...s Table 5 Torque Specification Guide For Grade 5 Bolts SHEAR BOLTS WARNING SHEAR BOLTS MAKE A LOUD NOISE WHEN SHEARED IMMEDIATELY SHUT THE TRACTOR IGNITION OFF AND DETERMINE THE CAUSE OF SHEARING Shear bolts will make a loud noise when they shear This is your warning to turn off the tractor ignition immediately and determine the cause of the shear When replacing sheared bolts always tighten them s...

Page 48: ...ially matched units All four corners can be used on each hammer Figure 93 Proper Hammer Spacing For 72 Hammers 20 Inch Hammermill To remove the hammers remove the bolts from the side of the mill and round plate See Figure 94 and Figure 95 Remove the pins from each end of the rod and pull the rods outward making sure the hammers are put back in the same place from which they were removed Figure 94 ...

Page 49: ...SERVICE 47 Figure 96 Belt Removal Shields Removed For Clarity B C ...

Page 50: ...rning the mixer while it is in operation Turning the mixer too sharply Avoid sharp turns Low volume from hammermill Hammermill is not operating at optimum speed Before grinding set tractor throttle to rated PTO speed 540 or 1000 rpm Hammermill screens and or hammers are worn Reverse and or replace the screens and hammers if necessary Hammermill is not level Find level surface if at all possible Mi...

Page 51: ... engaged Hydraulic flow control valve is disengaged Engage the flow control valve Selector valve is not positioned correctly Change the position of the selector valve out for auger feeder Discharge auger jerks when it is raised or lowered Excessive hydraulic flow rate to lift cylinder Adjust the flow rate with the needle valves See Note Lift lever is binding on holder Grease the zerks on the lift ...

Page 52: ...r Mixer Electrical Components Connect the tractor control box to the machine with the plug that has been provided Activate the electric linear actuator to engage the clutch It will ratchet when the actuator is fully retracted From this point the clutch should be fully engaged The clutch arm should be loosely riding in the groove of the clutch Adjustments can be made by loosening the rear mounting ...

Page 53: ...le Scale Arm Attachment DISCHARGE UNLOADING AUGER EXTENSIONS 3 foot and 6 foot folding and 3 foot and 6 foot bolt on discharge auger extensions are available See Figure 101 For unloading height obtainable with various extensions added to the unloading auger system refer to Table 4 For unloading auger instructions refer to OPERATION OF GRINDER MIXER section Figure 101 Folding Auger Extensions SCREE...

Page 54: ...low control valve allows separate speed control for the roll feed If equipped with the hydraulic roll feed only the flow control is on top of the hammermill The crank for lowering the roll feed is toward the front of the hammermill housing See Figure 103 Figure 103 Roll Feed and Auger Feeder Flow Control Valves ROLL FEED ADJUSTMENT Five holes are provided at the upper end of the roll feed spring T...

Page 55: ...ables at each side of the roll feed to see if they are both uniform on the roll feed crank shaft See Figure 105 Figure 105 Roll Feed Crank Cable lengths can be adjusted by loosening the nut with the special cable washer and retightened after the cables have been equalized ...

Page 56: ...width open 43 inches Height of hopper from ground in down position 16 1 2 inches Height of hopper from ground in up position 51 inches MIXING AUGER Auger width 12 inches Mixing base 24 inches SUPPLEMENT HOPPER Auger diameter 7 inches Hopper size 21 inches X 24 inches Height from ground 34 inches HAMMERMILLS Tank and frame 20 inches Width of mill Full 20 inches Screen area 600 sq in Operating speed...

Page 57: ...perator of the CattleMaxx Keep safety decals and signs clean and legible and be sure replacement parts display the current safety decals and signs as well Remember Always replace missing damaged or illegible safety decals New decals and signs are available from an authorized dealer Figure 106 CattleMaxx Decals FIG ITEM PART NUMBER NOMENCLATURE UNITS PER ASSY 1 268860 DECAL DANGER ROTATING DRIVE LI...

Page 58: ...ANGER 565 RPM PTO 1 9 467450 DECAL WARNING MOVING PART HAZARD 3 NOTE Keep all decals clean and free of dirt for maximum visibility Replace all individual decals that are no longer legible Read and obey all safety decals and be familiar with their meaning Figure 107 Safety Decals ...

Page 59: ...ls that are no longer legible Read and obey all safety decals and be familiar with their meaning Figure 108 Safety Decals NOTE Keep all decals clean and free of dirt for maximum visibility Replace all individual decals that are no longer legible Read and obey all safety decals and be familiar with their meaning ...

Page 60: ...e at full speed while rolling grain CAUTION NEVER OPERATE A 540 RPM PROCESSOR WITH A 1000 RPM TRACTOR The rollermill Figure 109 Detail B is precision built of tough cast iron construction designed to give a high degree of control over the quality of feed produced It is important that you become acquainted with your rollmill before operating at full capacity The rollermill will not start with grain...

Page 61: ...be under rollermill 6 Ingredient supplement hopper 7 Tongue jack and safety chain 8 Ladder and fenders 9 Four large inspection windows in tank 10 Spring loaded tank lid 11 Hydraulic or mechanical positioning of discharge auger This includes a hydraulic cylinder or mechanical crank for lift and hydraulic motor or mechanical crank for swing 12 8 inch diameter by 10 foot long unloading auger 13 Disch...

Page 62: ...pped with a tractor hydraulic auger feeder or roll feed refer to page 17 and page 18 for additional instructions TIRES Keep tires properly inflated Lack of pressure can result in torn valve stems fabric breaks and uneven tread wear Too much pressure can cause undue strain on fabric excessive tread wear and allows the tire to cut in more on wet surfaces Equal tire pressure reduces CattleMaxx sway w...

Page 63: ...pin hole is 14 inches for 540 RPM drives Lock the drawbar in its crossbar parallel with the centerline of the PTO Place locking pins on each side of the drawbar If the tractor has an offset drawbar the offset should be down for PTO work IMPORTANT An improperly located hitch point may cause damage to the universal joints U Joints of the PTO driveline Figure 112 Hitch Point Locations ATTACHING TO TH...

Page 64: ... the gate The rollermill will not start if there is any material or debris in the rolls See Figure 115 Figure 115 Rollermill in Closed Position A Gate Lever B Gate locking Knob BEFORE PROCESSING New machines should be operated before preparing feed A few hundred pounds of coarse material such as shelled corn or ground cobs should be ran through the grinder mixer This will remove the protective oil...

Page 65: ...PREPARING THE CATTLEMAXX FOR OPERATION 63 CattleMaxx tongue off of the tractor hitch Remove the hitch pin and safety chain Figure 116 PTO Support ...

Page 66: ...he grain roll gap power input roll speed differential drive and the general operation of the mill Always operate the rollermill at full speed 540 RPM when processing Slower speeds will increase power requirements and may cause damage or excessive wear to mill components ROLLERMILL The rollermill drive is a direct drive without a drive clutch so the rolls will turn at all times The drive consists o...

Page 67: ...been started and the hopper as about half full grain showing in the hopper inspection window Open the control gate enough to allow a smooth grain flow into the rollermill Recommended control gate opening is 0 5 inch to 1 0 inch A high grain flow rate will cause grain to boil on top of the rolls and decrease capacity of the rollermill IMPORTANT The grain control gate should be opened only enough to...

Page 68: ... positive pressure eccentric roll release to automatically open the gap between the rolls This is to minimize damage to the rolls and drive train from the induction of tramp metal or other foreign objects into the rolls Opening the grain control gate too far and overloading the rolls can also cause the eccentric roll release to trip Indications that the eccentric roll release has been tripped are ...

Page 69: ...m clean The CattleMaxx rolls should be equipped with a roll speed differential if high moisture grain is to be used A roll speed differential has also been found to decrease particle size and increase capacity of the rollermill ROLL SCRAPERS The CattleMaxx rollermill is equipped with roll scrapers to help prevent material from packing onto the rolls With course or dry material the spiral design of...

Page 70: ... IS DISENGAGED AND THE TRACTOR IS SHUT OFF PLACE THE KEY IN YOUR POCKET BEFORE OPENING OR CLOSING THE CLEAN OUT DOOR Figure 123 Tank Cone Clean Out Door On Right Hand Side Figure 124 Clean Out Door Located Under Right Hand Side Of Tank Assembly Located under the right hand side of the frame and tank assembly is a hinged door on the bottom of the auger trough Release two spring clamps and allow doo...

Page 71: ...OPERATION OF CATTLEMAXX 69 or grain last Excessive amounts of wet or bulky material may cause bridging in the mixing tank ...

Page 72: ...5 105 bu SPRING LOADED TANK LID CAUTION DISENGAGE ALL THE DRIVES SHUT OFF THE TRACTOR ENGINE AND PLACE THE KEY IN YOUR POCKET BEFORE OPENING THE MIXING TANK LID If the mixing tank is accidentally overfilled it is equipped with a spring loaded tank lid See Figure 126 The lid also allows access to the inside of the mixing tank Keep the lid closed and latched at all times CAUTION IF ENTERING THE TANK...

Page 73: ...ct four hydraulic hoses with the appropriate male connectors to the tractor Make sure the proper hoses are connected to the same tractor hydraulic circuit Activate the appropriate tractor valve to lift the unloading auger then use the other hydraulic valve to swing the unloading auger to the desired position UNLOADING AUGER ENGAGEMENT Operate the tractor at a minimum of 2 3 throttle for unloading ...

Page 74: ...he eccentric may be used to hold the door open See Figure 132 When the tank is unloaded reverse the procedure Always make sure that discharge is empty before transporting mixer Figure 133 Hydraulic Quick Connector FOLDING AUGER EXTENSION Optional extensions for the unloading auger include a 3 to 6 feet folding or bolt on extension See Figure 134 For discharge heights of the optional extensions See...

Page 75: ... Heights Refer To Table 9 for Detailed Heights UNLOADING AUGER HOOD When the unloading auger tube becomes overloaded a spring loaded door opens on the end to prevent damage to the drive See Figure 136 Figure 136 Unloading Auger Hood 29 Or 52 Vertical Tube ...

Page 76: ...the rope on the right hand side to disengage the height adjustment ratchet bar Raise or lower to the desired height and release the rope DANGER TO PREVENT PERSONAL INJURY 4 USE THE GRATE OVER THE AUGER WHENEVER POSSIBLE 5 KEEP HANDS AND FEET OUT OF THE HOPPER AREA AND DO NOT CLIMB ON OR OVER THE HOPPER AT ANY TIME 6 KEEP CHILDREN AND BYSTANDERS AWAY FROM THE MACHINE WHILE THE MACHINE IS IN OPERATI...

Page 77: ... lift and swing unloading auger a selector valve will be located to the left rear side of the processor The handle on this valve must be out to divert the oil to the auger feeder If the handle for the selector valve is in oil flows to the swing function of the unloading auger See Figure 141 Figure 142 Hydraulic Auger Feeder Selector Valve Lever Is In The Out Position Auger Feeder To start the auge...

Page 78: ...76 OPERATION OF CATTLEMAXX Figure 143 Hopper Inspection Window ...

Page 79: ...nd oiled daily ROLL SPEED DIFFERENTIAL Your CattleMaxx may be equipped with a belt driven roll speed differential that increases the speed of the eccentric roll Be certain to maintain proper belt tension with stretch loaded idler See Figure 144 as the belts will stretch during their break in period Improper tensioning or overloading the mill will cause the belts to slip causing premature wear and ...

Page 80: ... ROLL PARALLELISM If the roll gap is different from front to back on the rolls the rolls are out of parallel and need to be adjusted This can occur from the eccentric roll handle getting bent or twisted or uneven roll wear from not keeping the hopper full across the whole width while processing To adjust roll parallelism reset one stop bolt up or down Be certain to push down on each corner of the ...

Page 81: ...the three bolts shown See Figure 150 and moving the assembly up to engage the teeth of the sprocket with the disk Figure 150 Manual Unloading Auger Swing Crank Adjustment MANUAL UNLOADING AUGER SWING BRAKE ADJUSTMENT Tighten or loosen nut and bolt to maintain tension to hold unloading auger See Figure 151 Figure 151 Manual Brake Adjustment MANUAL LIFT ADJUSTMENT If the chain becomes loose loosen b...

Page 82: ...ally Different valve settings will cause excessive back pressure at the motor that my cause shaft seal failure To adjust the flow control valves loosen the jam nut behind the knob Turn the knob clockwise for lower flow or counter clockwise for higher flow Mark the knobs so they can both be adjusted equally Tighten the jam nut after adjustments are finished and check discharge auger swing for prope...

Page 83: ...ertical Figure 158 Lower Discharge Motor First Section POSITIONING THE UNLOADING AUGER TO OPPOSITE SIDE OF MACHINE To change to the opposite side lift the unloading auger until it is straight up and comes down the opposite side Rotate the hood downward Move the saddle to the opposite side of the mixing tank An unloading auger swivel stop See Figure 159 prevents the unloading auger from contacting ...

Page 84: ...See Figure 160 7 At the control valve upper right corner disconnect the hydraulic hose from the motor 8 Disconnect the hydraulic hose to tractor from the tee and elbow then remove the nipple 9 Install the plugs in the valve and tee where the nipple was removed 10 Connect the hydraulic hoses to the tee and elbow 11 Tie the hoses together for additional support WHEEL BEARINGS Raise the frame and mak...

Page 85: ...re 162 PTO Driveline Shield Removed For Clarity Figure 163 Plastic Shaft Bearings See Arrow GRAIN CONTROL GATE Grease the pivot points and slide on the grain control gate once a year or every 100 hours of operation See Figure 164 Figure 164 Grain Control Gate Lubrication 2 Zerks and Slide Guides ROLL BEARINGS The rollermill roll shaft bearings are a sealed bearing and require no additional lubrica...

Page 86: ...llermill Belt Drive HOPPER MAGNETS Periodically check the hopper magnets for tramp metal and debris and clean as necessary Open the hopper lid to inspect the hopper plate magnets Always clean the plate magnets with the throat magnet installed Remove the throat magnet for cleaning and inspection Be sure not to let any material from the magnets fall into the rollermill See Figure 167 Figure 167 Clea...

Page 87: ...Mixing Auger UPPER VERTICAL MIXING AUGER Grease the upper vertical mixing auger bearing weekly or every 10 hours of operation with SAE multi purpose type grease Access to this bearing can be gained through the top of the mixing tank See Figure 172 Figure 172 Upper Vertical Mixing Auger Bearing TANK VENT The mixing tank is vented through the left ladder rail right hand when facing ladder Periodical...

Page 88: ... transfer point using SAE multi purpose grease every 20 hours See Figure 176 and Figure 177 Figure 176 Discharge Auger Bevel Gears Inner Elbow Shields Removed For Clarity Figure 177 Discharge Auger Bevel Gears Outer Elbow Shield RING AND WORM GEAR MECHANICAL Grease at two locations on large ring gear for unloading auger lift pivot See Figure 178 On units with mechanical back auger apply grease at ...

Page 89: ...LUBRICATION 87 WHEELS Remove clean and repack the wheel bearings once a year or every 100 hours of operation using SAE multi purpose type grease See Figure 179 Figure 179 Wheel Bearing Lubrication ...

Page 90: ...hear Shear bolt locations on the CattleMaxx are The PTO driveline shear clutch The mixer drive 80 sprocket on the lower drive shaft The mill to mixer and supplement auger drive 40 sprocket on the lower driveshaft Discharge auger drive clutch on the gearbox output shaft Drive Location Bolt Pin Part No PTO Driveline PTO Shear Clutch Bolt M10 1 5 x 60 metric 407760 Mixer Drive 80 Sprocket Lower Drive...

Page 91: ...l castings that hold the top and bottom halves of the mill together Lift the top half off in one assembly Pick up and save the two brass plugs that were in the upper castings beneath the eccentric tightener bolts 4 Lift out the rolls and remove any pulleys sprockets and bearing housings For 20 inch rolls leave the old shaft and bearings with the worn rolls The roll handle is a press fit into the b...

Page 92: ...or drawbar Tractor engine RPM falls below the rated PTO speed while grinding Overloading mill Close grain control gate Drive belts too loose Tighten belts Drive belts wore Replace drive belts Material packing on rolls Adjust scrapers Open roll gap Install roll speed differential Shear pins break Foreign objects and debris nuts bolts etc in mill mixers or augers Remove foreign objects Grain in mill...

Page 93: ...t roll scrapers Overloading mill Close down grain control gate Drive belts show excessive wear Belts are out of alignment Align the pulleys Belts are slipping Tighten belts Whole grain kernels in feed Large roll gap Adjust belts Rolls out of parallel Check roll parallelism and adjust as needed Eccentric roll moving increased roll gap Tighten eccentric lock bolts Check and replace brass shear plug ...

Page 94: ... the electronic scale to be positioned along a 180 arc off the side of the grinder See Figure 184 Tension on the pivot point spring can be increased or decreased by tightening or loosening the nut Periodic grease needs to be applied to the zerk on the pivot point Figure 184 Adjustable Scale Arm Attachment DISCHARGE UNLOADING AUGER EXTENSIONS 3 and 6 foot folding and 3 and 6 foot bolt on discharge ...

Page 95: ... operating arc Infinite Auger Feeder Auger length 117 inches Auger diameter 7 inches Auger hopper width 23 inches Height of hopper from ground in down position 17 5 inches Height of hopper from ground in up position 42 inches Mixing Auger Auger width 12 inches Mixing base 24 inches Supplement Hopper Auger diameter 7 inches Hopper size 21 inches X 24 inches Height from ground 34 inches Rollermill R...

Page 96: ...del and Serial Number so your local dealer can provide the correct manuals for your machine Art s Way Manufacturing Co Inc reserves the right to make improvements in design or changes in specifications at any time without incurring any obligation to install them on units previously sold Except as expressly authorized no part of this manual may be reproduced copied transmitted disseminated download...

Page 97: ...t s Way Manufacturing Co Inc Hwy 9 West PO Box 288 Armstrong IA 50515 U S A Produced And Published In The U S A By CPS DYNAMICS LLC PO Box 9007 Wichita KS 67205 www cpsdynamics com NEW ARTS WAY LOGO HERE ...

Reviews: